Yip Corona is a necessity… 
1 Like
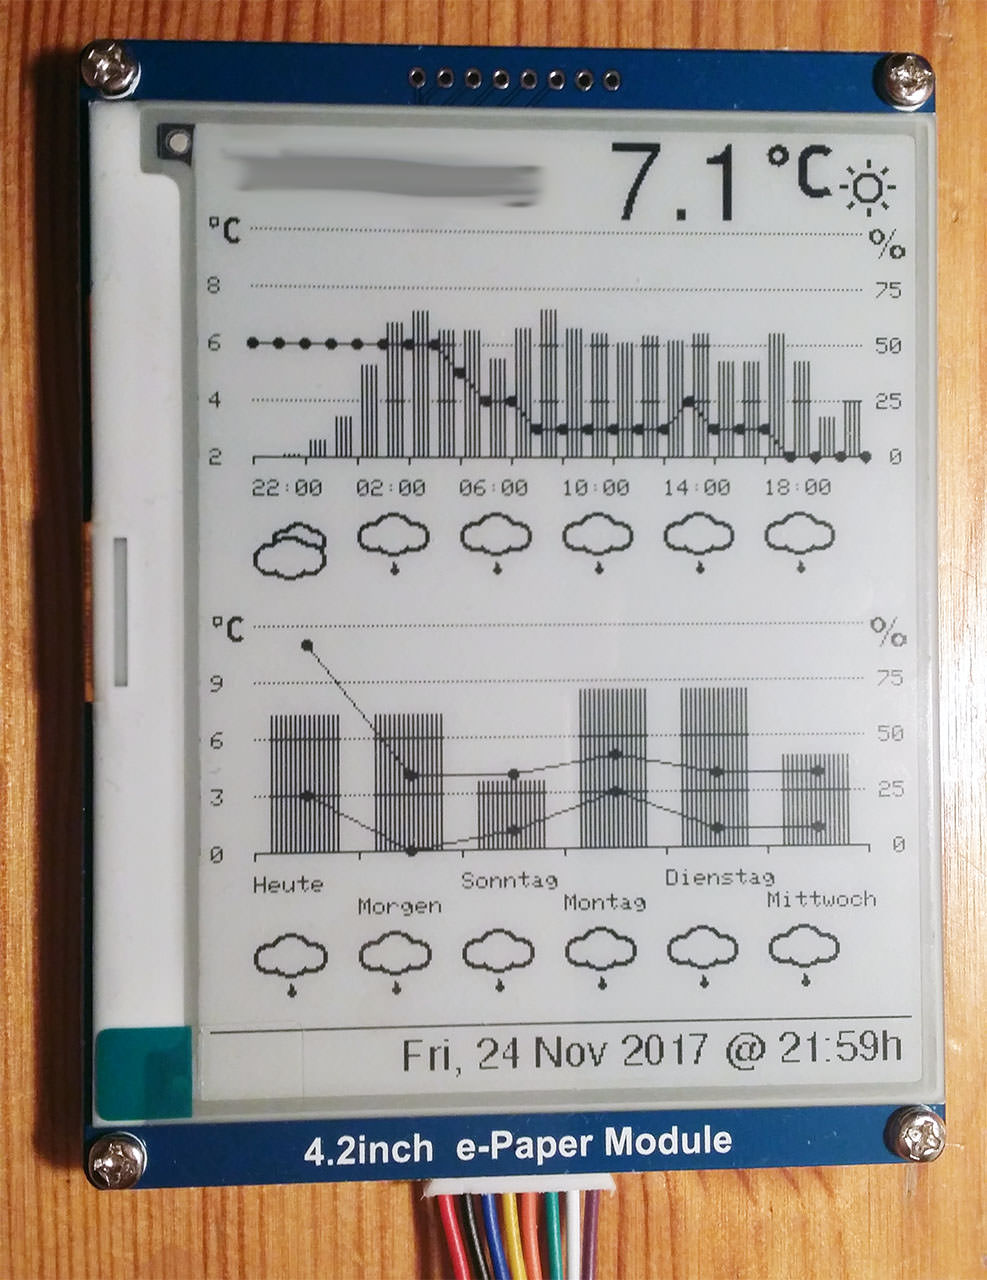
A nice article on increasing refresh rate of the waveshare display: http://benkrasnow.blogspot.fr/2017/10/fast-partial-refresh-on-42-e-paper.html
1 Like
- https://www.waveshare.com/wiki/1.54inch_e-Paper_Module_(B)
- https://github.com/ZinggJM/GxEPD
- https://github.com/olikraus/u8g2/issues/318
- https://www.youtube.com/watch?v=vnJT_nfZ_fA
- https://www.ebay.com/itm/1-54-inch-E-Ink-200x200-Display-SPI-Port-Partial-Refresh-Screen-for-Raspberry-Pi/272818680941
- https://bluexanh.com/arduino/esp32-e-paper-thermometer.html
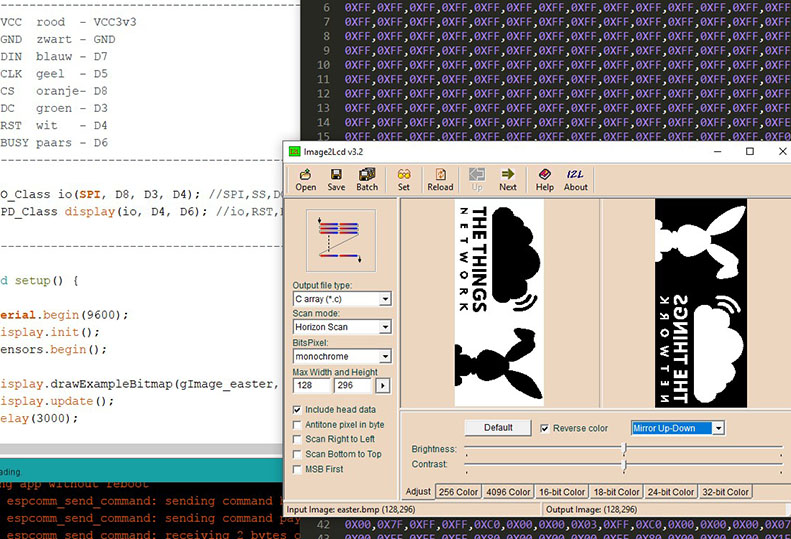
- https://www.buydisplay.com/default/image2lcd
- http://www.alessioatzeni.com/meteocons/
objective is to mount it on a RPI zero (gw) … after I understand 
what about this … 
2 Likes
2 Likes
Really? Do I need to change GW Shield to have holes to fix this display that I love so much ![]()
PS : Take care that 2 SPI devices on same SPI bus with 2 different process may cause trouble (both process accessing SPI bus at the same time). I do not know if Debian has a kind of build in semaphore to prevent this to happen?
LOL… no I wasn’t talking about a gateway display so you don’t have to design a new PCB 
(but technically it’s possible to control 2 spi devices on one bus… but that’s another story)
woke up with an idea this morning :
create an (esp) webserver that transmits a webpage with the TTN’s gateway UART debug data, so you can check on a browser (phone/laptop ) the uart output messages wireless.
just a little tool that you plugin the TTN gateway and it works.
but I realize that the TTN gateway power supply is possibly not strong enough ?
- https://github.com/nvl1109/ESP8266-UART-over-Wifi
- https://github.com/jeelabs/esp-link
- https://hackaday.com/2016/03/07/monitor-a-serial-port-from-anywhere/
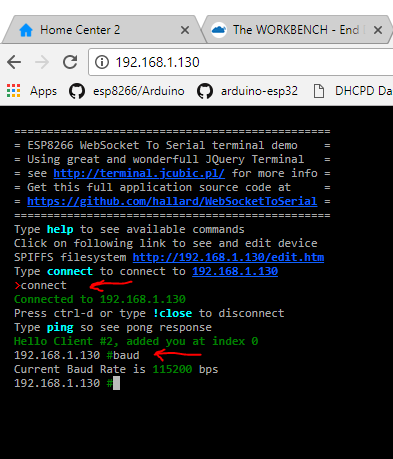
- https://github.com/hallard/WebSocketToSerial
a serial to wifi bridge, any input / ideas very welcome 
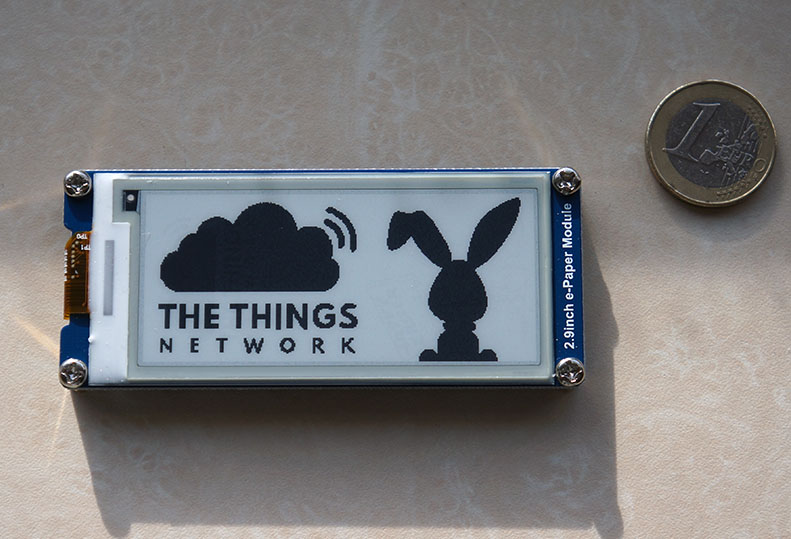
---------------------- HAPPY EASTER WEEKEND ------------------------------
And this one with a browser terminal interface
we want only to remotely read out the gateway’s uart debug messages in a browser and no programming on the gateway’s side 
Yes got it, that what’s it basic does ![]()
got it to … I put it in the hackable usefull list tnx Charles 
- what do ya think… is it feasable ?
For sure, I’ve updated the repository
-
put in the sketch your SSID/PASSWORD here
-
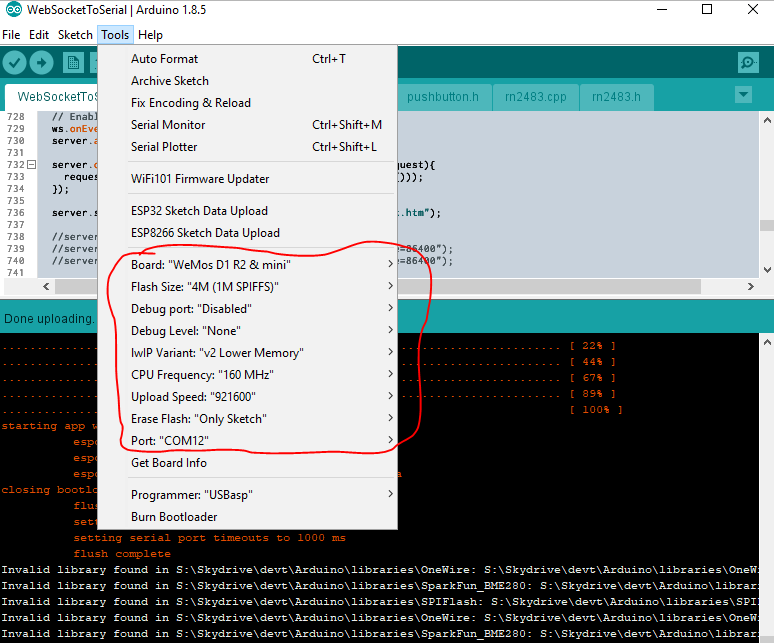
Select correct Flash size from Arduino IDE (example for a WeMos) usually (4M / 1M SPIFFS)
-
just flash the SPIFFS file system from Arduino IDE (contains webserver) to ESP8266 (From Tools
ESP8266 Sketch Data Upload, see pictures above) -
then just flash the sketch above with classic upload button
-
once flashed connect TTN GW TX to ESP8266 RX (GPIO3)
-
connect to http:/your_ESP_IP/ then on terminal type connect
-
take care serial port used for upload is the same so to update firmware of ESP8266 so you have 3 choices:
- you need to remove TTN GW TX when flashing
- use OTA to update
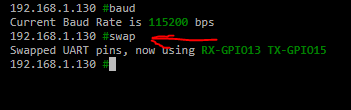
- connect TTN TX pin to GPIO13 and use swap to swap serial pins
Picture does not show data because I have not connected GW to ESP8266 so it’s empty
Have fun
wow a complete tutorial… great tnx Charles… I’ll try later today
oh no, far from complete ![]()


1 Like


You’re welcome,
Took 3 days coming from France to NL with 1€ basic post enveloppe, not bad at all
Have fun
1 Like
Wondering how to get accurate UV and lux measurements from a sensor, while still protecting the electronics  A piece of glass would be the obvious thought, but glass is pretty good at blocking UV.
Started thinking about using flexible TPU to print a “snug” case for the sensors themselves - needs some alignment still but I can see how you might want to assemble most of the case internals like this. (I don’t think it’ll provide much environmental protection tho).
How do other folks do this?

2 Likes