@tkerby
What image are you talking about? The bootloader files located here?
I use MiniCore also, I even asked the author to add new uart speed in #18 because compiling bootloader can be painfull. But I needed to do it on my own, so that’s why I compiled mine and published them for others.
But you’re right, I did not mention how to flash sketch from Arduino IDE once bootloader is installed. Shame on me, it’s because I already have boards defined with correct UART speed on my Arduino IDE (with ULPNode) so I forgot this step.
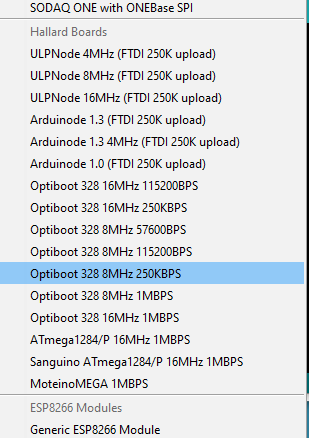
I need to package back my boards file but in the meantime adding this to your boards.txt of your Arduino IDE should bring you all necessary menu entries (quick and dirty fix, I know)
menu.cpu=Processor

##############################################################
#                Optiboot 16Mhz 115200 BOD 1.8V              #
# bootloader of this board is just UNO running up 115200BPS  #
##############################################################
Optiboot16115.name=Optiboot 328 16MHz 115200BPS

Optiboot16115.build.f_cpu=16000000L
Optiboot16115.upload.speed=115200
Optiboot16115.bootloader.file=optiboot_atmega328_1152200_16MHz.hex

Optiboot16115.upload.tool=arduino:avrdude
Optiboot16115.upload.protocol=arduino
Optiboot16115.upload.maximum_size=32256
Optiboot16115.upload.maximum_data_size=2048

Optiboot16115.bootloader.low_fuses=0xff
Optiboot16115.bootloader.high_fuses=0xde
Optiboot16115.bootloader.extended_fuses=0x06
Optiboot16115.bootloader.path=optiboot
Optiboot16115.bootloader.unlock_bits=0x3F
Optiboot16115.bootloader.lock_bits=0xCF
Optiboot16115.bootloader.tool=arduino:avrdude

Optiboot16115.build.mcu=atmega328p
Optiboot16115.build.board=AVR_PRO
Optiboot16115.build.core=arduino:arduino
Optiboot16115.build.variant=arduino:standard

##############################################################
#               Optiboot 16Mhz 250000 BOD 1.8V               #
# bootloader of this board is just UNO running up 250000KBps #
##############################################################
Optiboot16250.name=Optiboot 328 16MHz 250KBPS

Optiboot16250.build.f_cpu=16000000L
Optiboot16250.upload.speed=250000
Optiboot16250.bootloader.file=optiboot_atmega328_250000_16MHz.hex

Optiboot16250.upload.tool=arduino:avrdude
Optiboot16250.upload.protocol=arduino
Optiboot16250.upload.maximum_size=32256
Optiboot16250.upload.maximum_data_size=2048

Optiboot16250.bootloader.low_fuses=0xff
Optiboot16250.bootloader.high_fuses=0xde
Optiboot16250.bootloader.extended_fuses=0x06
Optiboot16250.bootloader.path=optiboot
Optiboot16250.bootloader.unlock_bits=0x3F
Optiboot16250.bootloader.lock_bits=0xCF
Optiboot16250.bootloader.tool=arduino:avrdude

Optiboot16250.build.mcu=atmega328p
Optiboot16250.build.board=AVR_PRO
Optiboot16250.build.core=arduino:arduino
Optiboot16250.build.variant=arduino:standard

##############################################################
#                 Optiboot 8Mhz 57600 BOD 1.8V               #
# bootloader of this board is just UNO running up 57600BPS  #
##############################################################
Optiboot8576.name=Optiboot 328 8MHz 57600BPS

Optiboot8576.build.f_cpu=8000000L
Optiboot8576.upload.speed=57600
Optiboot8576.bootloader.file=optiboot_atmega328_57600_8MHz.hex

Optiboot8576.upload.tool=arduino:avrdude
Optiboot8576.upload.protocol=arduino
Optiboot8576.upload.maximum_size=32256
Optiboot8576.upload.maximum_data_size=2048

Optiboot8576.bootloader.low_fuses=0xff
Optiboot8576.bootloader.high_fuses=0xde
Optiboot8576.bootloader.extended_fuses=0x06
Optiboot8576.bootloader.path=optiboot
Optiboot8576.bootloader.unlock_bits=0x3F
Optiboot8576.bootloader.lock_bits=0xCF
Optiboot8576.bootloader.tool=arduino:avrdude

Optiboot8576.build.mcu=atmega328p
Optiboot8576.build.board=AVR_PRO
Optiboot8576.build.core=arduino:arduino
Optiboot8576.build.variant=arduino:standard


##############################################################
#                Optiboot 8Mhz 115200 BOD 1.8V               #
# bootloader of this board is just UNO running up 250000KBps #
##############################################################
Optiboot8115.name=Optiboot 328 8MHz 115200BPS

Optiboot8115.build.f_cpu=8000000L
Optiboot8115.upload.speed=115200
Optiboot8115.bootloader.file=optiboot_atmega328_1152200_8MHz.hex

Optiboot8115.upload.tool=arduino:avrdude
Optiboot8115.upload.protocol=arduino
Optiboot8115.upload.maximum_size=32256
Optiboot8115.upload.maximum_data_size=2048

Optiboot8115.bootloader.low_fuses=0xff
Optiboot8115.bootloader.high_fuses=0xde
Optiboot8115.bootloader.extended_fuses=0x06
Optiboot8115.bootloader.path=optiboot
Optiboot8115.bootloader.unlock_bits=0x3F
Optiboot8115.bootloader.lock_bits=0xCF
Optiboot8115.bootloader.tool=arduino:avrdude

Optiboot8115.build.mcu=atmega328p
Optiboot8115.build.board=AVR_PRO
Optiboot8115.build.core=arduino:arduino
Optiboot8115.build.variant=arduino:standard


##############################################################
#                Optiboot 8Mhz 250000 BOD 1.8V               #
# bootloader of this board is just UNO running up 250000KBps #
##############################################################
Optiboot8250.name=Optiboot 328 8MHz 250KBPS

Optiboot8250.build.f_cpu=8000000L
Optiboot8250.upload.speed=250000
Optiboot8250.bootloader.file=optiboot_flash_atmega328p_250000_8000000L.hex

Optiboot8250.upload.tool=arduino:avrdude
Optiboot8250.upload.protocol=arduino
Optiboot8250.upload.maximum_size=32256
Optiboot8250.upload.maximum_data_size=2048

Optiboot8250.bootloader.low_fuses=0xff
Optiboot8250.bootloader.high_fuses=0xde
Optiboot8250.bootloader.extended_fuses=0x06
Optiboot8250.bootloader.path=optiboot
Optiboot8250.bootloader.unlock_bits=0x3F
Optiboot8250.bootloader.lock_bits=0xCF
Optiboot8250.bootloader.tool=arduino:avrdude

Optiboot8250.build.mcu=atmega328p
Optiboot8250.build.board=AVR_PRO
Optiboot8250.build.core=arduino:arduino
Optiboot8250.build.variant=arduino:standard

##############################################################
#                Optiboot 8Mhz 1000000 BOD 1.8V              #
#   bootloader of this board is just UNO running up 1MBPS    #
##############################################################
Optiboot81000.name=Optiboot 328 8MHz 1MBPS

Optiboot81000.build.f_cpu=8000000L
Optiboot81000.upload.speed=1000000
Optiboot81000.bootloader.file=optiboot_flash_atmega328p_1000000_8000000L.hex

Optiboot81000.upload.tool=arduino:avrdude
Optiboot81000.upload.protocol=arduino
Optiboot81000.upload.maximum_size=32256
Optiboot81000.upload.maximum_data_size=2048

Optiboot81000.bootloader.low_fuses=0xff
Optiboot81000.bootloader.high_fuses=0xde
Optiboot81000.bootloader.extended_fuses=0x06
Optiboot81000.bootloader.path=optiboot
Optiboot81000.bootloader.unlock_bits=0x3F
Optiboot81000.bootloader.lock_bits=0xCF
Optiboot81000.bootloader.tool=arduino:avrdude

Optiboot81000.build.mcu=atmega328p
Optiboot81000.build.board=AVR_PRO
Optiboot81000.build.core=arduino:arduino
Optiboot81000.build.variant=arduino:standard

##############################################################
#               Optiboot 16Mhz 1000000 BOD 1.8V              #
#   bootloader of this board is just UNO running up 1MBPS    #
##############################################################
Optiboot161000.name=Optiboot 328 16MHz 1MBPS

Optiboot161000.build.f_cpu=16000000L
Optiboot161000.upload.speed=1000000
Optiboot161000.bootloader.file=optiboot_atmega328_1000000_16MHz.hex

Optiboot161000.upload.tool=arduino:avrdude
Optiboot161000.upload.protocol=arduino
Optiboot161000.upload.maximum_size=32256
Optiboot161000.upload.maximum_data_size=2048

Optiboot161000.bootloader.low_fuses=0xff
Optiboot161000.bootloader.high_fuses=0xde
Optiboot161000.bootloader.extended_fuses=0x06
Optiboot161000.bootloader.path=optiboot
Optiboot161000.bootloader.unlock_bits=0x3F
Optiboot161000.bootloader.lock_bits=0xCF
Optiboot161000.bootloader.tool=arduino:avrdude

Optiboot161000.build.mcu=atmega328p
Optiboot161000.build.board=AVR_PRO
Optiboot161000.build.core=arduino:arduino
Optiboot161000.build.variant=arduino:standard


##############################################################
#               Optiboot 16Mhz 1000000 BOD 1.8V              #
#        bootloader for  ATMega1284p running up 1MBPS        #
##############################################################

atmega1284p_1M.name=ATmega1284/P 16MHz 1MBPS

atmega1284p_1M.build.f_cpu=16000000L
atmega1284p_1M.upload.speed=1000000
atmega1284p_1M.bootloader.file=optiboot_atmega1284p_1Mbps_D15.hex

atmega1284p_1M.upload.tool=arduino:avrdude
atmega1284p_1M.upload.protocol=arduino
atmega1284p_1M.upload.maximum_size=130048
atmega1284p_1M.upload.maximum_data_size=16384

atmega1284p_1M.bootloader.low_fuses=0xFF
atmega1284p_1M.bootloader.high_fuses=0xDE
atmega1284p_1M.bootloader.extended_fuses=0xFE
atmega1284p_1M.bootloader.path=optiboot
atmega1284p_1M.bootloader.unlock_bits=0x3F
atmega1284p_1M.bootloader.lock_bits=0x0F
atmega1284p_1M.bootloader.tool=arduino:avrdude

atmega1284p_1M.build.mcu=atmega1284p
atmega1284p_1M.build.board=AVR_MOTEINOMEGA
atmega1284p_1M.build.core=arduino:arduino
atmega1284p_1M.build.variant=MoteinoMEGA