The Things Network
HowTo: Update RN2483 Firmware on 'The Things Node'
End Devices (Nodes)
pe1mew
(Remko)
January 16, 2018, 1:48pm
3
@BoRRoZ
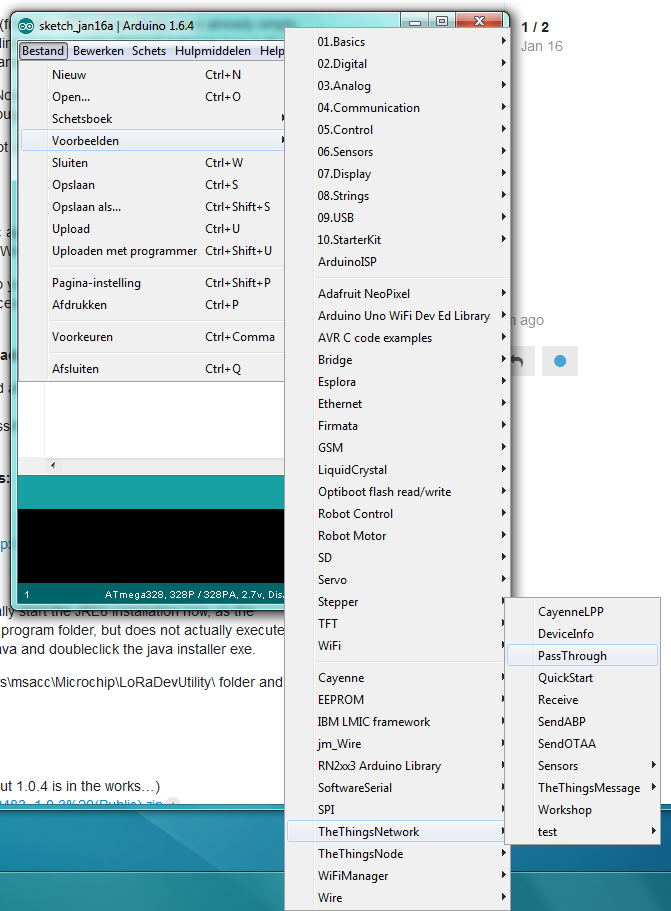
See the image:
1 Like
The Things Node - Central
show post in topic