Any tips for a LiPo battery, charger and solar panel for an always-on node?

Guys,

I just recycled early ULPNode prototypes to test and measure solar/lipo

All is done with custom classic Atmega328 early ULPNode prototype with

  • RFM69 RF module on board
  • Chinese Solar Panel
  • 240mA Chinese Lipo charging @100mA
  • Adafruit Mini Lipo Charger
  • RF/LowPower is done with unreleased ULPNode Library

RF Transmit is done every minute and LED is blinking every 8S (Watchdog wake), so it really not “Ultra Low Power” but I want to see how how far can we go with this not optimized settings

Inside

All mounted (nodeMCU is just for "size view)

Live view started

Dashboard published, you can follow and access them any time here if node and battery survive to this night :wink:
PS click week on dashboard since data shows default for year.

1 Like

@BoRRoZ
Got my Amazon gift today Solar Outdoor light talked above, seems pcb have changed

Seems the Lipo has lower size also (lower capacity?)

thank telling me about the on switch amazing to find it (but it clear on documentation we all must read it :wink:

where is IC 1 ?

I swear, I didn’t hacked it and removed, but I don’t know, what was it for?

check your other solarlights… if they all are the same it’s a feature by design and not a mondaymorning production

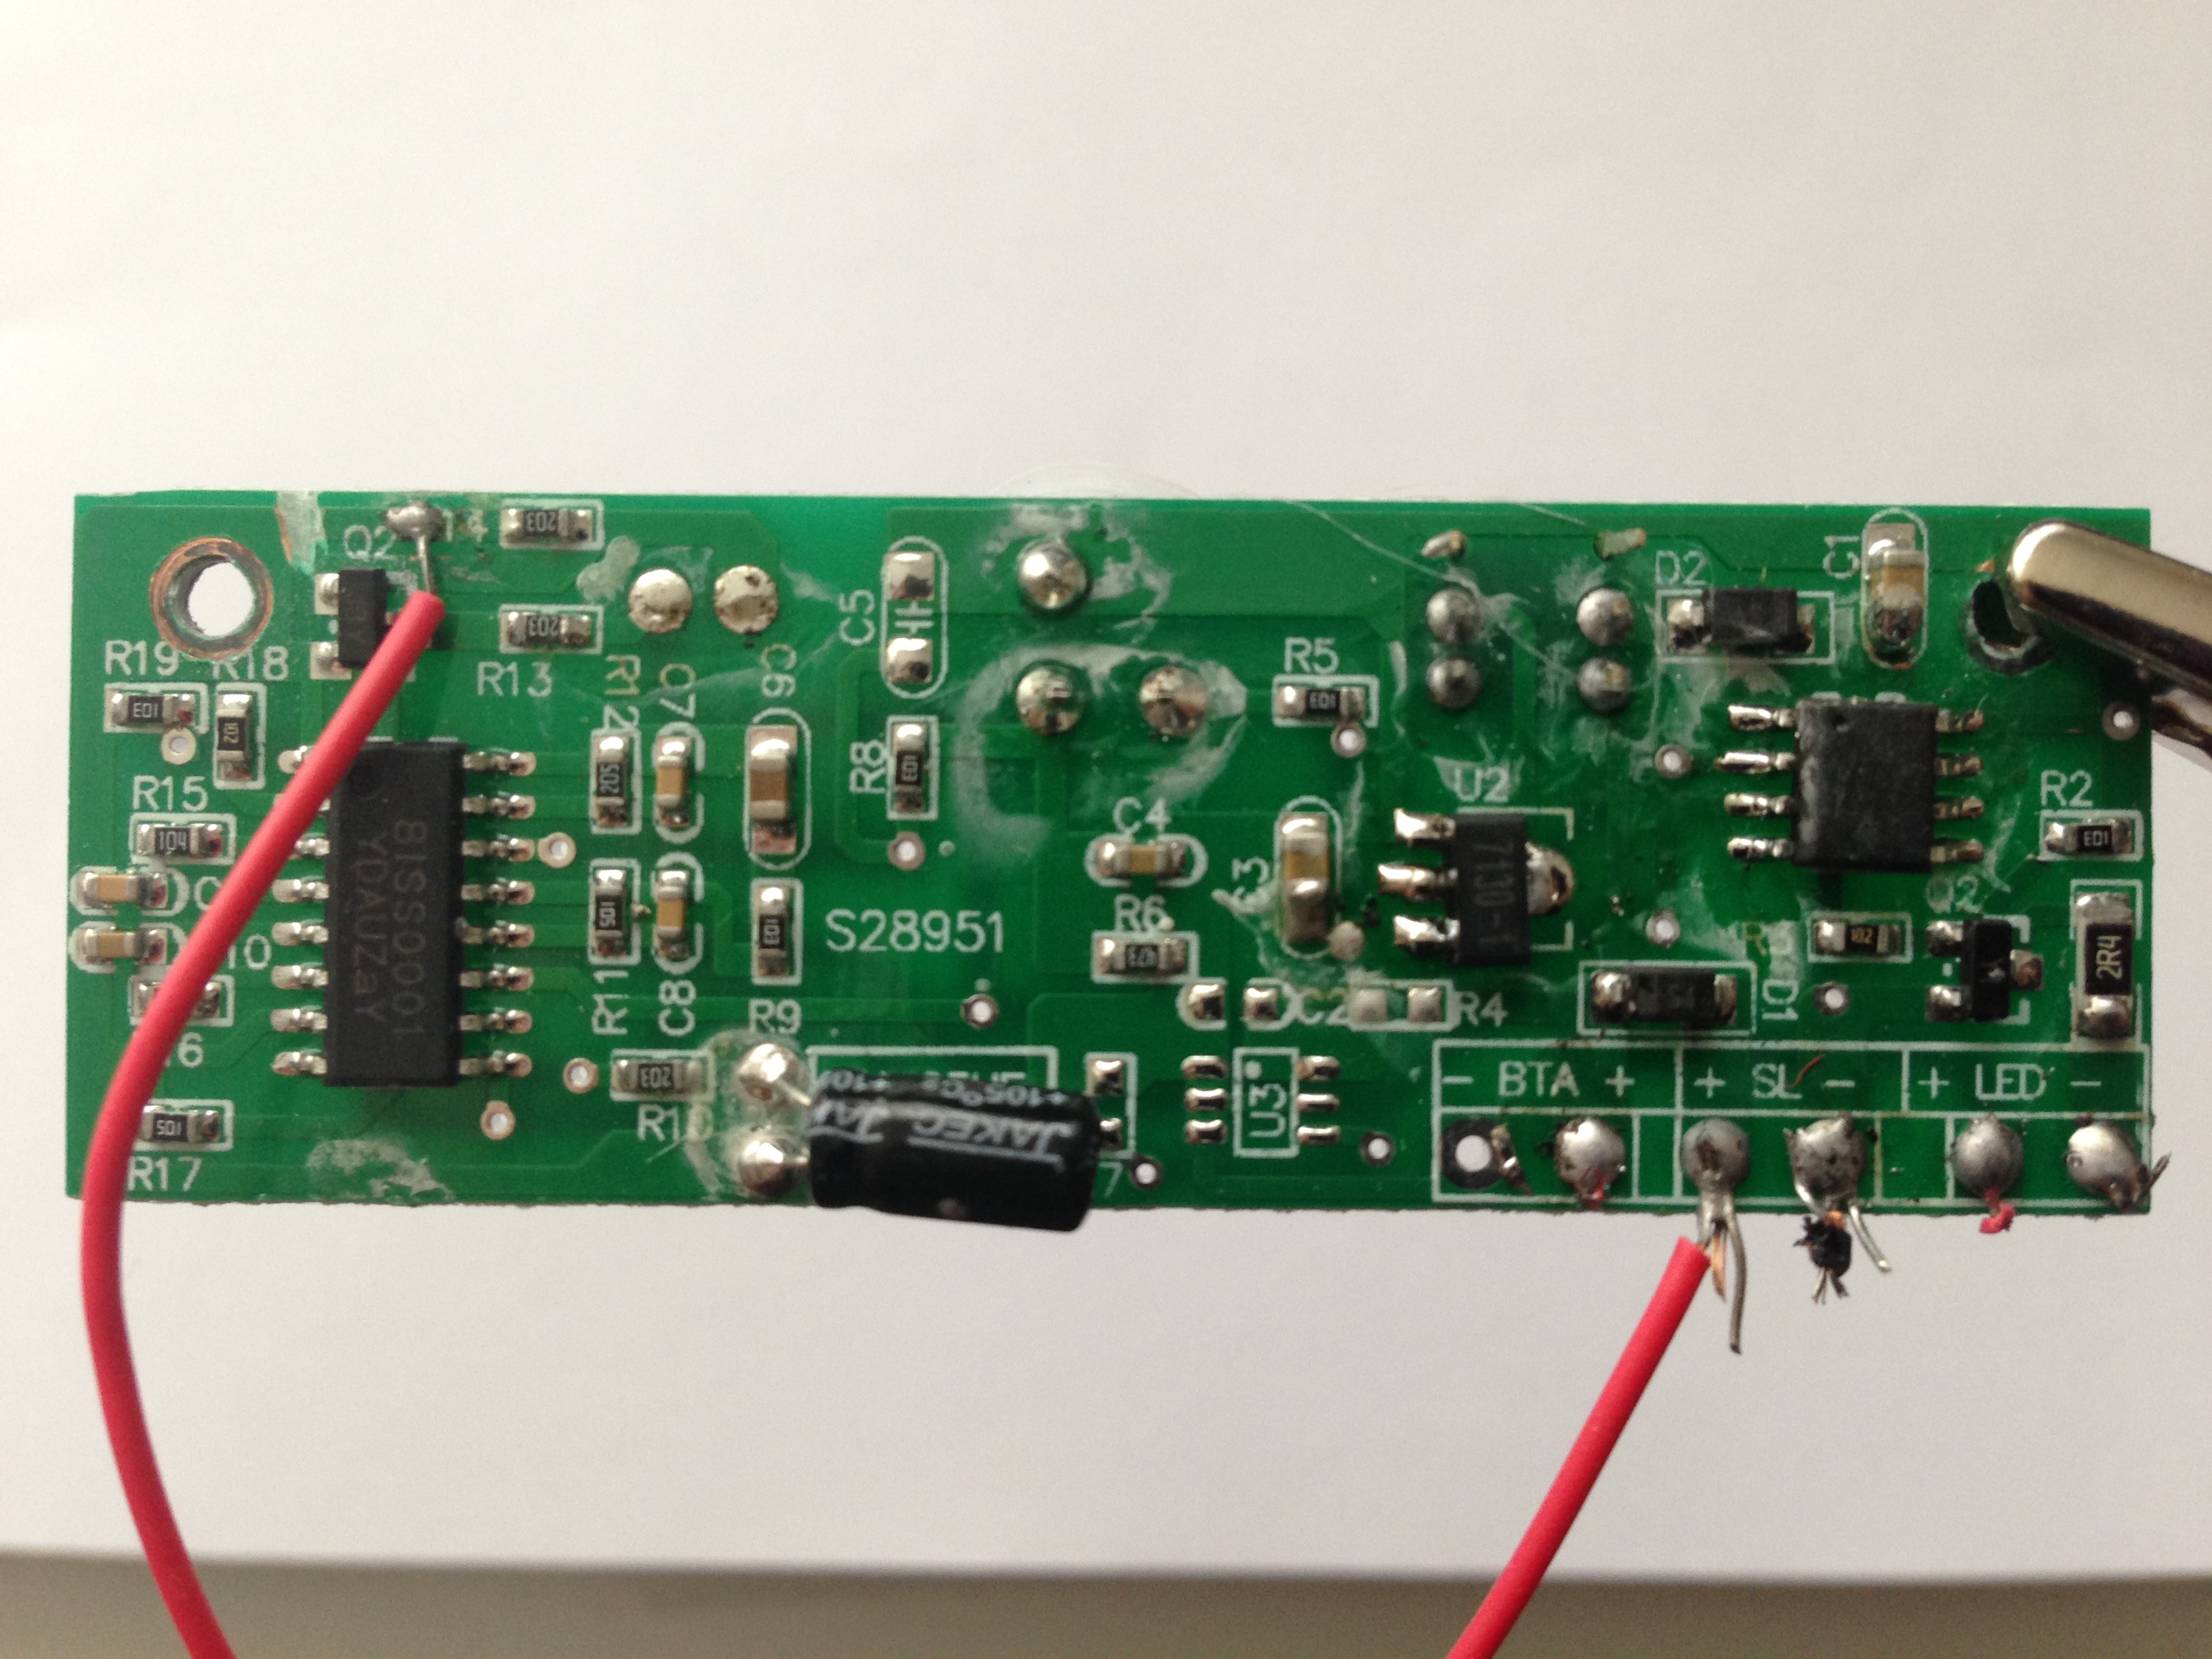
Here an other board out of the Solar_Wall_Light from Interdiscount in Zurich
LiPo has 900mAh

Humm, this one shows that “waterproof” word can have different appreciation :wink:

about waterproof enclosures for little chinese panels… be carefull because when they are the whole day full in the sun, it gets to hot inside the waterproof (airtight|) plastic box, the panelcapacity can decrease 15-30%…
I bought these little fans and my plan is to build one in the enclosure and switch it on a short time @ a certain temp, maybe controlled by a bi-metal and a transistor (not tested yet)
Another possibillity is drill a few holes in the bottom :wink:

I was thinking about that issue too and was considering small holes in the bottom, but I am concerned about condensation in front of the panel.

I’ll place a 30x30mm 5V fan at the far end (wall side) below the battery; placing some holes near the front, where the antenna will be mounted to exhaust. Temperature will be controlled by a TMP3x not wasting energy

1 Like

yes condensation will/can be a problem, I used a few sillica gel packs I saved from packaging, but they are very cheap

You do not have any regeneration when heating ? Typical regeneration temperature is at 120°C but I have seen people regenerating it behind a glass with direct sun…as our solar panels :confused:

Best way is vacuum, but will not match with holes nor fan :stuck_out_tongue:

My morning gift,
3 days to come from China to France, then 32 days from Paris to my home, WTF ?

Anyway, these one are incredible, I looked at schematics below

for $2.5 you have:

  • One Charger with programmable current
  • 5V Step UP (1A) ok would prefer 3V3 but it’s fine since 3V3 regulator is on WeMos Boards
  • USB micro connector to charge Lipo
  • Chip input accept up to 10V input, this mean any solar panel can be connected instead of USB

Unbeatable price guys, need to test with WeMos and onboard Lora and add this on dashboard

3 Likes

yes nice board ! , I am curious what results you get :sunglasses:

solar powered RPI

solar powered Arduino

sometimes it’s nice to see all the voltages at once when testing , like solarpanel output, step up or charger out, batteries ect.
that’s why I build this quadro voltmeter :sweat_smile:

2 Likes

Nice !
I agree with you, so I have done the same…but unfortunately it is laggy because over Lora :stuck_out_tongue:
Just need to add a DH22 and pack everything inside the box.

By the way, nice toys on you desk !

1 Like

Nice, I can see Aliexpress enclosure have great success

Excellent voltmeter thank for the link @BoRRoZ, I had same idea today, doing some 4 entries Voltage divider so I can connect more than 3.3V entry to measure. This little board than can also be connected to Adafruit 4 channels I2C ADC (for WeMos as an example)

Will be cool doing some measure with it and will make my WeMos more ADC compliant :smile:

All information on github you can order PCB from PBCs.io 4 boards for less than 3$

Yo can find ADS I2C ADC boards on Ebay for less than $3 per board too

1 Like

I bought the china voltmeter modules for a different project I wanted to try , never finished :innocent:

I2C LED Display From Hacked Voltmeter

LiPo charge board solar controller

Input voltage: 4.4V - 6V
Constant charging voltage : 4.2V
Constant charging current: Max 900mA
Size: 15*22MM

1 Like

I must admit the more I think about this the more i’m tempted to just oversize everything…

£13 5000ma battery


£10.99 for ‘7w’ (probably nearer 5w in reality) solar panel

For the sake of £24 seems like it would be worth it to have it -just work- through a cold and dingy winter?

1 Like

Nice finding ! I should have found it as it is used in Seedstudio Stalker, the kit I bought with the solar pannel :confused:

Regarding my test, it was not charging yesterday with a charging current set to 100mA.
After searching specs of my solar panel I found that it is a 100mA@5.5V. So I tried to set the TP4056 at 50mA, but does not work today too.
I suspect that it is not linked to constant current setpoint but to the current injected in constant voltage mode as my battery is currently @4.15V
Unfortunately the current required is not in the datasheet :confused: I might try to measure it this weekend

By the way temperature inside the enclosure grew up to 60°C, which is usually the max specified in18650 datasheets.