We want to encourage community members to post their success stories and use cases! We’re always thrilled to see what you’re using The Things Stack for.
Here’s my story  I provided some steps in order for others to be able to reproduce, and I suggest others to do the same. Feel free to discuss about the project in comments!
Recently, I got a LoRa Edge development kit so I went playing with it a bit. I wanted to obtain the location solution from LoRa Cloud and then send my results to Ubidots in order to visualize them on a map. This post will contain short steps on how to reproduce this little project.
Step 1 - Assemble the LoRa Edge tracker device
The assembly process is fully explained here.
Step 2 - Install the LoRa Basics Modem-E firmware and Demo app
The instructions to install this firmware and a demo app on the tracker device are available here.
Step 3 - Claim the device
Follow the instructions on how to claim the LoRa Edge tracker device using LoRa Cloud Device Join service.
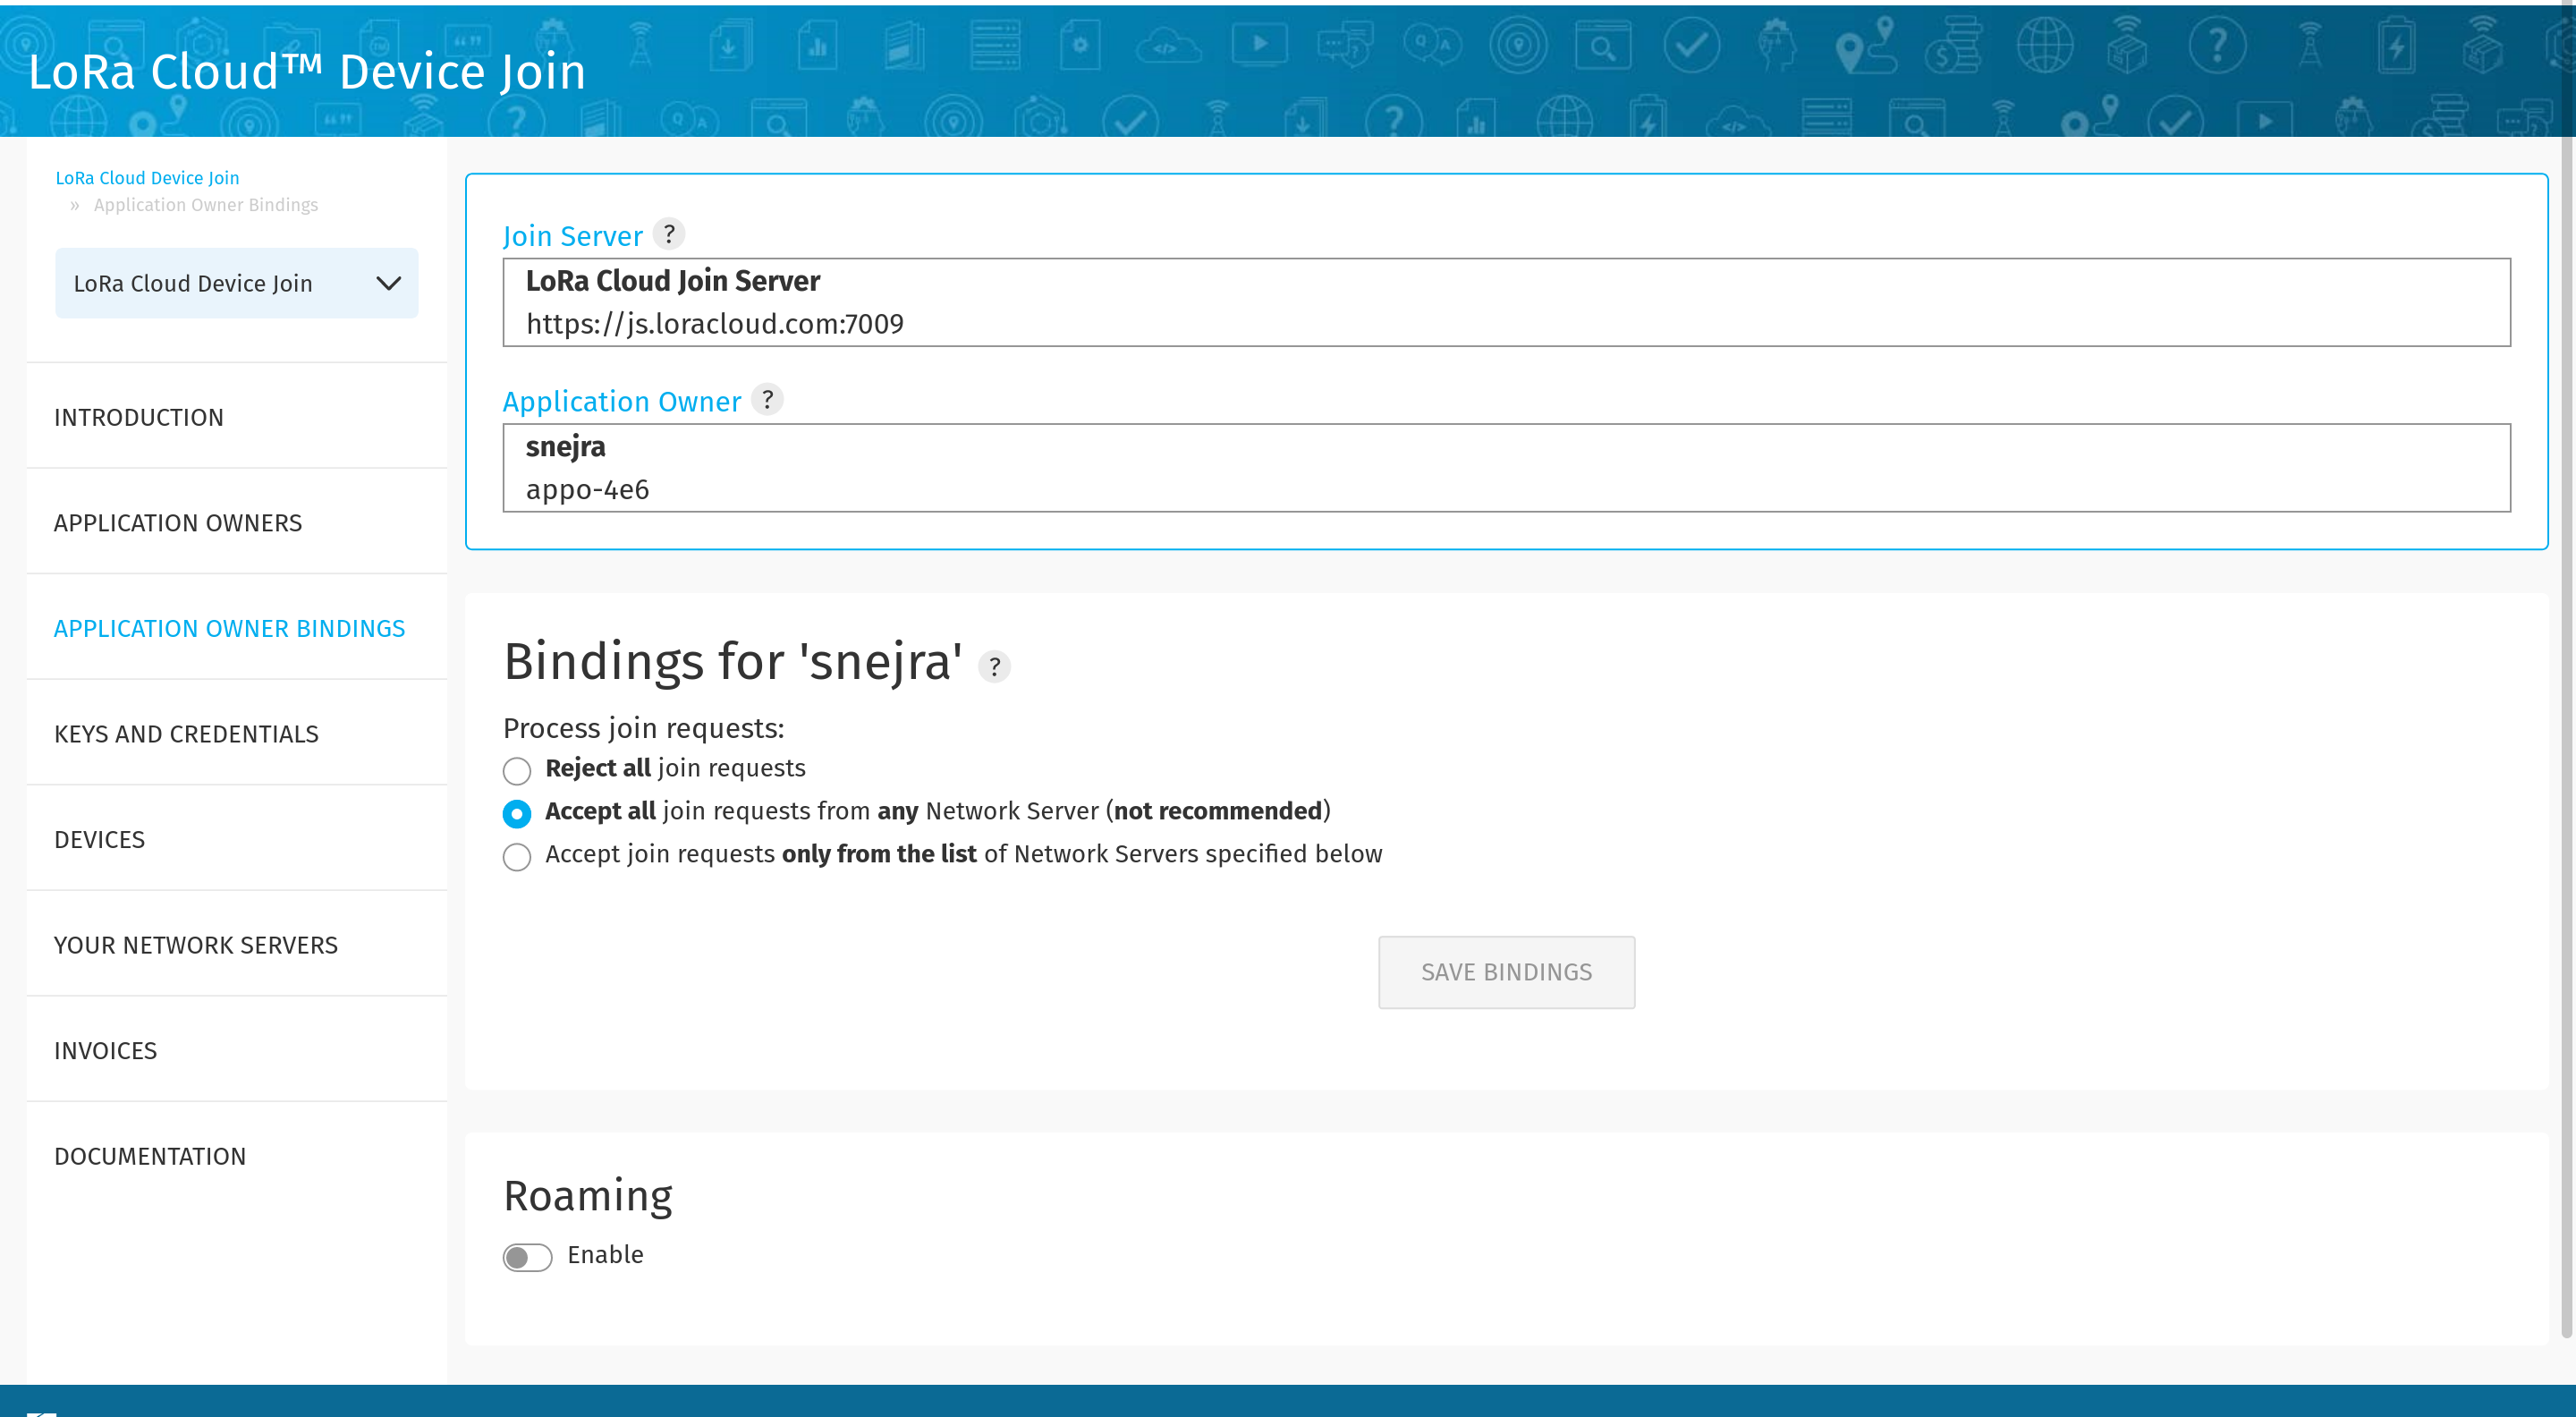
Step 4 - Set application owner bindings
Navigate to Application Owner Bindings on the left hand menu in LoRa Cloud and set the application owner bindings so that join requests, that will be sent from the tracker device once it’s registered on The Things Stack, can be accepted by the LoRa Cloud Device Join service. I chose an option to allow joins from any network that’s obviously not recommended, but it’s just for testing purposes anyway.
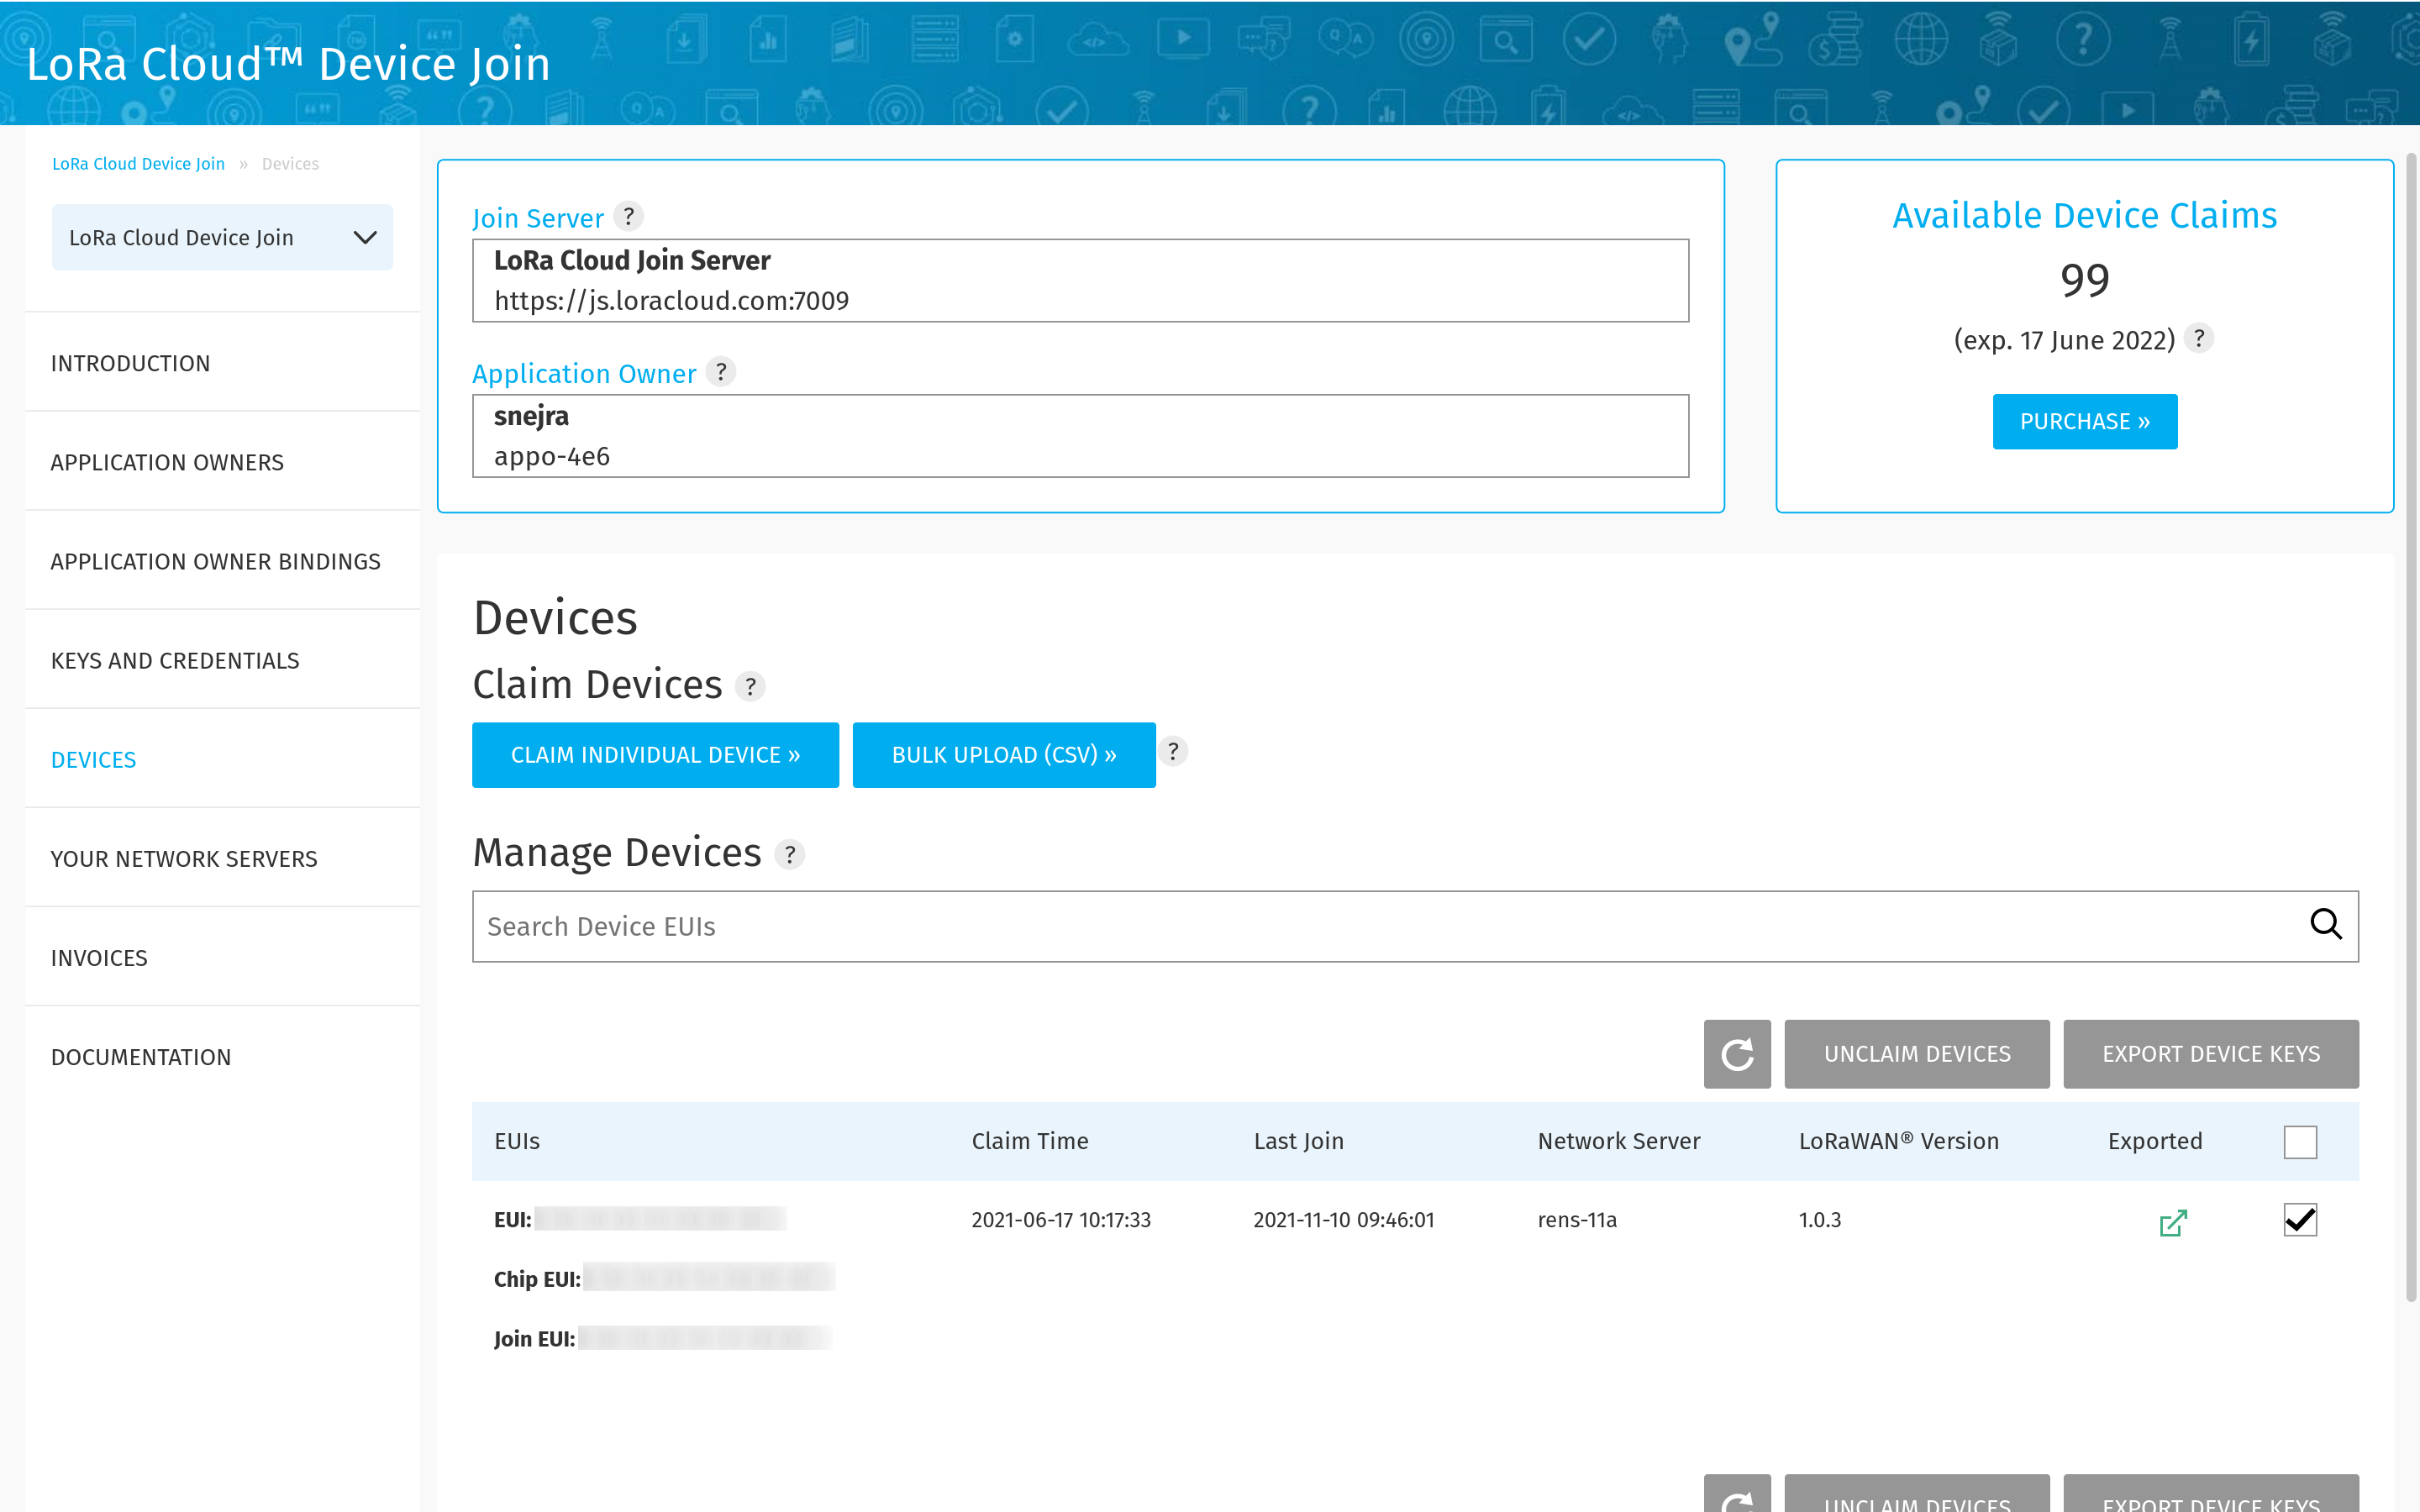
Step 5 - Export device keys
Now navigate to Devices on the left hand menu in LoRa Cloud, find the previously claimed device, select it and click on Export device keys. This will download a .csv file for your device, containing DevEUI, AppKey and NwkKey you need for device registration on The Things Stack.
You’ll also see your device’s Join EUI and LoRaWAN version under device details.
Step 6 - Register the tracker device on The Things Stack
Now follow the Adding devices tutorial to add the tracker device on The Things Stack. Upon registration, use the LoRaWAN version, DevEUI, JoinEUI and AppKey you got from the steps above.
When you finish, save the device and enter its settings. Go to the General settings tab and enable the External Join Server option to tell The Things Stack that the LoRa Cloud Device Join service will take care of the join procedure.
Step 7 - Configure the LoRa Cloud DAS integration
Now configure the integration with LoRa Cloud DAS following these instructions. As a result, when you perform a scan, in the Live data tab, you should see a location_solved message containing location solution.
Step 8 - Configure Ubidots integration
The next step is to configure the Ubidots integration as explained here. There are two things you have to pay attention to, ie. that are slightly different than in the linked guide.
Set the decoder function
Instead of the the decoder function mentioned in the guide, you will need to use something like this:
function format_payload(args){
  var ubidots_payload = {};
  var data = args['location_solved'];

  ubidots_payload['location'] = data['location'];

  return ubidots_payload
}

module.exports = { format_payload };
Enable the integration for location_solved messages
The Ubidots webhook integration (when created using the Ubidots webhook template) is enabled for uplink messages only by default. This means that if you don’t change the enabled message type from Uplink message to Location solved, the uplink messages will be sent to Ubidots via webhook. In that case, Ubidots will not be able to parse the message properly, because it will look for a location_solved object, that doesn’t exist in the uplink messages.
To make this right, just open the webhook integration you created, scroll down, disable Uplink message, enable Location solved, then copy the path from Uplink message and paste it as path for Location solved, as shown below.

Final step - Visualize your device’s location data on a map
Now, everything that’s needed is configured, and you can head over to Ubidots to monitor the results. When you perform a scan with your LoRa Edge tracker and obtain a location solution from LoRa Cloud, the results will automatically be sent to Ubidots.
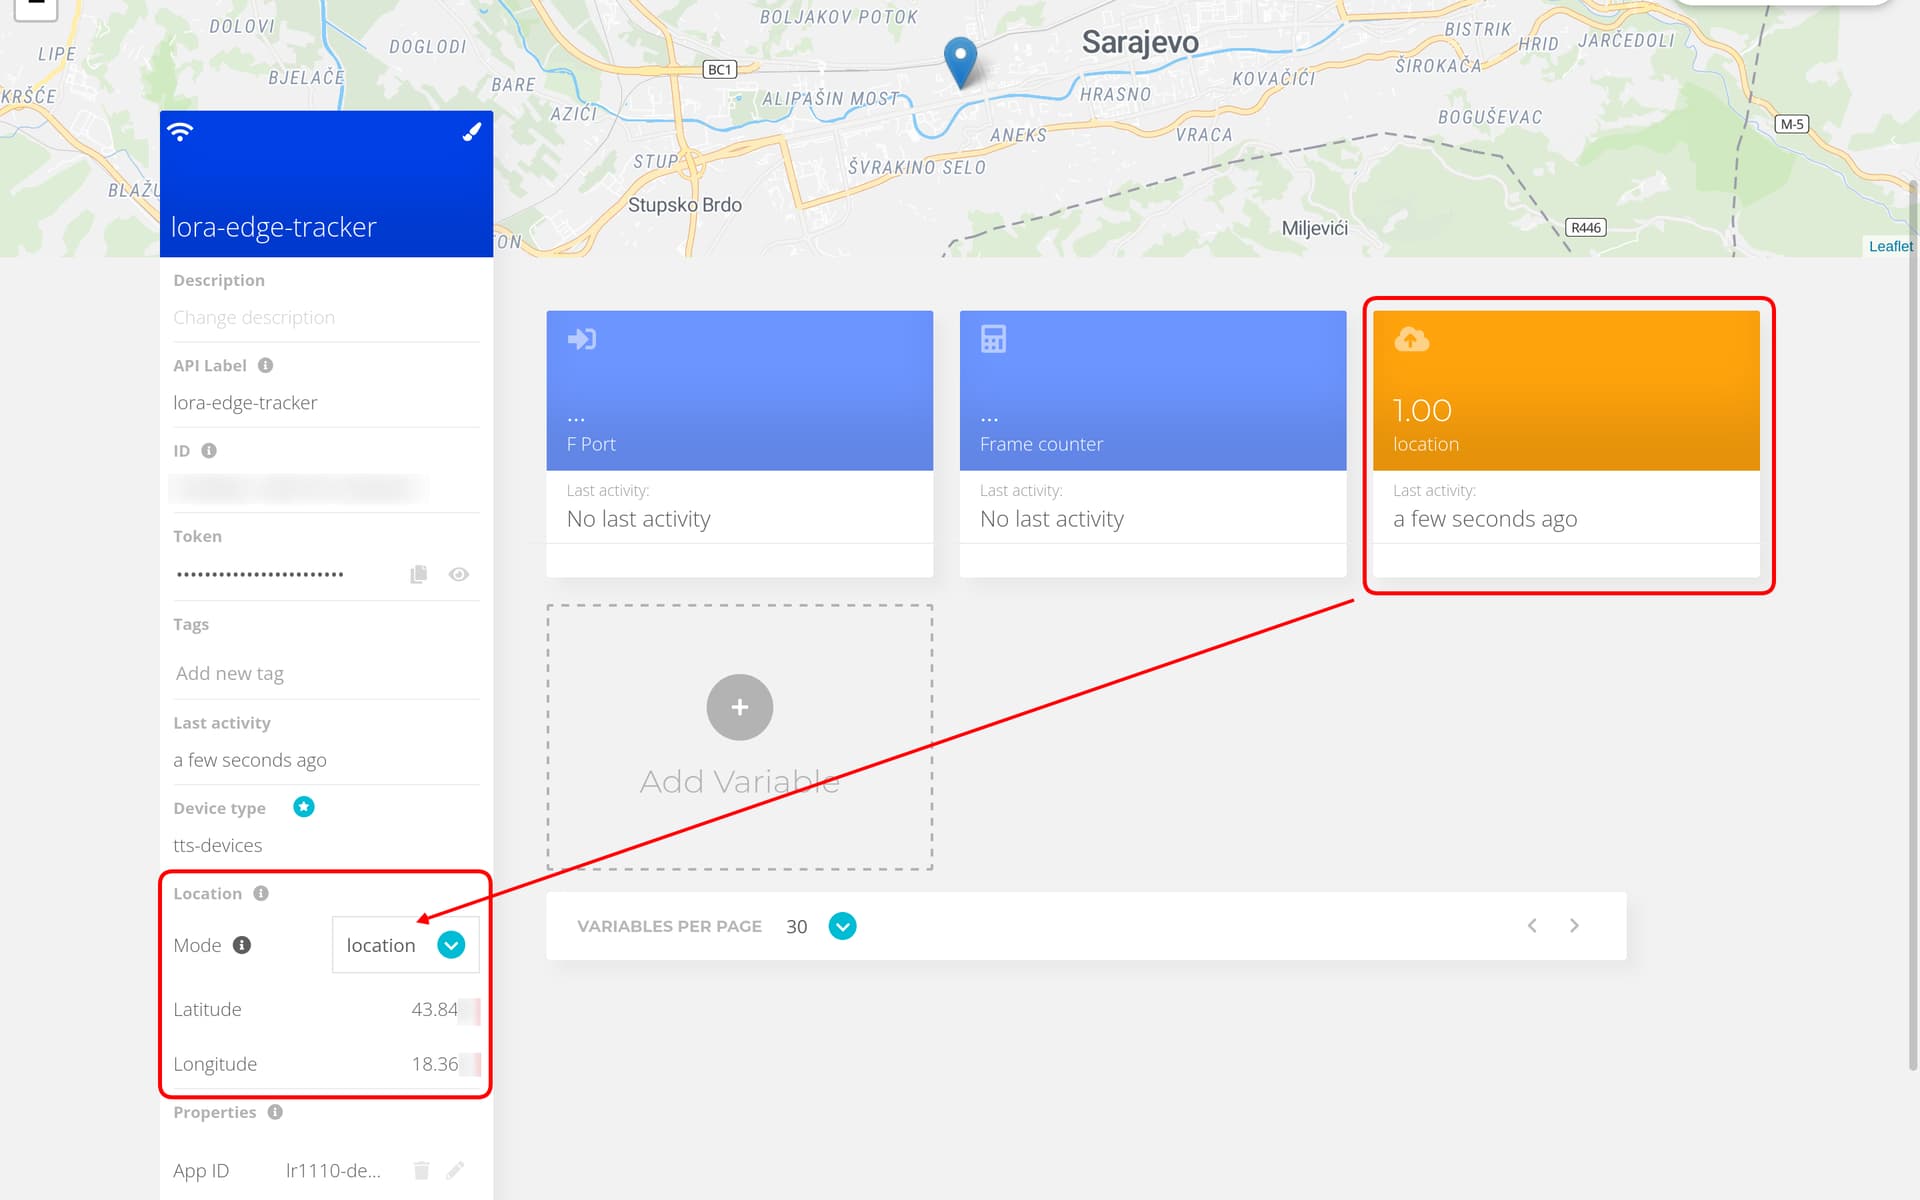
Navigate to Devices in Ubidots. Your device will show up in a list if at least one Location solved message reached Ubidots. If you click on your device, you’ll see that a variable location containing your tracker device’s location info has been automatically created.
However, you must explicitly tell Ubidots to use this data as location data, in order to visualize it for example on a map. In device settings on the left, under Location, edit Mode and set it to the name of the variable containing location (location in this example), like shown below.
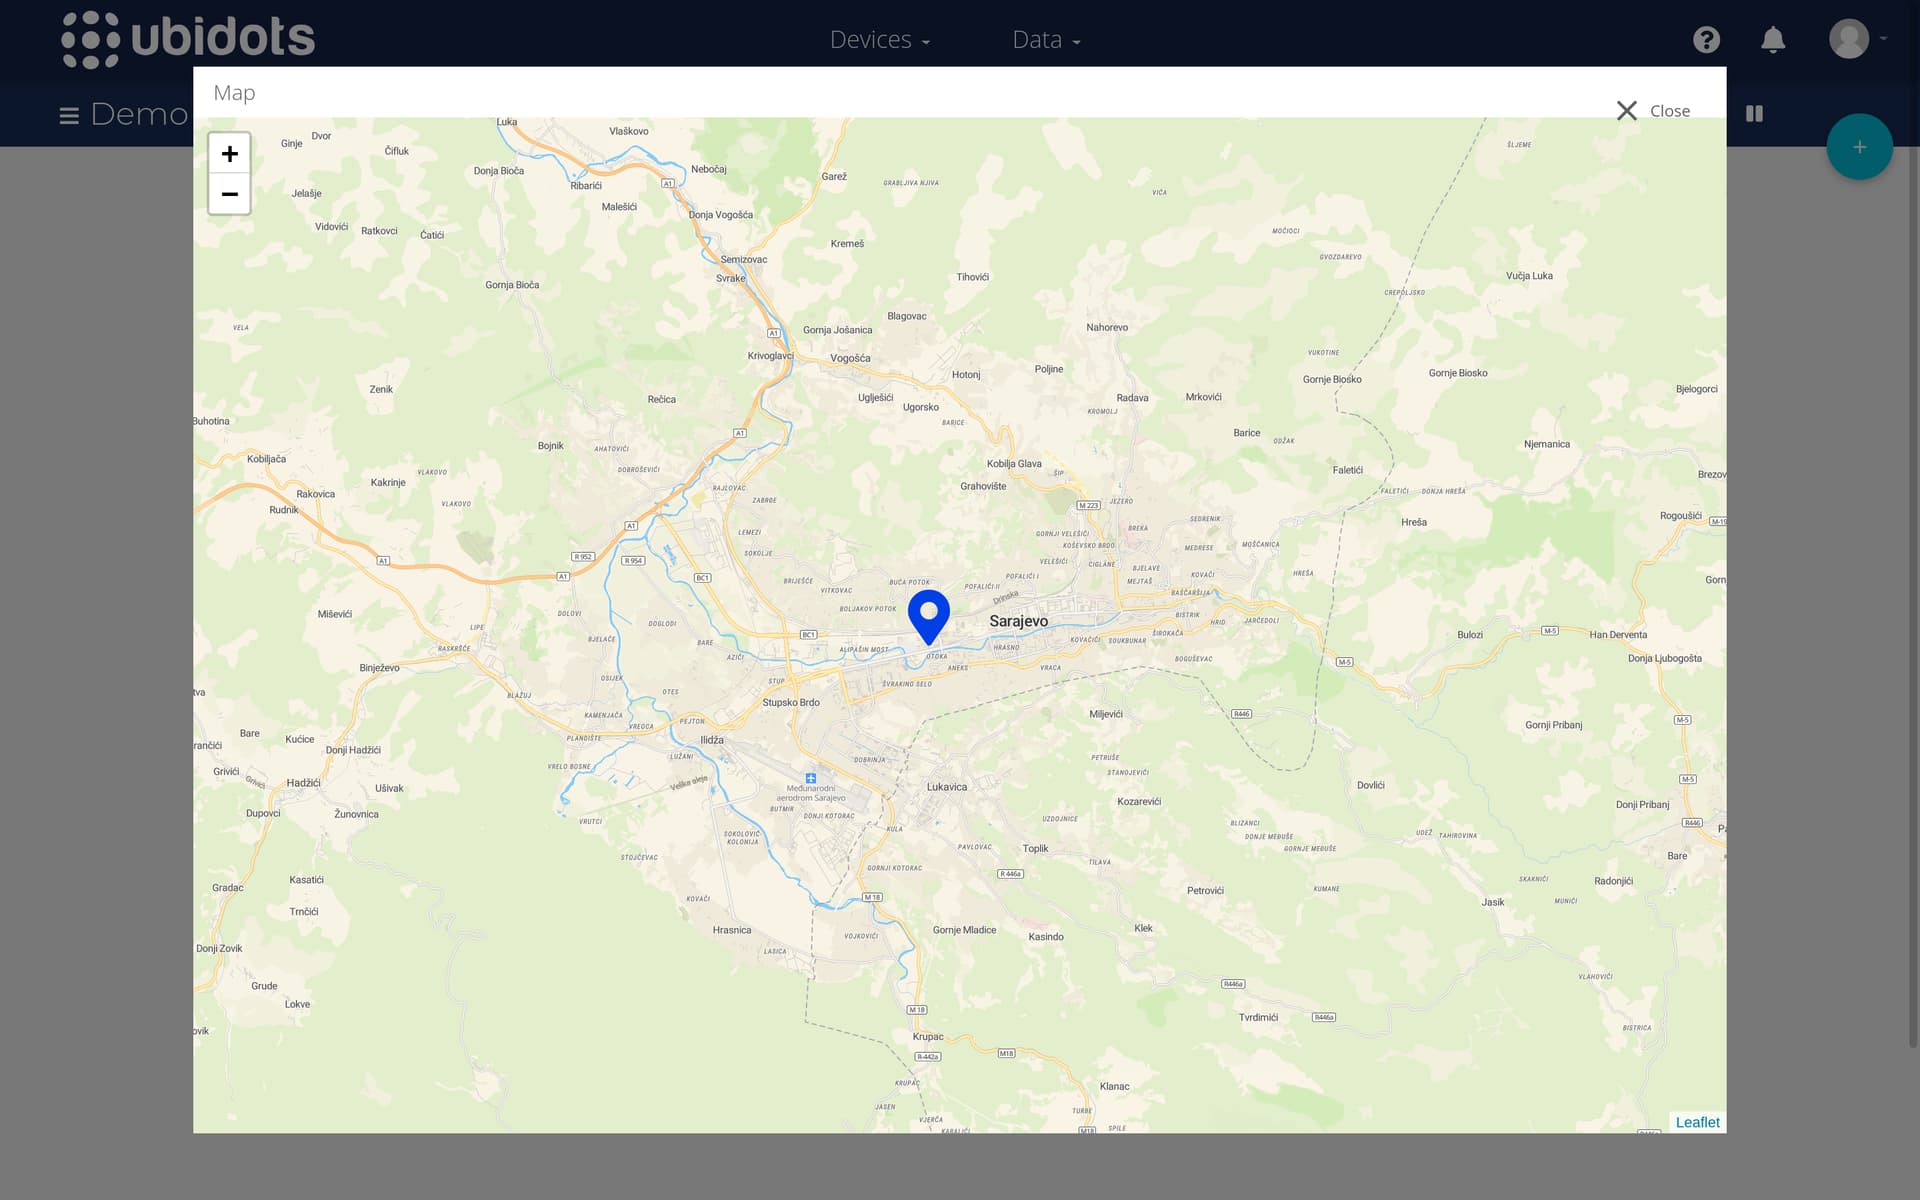
Now navigate to Data → Dashboards and create a new Map widget. While making a widget, under Data, click Select devices and select your device from a list. Customize your widget if you want and save it.
Et voilà!  Your dashboard will now show your tracker’s location on a nice map.