Thank you!
You can ask at will !! I’m just sorry if I’m slow to respond.
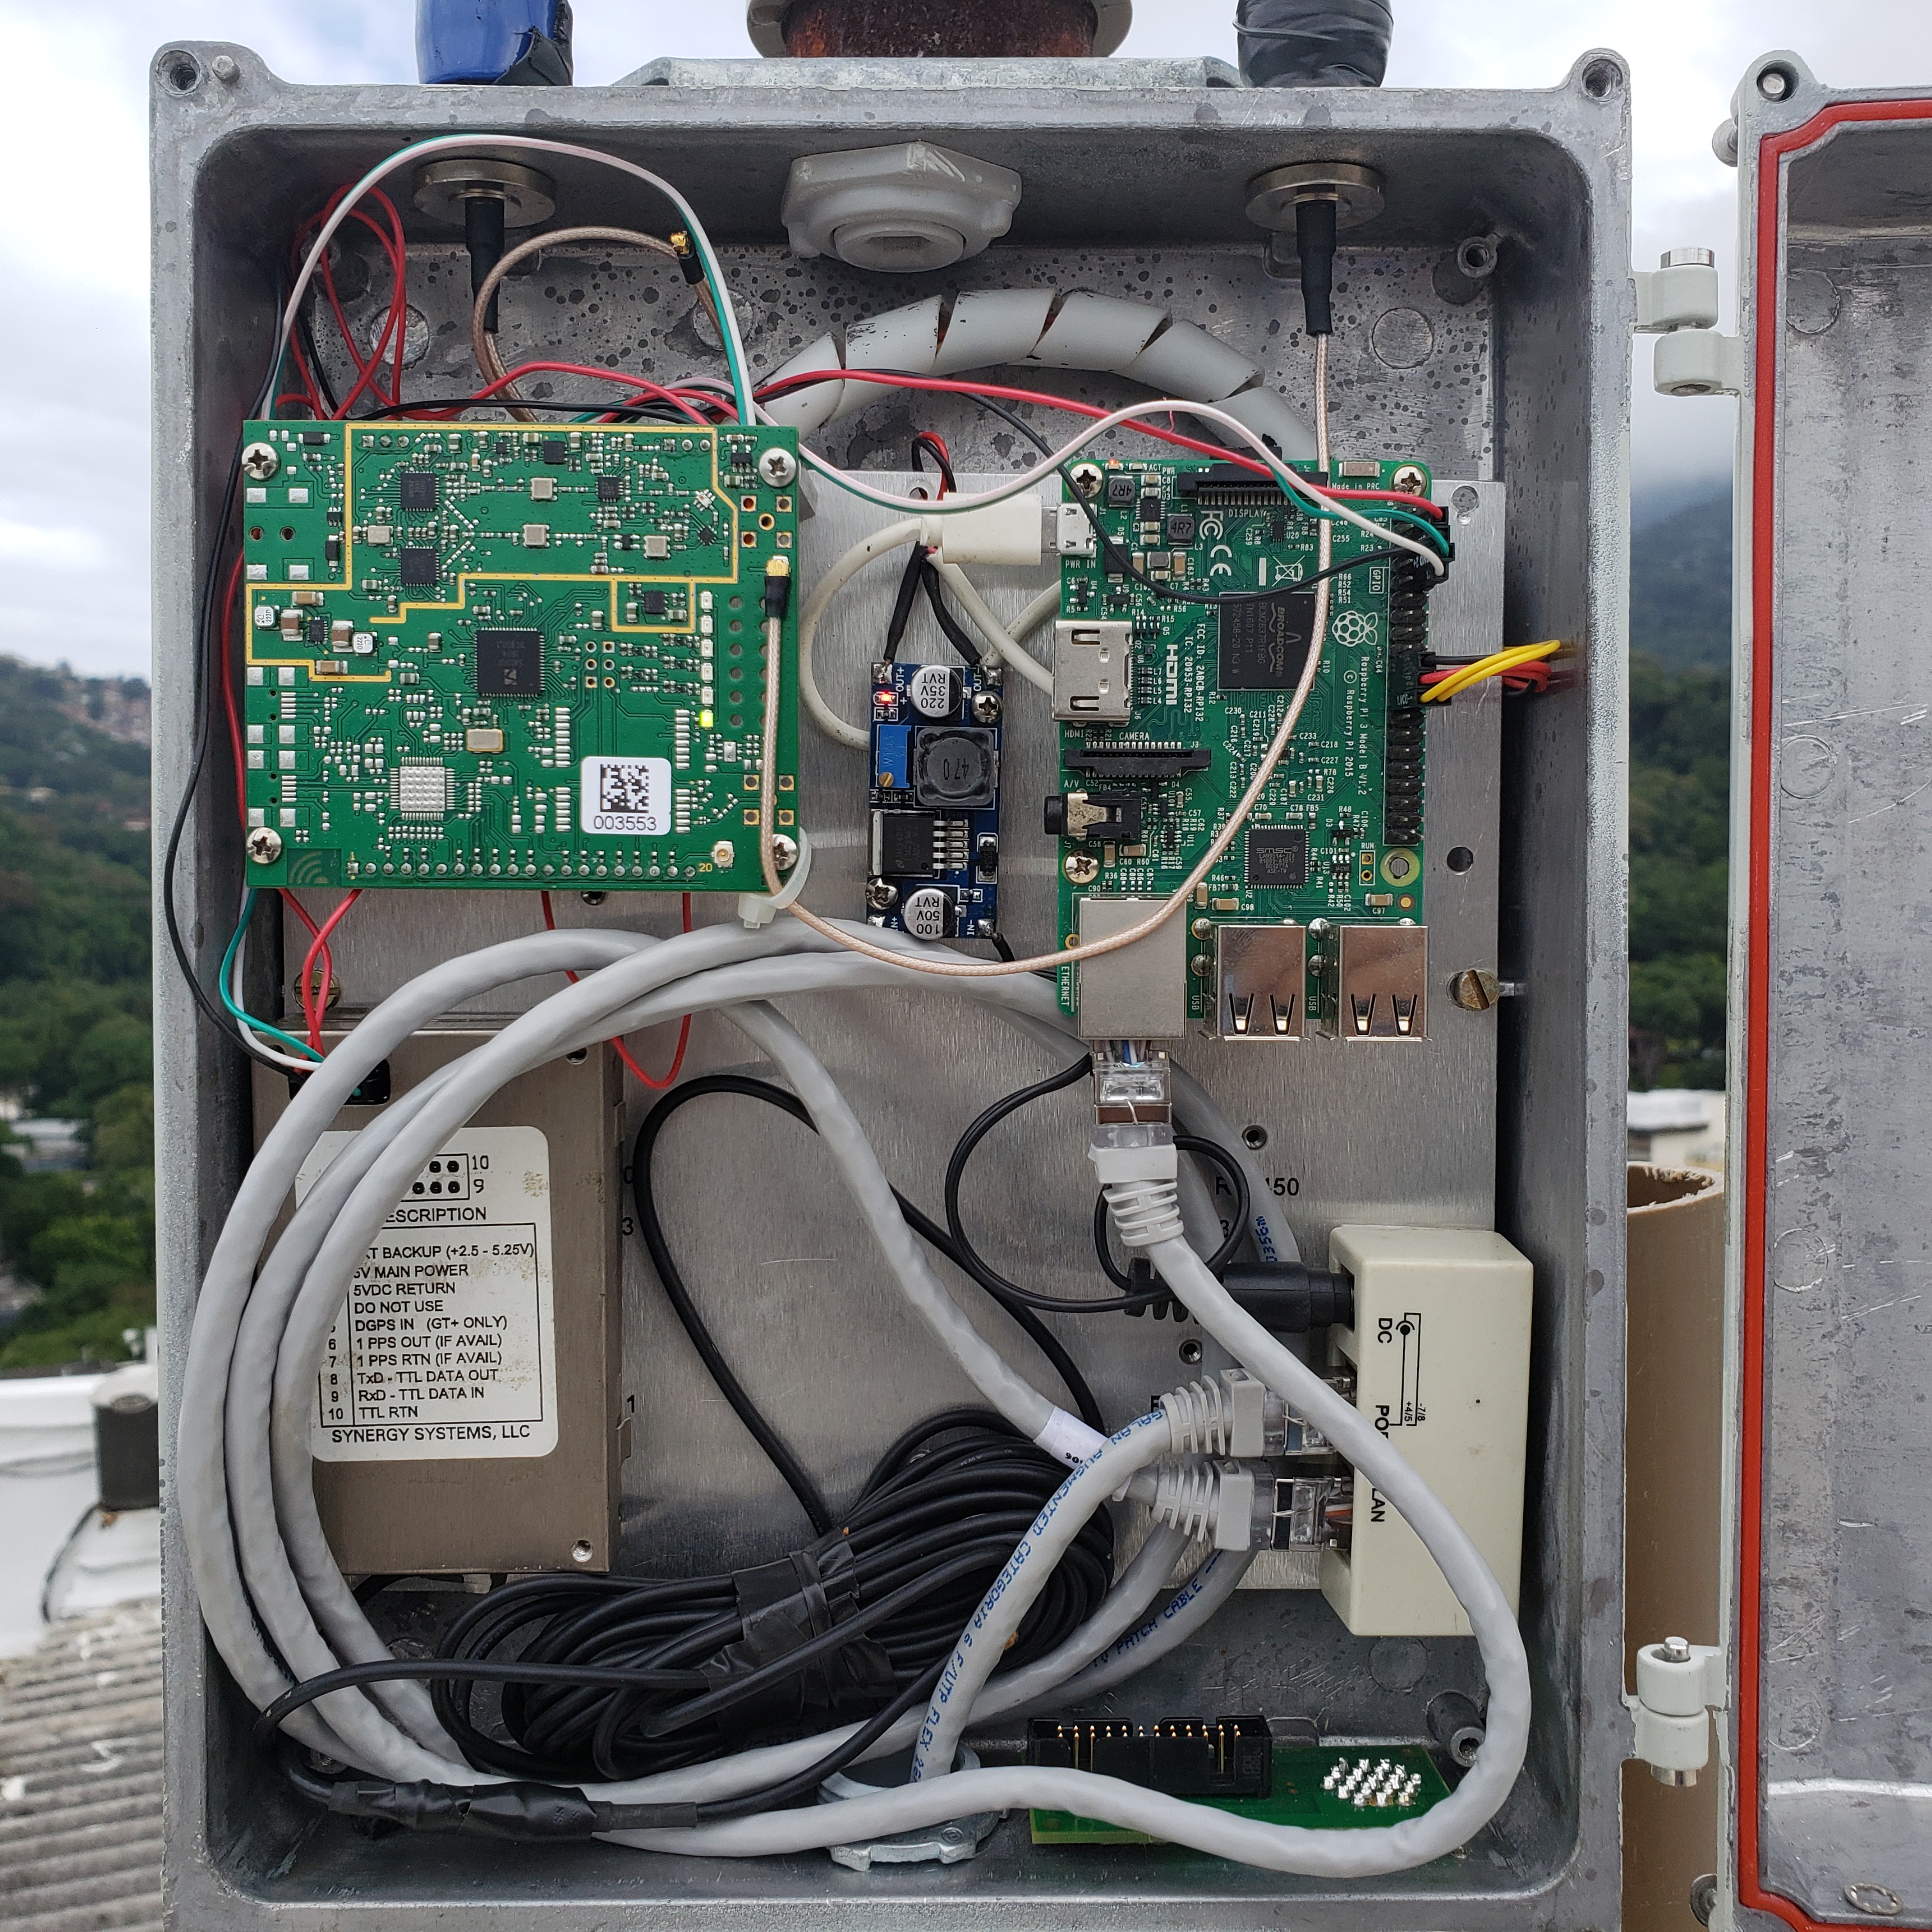
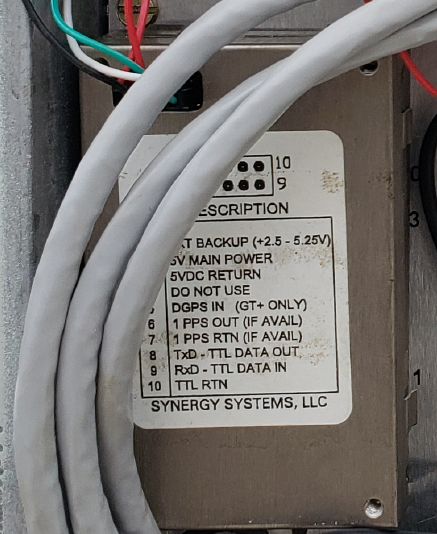
The device is an old GPS module that I had saved. I just do not remember the model, but I already say that it is Motorola.
I use a PoE source to power my device. In the case of the plug poe I use it inverted.
The PoE cable goes into the LAN and the data goes out into the PoE and feeds a voltage regulator. With the voltage regulator I go from 24V to 5V and feed the concentrator IMST and Raspberry. Note that the poe connector has a font connector on it. This is where the power goes out to power the voltage regulator. Like I said, I use it the inverted PoE connector.
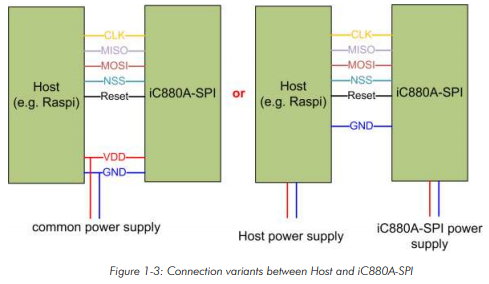
In my opinion the best is the HAT PoE for raspberry. But in the IMST documentation he asks to feed separately.
I advise you to see this link here because I describe the project I am developing. He is also here from the TTN forum. If you do not respond to your response please let me know that I will try to be as clear as possible.
https://www.thethingsnetwork.org/forum/t/mapping-of-iot-lora-network-coverage-at-puc-campus-and-the-first-prototype-of-temperature-and-humidity-sensor/ 15974
This code is what I used to program the seeeduino to measure temperature and humidity and send the data to the TTN network.
#include <TheThingsNetwork.h>
#include <LoRaWan.h>
#include “DHT.h”
#define DHTPIN 7
#define DHTTYPE DHT22
DHT dht(DHTPIN, DHTTYPE);
unsigned char data[4];
char buffer[256];
void setup(void)
{
dht.begin();
lora.init();
memset(buffer, 0, 256);
lora.getVersion(buffer, 256, 1);
SerialUSB.print(buffer);
memset(buffer, 0, 256);
lora.getId(buffer, 256, 1);
SerialUSB.print(buffer);
lora.setId("XXXXXXXXXXXXX", "XXXXXXXXXXX","XXXXXXXXXXXXXXXX" );
lora.setKey(NULL, NULL, "XXXXXXXXXXXXXXXXXXXXXXXXXXXX");
lora.setDeciveMode(LWOTAA);
lora.setDataRate(DR5, EU868);
lora.setAdaptiveDataRate(true);
lora.setChannel(0, 868.1);
lora.setChannel(1, 868.3);
lora.setChannel(2, 868.5);
lora.setChannel(3, 867.1);
lora.setChannel(4, 867.3);
lora.setChannel(5, 867.5);
lora.setChannel(6, 867.7);
lora.setReceiceWindowFirst(1, 868.3);
lora.setReceiceWindowSecond(869.525, DR0);
lora.setPower(14);
while(!lora.setOTAAJoin(JOIN));
}
void loop(void)
{
bool result = false;
delay(2000);
SerialUSB.println("-- LOOP");
// Aqui esta lendo o dado do sensor e multiplicando por 100 para tornar o envio eficiente com 2 decimais
// Lendo a umidade do sensor
uint32_t humidity = dht.readHumidity(false) * 100;
// Lendo a temperatura do sensor / Valor falso (false) para Celsius e Verdadeiro (true) para Farenheit
uint32_t temperature = dht.readTemperature(false) * 100;
// Dividindo em 2 palavras (32 bits) para dois bytes de 16
byte payload[4];
payload[0] = highByte(temperature);
payload[1] = lowByte(temperature);
payload[2] = highByte(humidity);
payload[3] = lowByte(humidity);
// Exibir no terminal serial a Temperatura e Umidade lida do sensor
SerialUSB.print("Temperatura: ");
SerialUSB.println(temperature);
SerialUSB.print("Umidade: ");
SerialUSB.println(humidity);
// Nesta parte abaixo a função transfer packet pega o dado do payload o prepara para enviar via rede LoRa
result = lora.transferPacket(payload, 4, 10);
if(result)
{
short length;

short rssi;

memset(buffer, 0, 256);

length = lora.receivePacket(buffer, 256, &rssi);

if(length)

{

    SerialUSB.print("Length is: ");

    SerialUSB.println(length);

    SerialUSB.print("RSSI is: ");

    SerialUSB.println(rssi);

    SerialUSB.print("Data is: ");

    for(unsigned char i = 0; i < length; i ++)

    {

        SerialUSB.print("0x");

        SerialUSB.print(buffer[i], HEX);

        SerialUSB.print(" ");

    }

    SerialUSB.println();

}
}
delay(5000);
}
Decoder on TTN
// Decodificação do payload no tttn
function Decoder(bytes, port) {
var humidity = (bytes[0]<< 8) | bytes[1];
var temperature = (bytes[2] <<8) | bytes[3];
return {
humidity: Umidade,
temperature: Temperatura
}
}
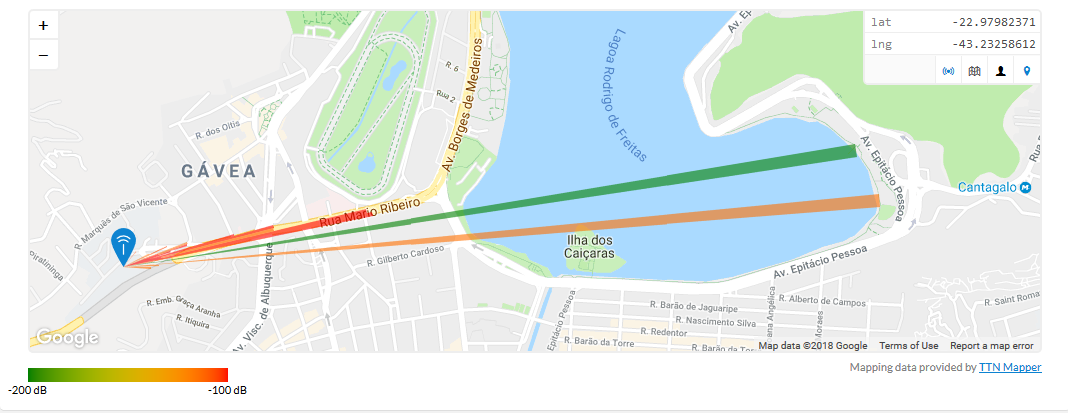
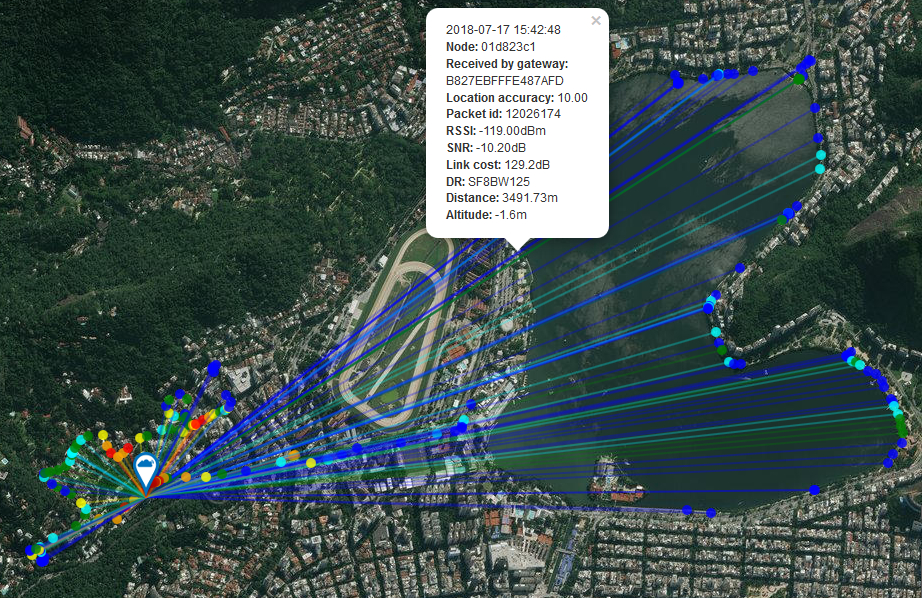
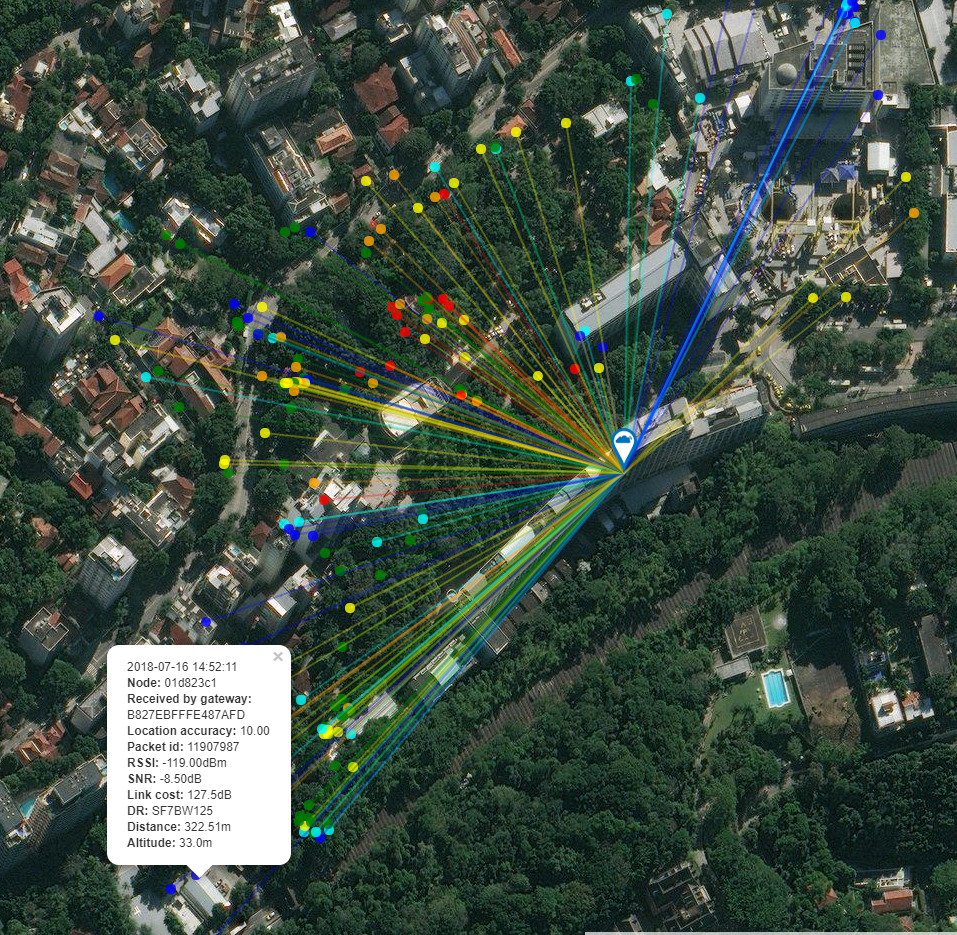
Mapa de minha rede
https://ttnmapper.org/special.php?node=01d823c1&date=2018-07-17&gateways=on
TTN APP Android
https://play.google.com/store/apps/details?id=org.ttnmapper.phonesurveyor


 ):
):