LMIC-node | One example to rule them all

LMIC-node

LMIC-node is an example LoRaWAN application for a node for The Things Network.
It uses the Arduino framework, the LMIC LoRaWAN library and PlatformIO.

With LMIC-node it is easy to get a working node quickly up and running.

Basic steps to get a node up and running with LMIC-node

  • Select a supported board
  • Select your LoRaWAN region
  • Provide the LoRaWAN keys for your node
  • Compile and upload the firmware and you’re ready to go!

Implemented features

  • Send uplink messages.
  • Receive downlink messages.
  • Implements a downlink command.
  • Provides detailed status feedback via serial port, LED and OLED display.
  • Supports both OTAA and ABP activation. Simply switch via configuration option.
  • Supports both: MCCI LoRaWAN LMIC library and IBM LMIC framework.
  • LoRaWAN keys are placed in a separate file.
  • Requires only some configuration to get it up and running.
    (No programming or modification of source code is required.)
  • Configuration is done in a single file.
  • And more

Supported boards

LMIC-node supports the following popular LoRa development boards and development boards with external SPI LoRa module (SX127x, RFM9x, HPD1xA).

LoRa development boards

  • Adafruit Feather M0 RFMx LoRa
  • BSFrance LoRa32u4 II
  • Heltec WiFi LoRa 32 V2
  • Heltec WiFi LoRa 32
  • Heltec Wireless Stick
  • Heltec Wireless Stick Lite
  • Pycom LoPy4
  • ST B-L072Z-LRWAN1 Discovery kit
  • TTGO LoRa32 V1.3
  • TTGO LoRa32 V2.0
  • TTGO LoRa32 V2.1.6
  • TTGO T-Beam V0.x
  • TTGO T-Beam V1.x

Development boards that require an external SPI LoRa module

  • Adafruit QT Py
  • Arduino Pro Mini (8mHz)
  • Black Pill (64k and 128k)
  • Blue Pill (64k and 128k)
  • Lolin D32 Pro
  • Lolin D32
  • Lolin32
  • NodeMCU-32S
  • NodeMCU V2 (aka v1.0)
  • Raspberry Pi Pico
  • SAMD21 M0-Mini
  • Teensy LC

For more information see the repository: LMIC-node

17 Likes

Interesting, in essence a well written boiler plate wrapper around lmic ? looks good - I may contribute a couple of boards too

2 Likes

Wrapper in the sense of being an application, not a library.

1 Like

Good job, I remember you talking about this - looking forward to trying it out!

1 Like

LMIC-node v1.1.0

LMIC-node v1.1.0 has been released.
This is a maintenance release.

Release notes can be found here: release notes

2 Likes

Added: pinout diagrams for most supported boards.

See Pinout diagrams in README.md for more information.

2 Likes

LMIC-node v1.2.0

LMIC-node v1.2.0 has been released.

Release notes can be found here: LMIC-node v1.2.0 Release Notes

Added support for the following boards:

  • Raspberry Pi Pico
  • Teensy LC

For more information about what’s new and changed see the release notes.

3 Likes

LMIC-node v1.3.0

LMIC-node v1.3.0 has been released.

Release notes can be found here: LMIC-node v1.3.0 Release Notes

Added

  • Subband selection for US915 and AU915 for OTAA (fixes issue for AU915).

Fixed

  • Do not schedule uplinks while still joining.
    processWork() will be skipped when still joining (counter will not be read).
  • Incorrect DIO1 pin mapping (5 → 6) for Adafruit Feather M0 LoRa board.
  • AU915 joining fails because proper subband is not selected (OTAA).
  • LMIC_PRINTF_TO not working (properly) (at least on Windows) for boards with ARM based MCU.
  • LMIC_PRINTF_TO not working for boards using SerialUSB.

For more information about what’s new and changed see the release notes.

2 Likes

I welcome your feedback. Please share if you have your device(s) working
with LMIC-node and whether you use macOS, Linux or Windows.

Or discuss issues you run into that may need to be fixed in LMIC-node.
Issues can be reported in the LMIC-node repository on GitHub.

Easy and well working.
Tried on ESP32 Espressif DevKit v1 and ESP32 Wroom32 module
Easy to set and to use. The only needed adaptation is the pinout which depends on the used board.

Not clear what the max possible power is.
Looks to be 14dBm “only”

1 Like

Support has been added for the compact Adafruit QT Py board.

A picture of a working setup can be seen in The Workbench topic here

MCCI LoRaWAN LMIC library v4.0.0 has been released.

If the LMIC-node application is already cloned/installed onto your system and you want to use the latest LMIC library version, you can update the LMIC library in your LMIC-node project by running the PlatformIO command:

pio lib update

This will update all libraries in the project that were previously downloaded (based on lib_deps in platformio.ini). Without a manual lib update PlatformIO will keep using the previously downloaded libraries (which may not be the latest versions).

If a library was not previously downloaded, the latest version will be downloaded.

(PlatformIO downloads libraries separately for each board.)

Espressif8266 platform version 3.0.0 causes an issue in LMIC-node for the NodeMCU V2 (ESP8266) board. If you run into this problem, to fix just update to the latest LMIC-node version on Github.

In PlatformIO installed platforms (e.g. ESP32, STM32, SAMD, ESP8266) are not automatically updated. Updating a platform can be done from the PlatformIO IDE Home/Platforms/Update page or with PlatformIO command pio update. Latter will update all platforms at once.

Updating a platform normally does not cause issues. However, the new espressif8266 platform version 3.0.0 does cause an issue for the NodeMCU V2 (ESP8266) board for LMIC debugging (LMIC_PRINTF_TO). This manifests as compilation error "cookie_io_functions_t does not name a type". This has been fixed (i.e. support for espressif8266 v3.0.0 has been added) in the latest version of LMIC-node.

4 posts were split to a new topic: Looking for easier to program node

I added GPS functionality to the LMIC-node application. You can find my github repository here:
LMIC-node-gps-tracker, forked from lnlp/LMIC-node.

I did not add a decent readme file in the repository yet , but I did add a lot of comments in the code.

1 Like

Nice!

A decent README.md was already included with LMIC-node so you won’t have to write it from scratch. :wink:

The README.md is the first thing people will see on the repository home page.
At minimum it should be updated to reflect the name of your repository.

Requiring users to dive into the code first to find out if it provides the functionality they are looking for and if they can use it for their board and GPS module is not user friendly and time consuming. Some documentation will therefore be appreciated.

Adding the documentation in a separate file (e.g. GPS.md) will make it easier to sync with future LMIC-node updates.

Things that will be useful to document:

  • What functionality is added and/or changed in your code?
    What makes your repository different from LMIC-node?
  • Which GPS module(s) and which board(s) are supported by the added GPS code?
  • A description of added functionality and how people can use it.
  • With which GPS module and board was it tested?
  • Any known limitations.

(Don’t forget to also update the repository description aka ‘About’).


In a future update LMIC-node program documentation will be moved from README.md to a separate file. That will make it easier to update the README.md for repository forks.

I know, (and a very extensive one) but I did not have the time to complete a readme.
When writing the readme I will adopt your recommendations.

What do you mean by that? It is my first forked repository that I published on Github. (I have a lot to learn)

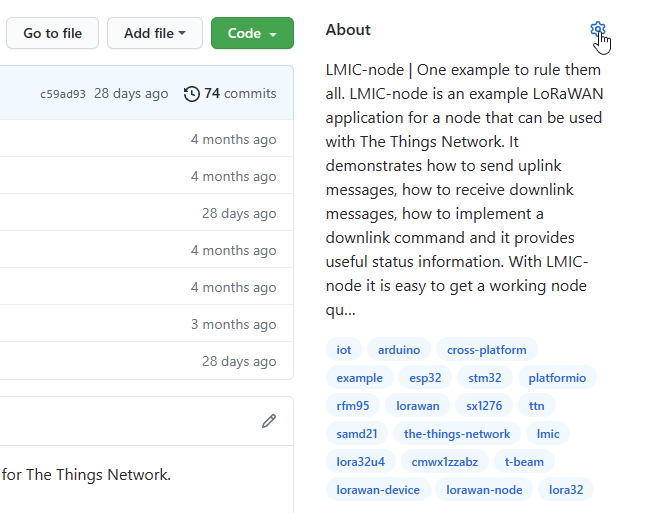
On the repository home page top-right select the settings icon:

capture 2021-08-19 14·40·07

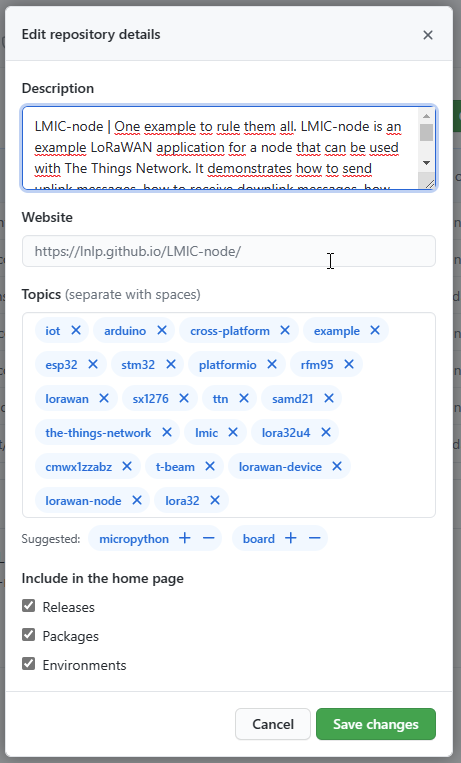
You can then edit/update the description:

capture 2021-08-19 14·40·47

It will also be useful to add “GPS” as keyword (‘topic’). LMIC-node already has the maximum number of 20 topics defined so you will need to remove one of the existing topics first (I suggest to remove cmwx1zzabz).

The description (‘about’) and keywords (‘topics’) are used by search engines (including GitHub search) for finding relevant matches.

1 Like

Thank you for your extensive answer. I know now what to do.

Please specify (in this thread) which board and GPS module your added GPS code supports.