Interesting work, but not recommended for use with TTS CE - no downlinks means no ADR.
An ATtiny3216 in SOIC format is a third of the price of an ATtiny85A and has the capacity to run the latest version of LMIC which works with TTS. You can hand solder it to your own design PCB or use one of the adapter PCB’s from the usual sources.
Hi Marco,
thanks for sharing!
I am currently looking for something similar (Soil moisture , Temp, Humidity measuring - remote location with no power supply and no Wifi nearby but TTN)
I am just starting into the TTN world
Do I get this right that your link posted in the last post provides everything required but with the improved Attiny 3216?
Any reason why you did chose this specific soil moisture sensor?
Any longterm results (sensor accuracy, failures, etc)?
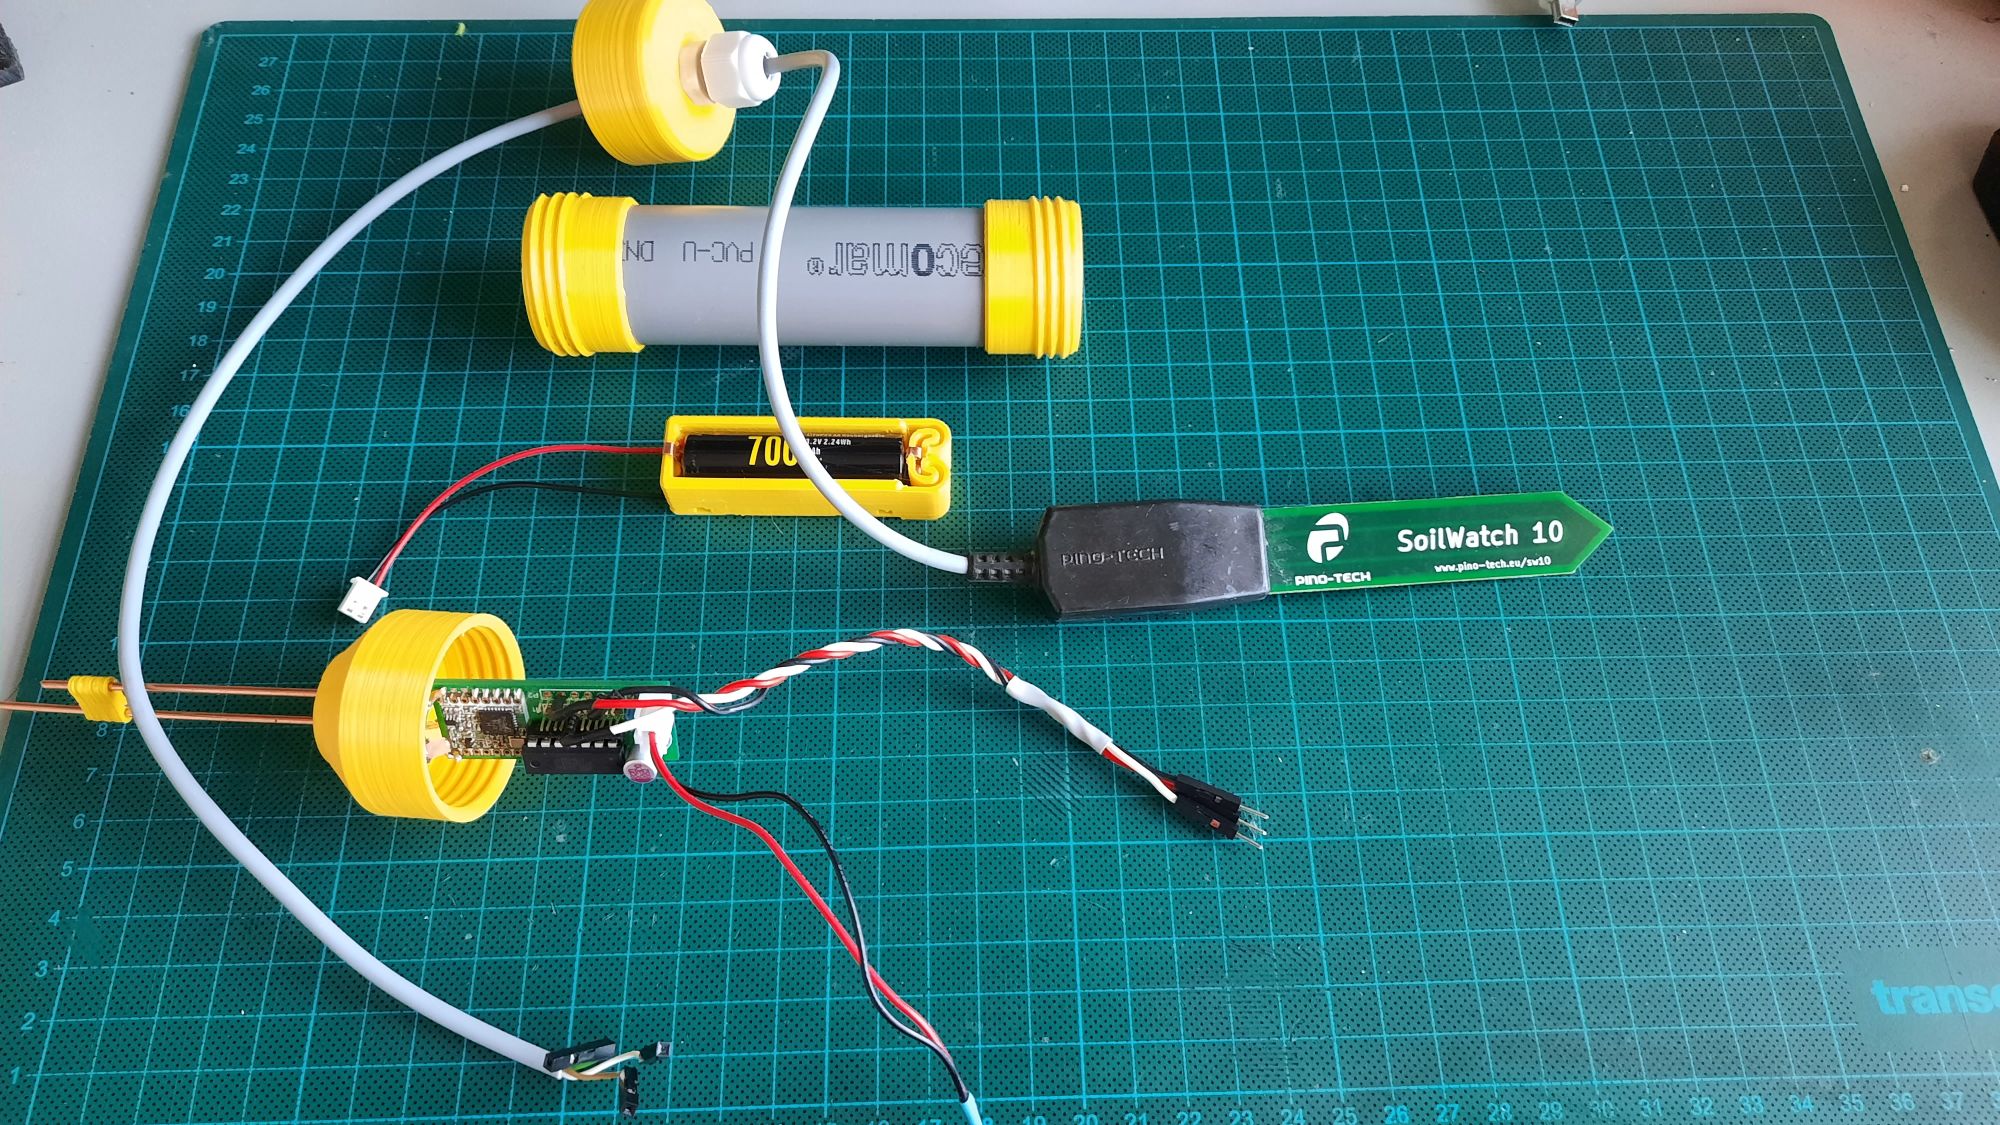
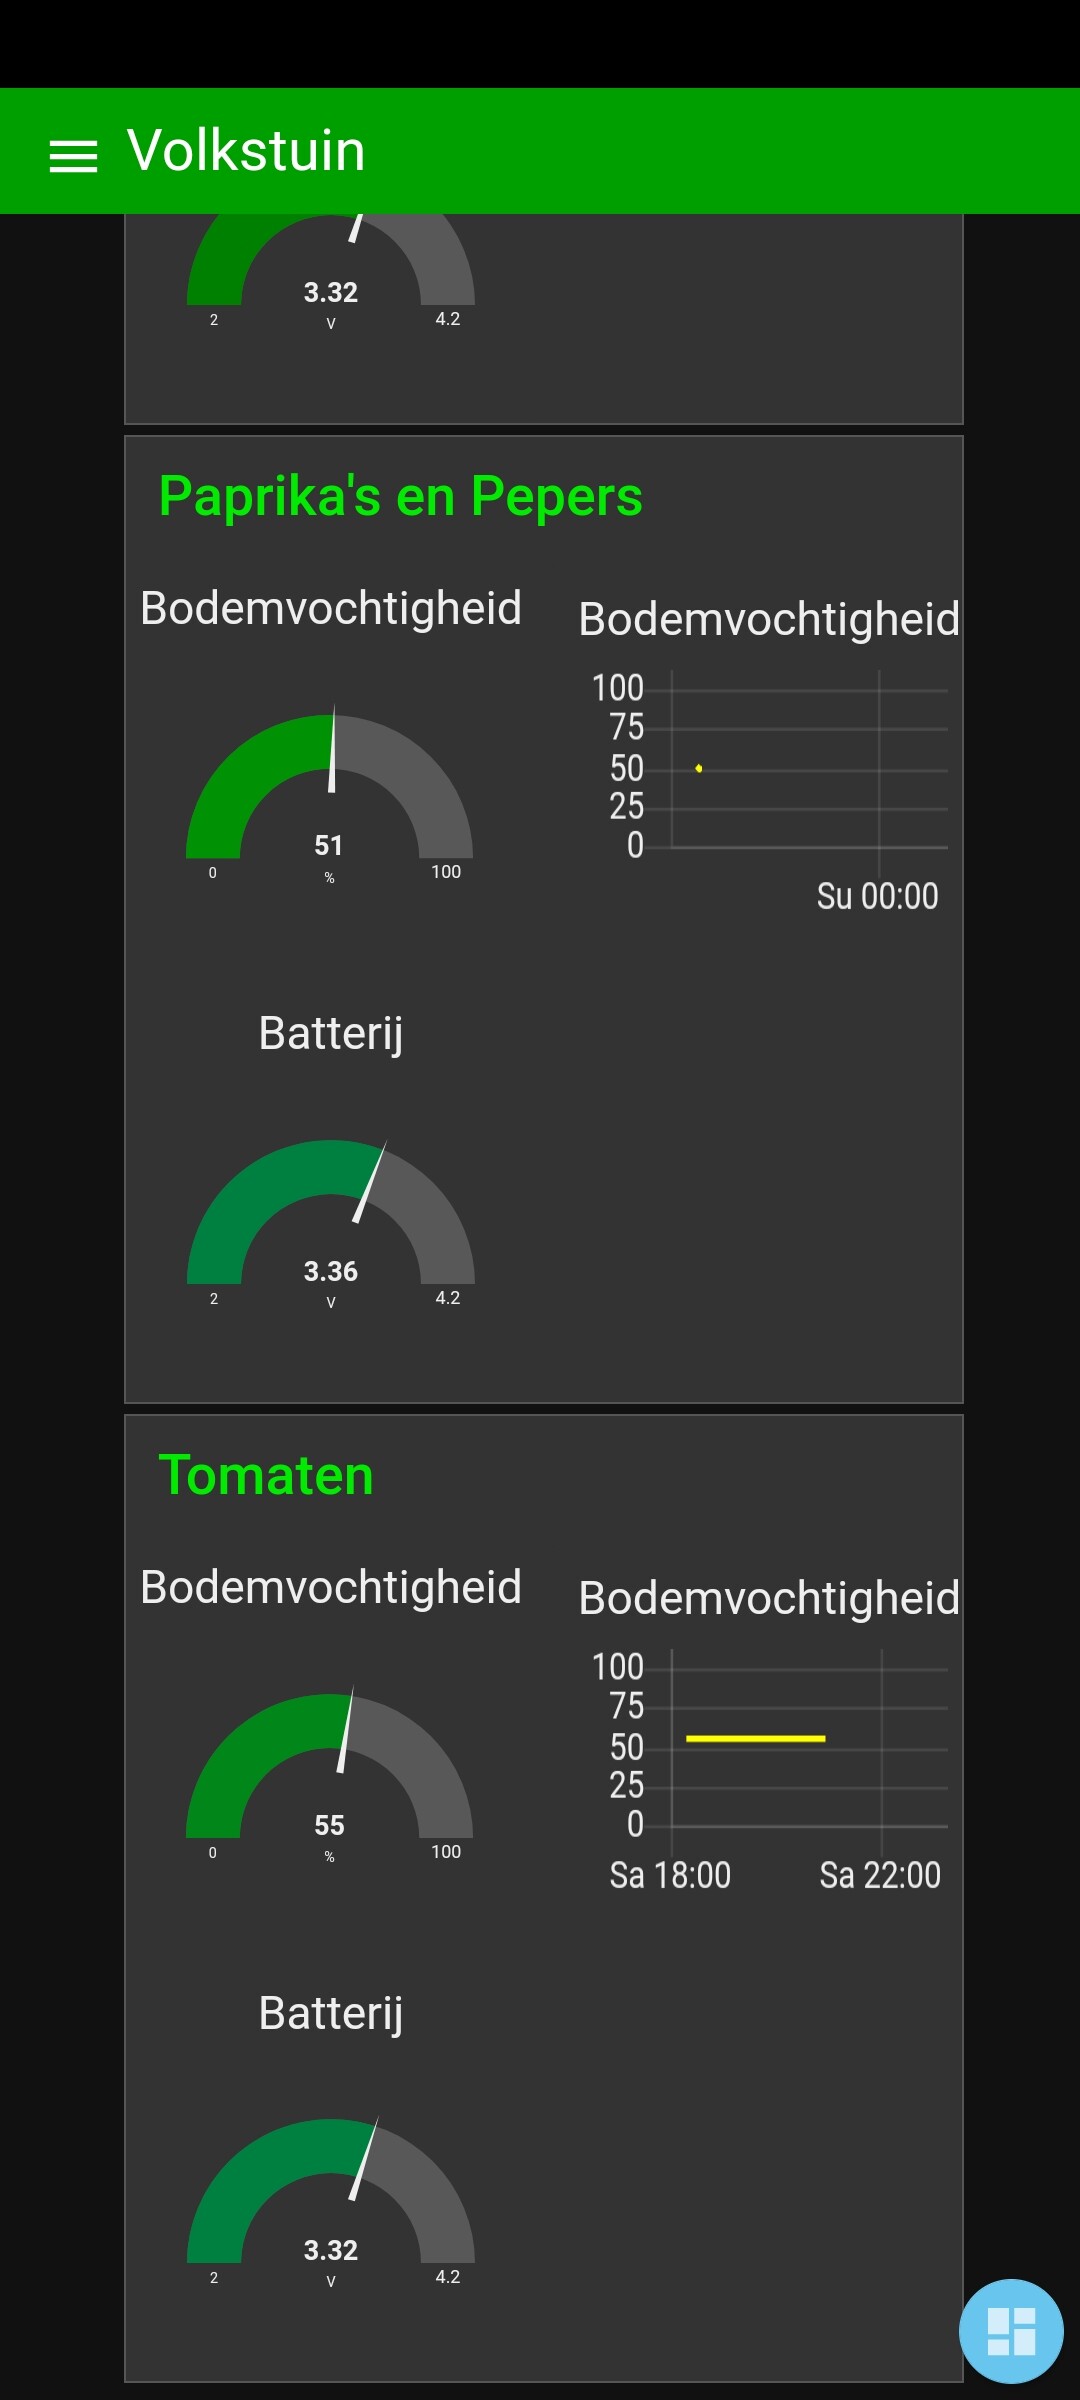
Yes, the ATTnodes are complete but with such a sensor it is recommended to use a rechargeable battery as you can see I also use an AA LifeP04 (3.2V 700mAh) battery taking into account the max. voltage of the RFM95.
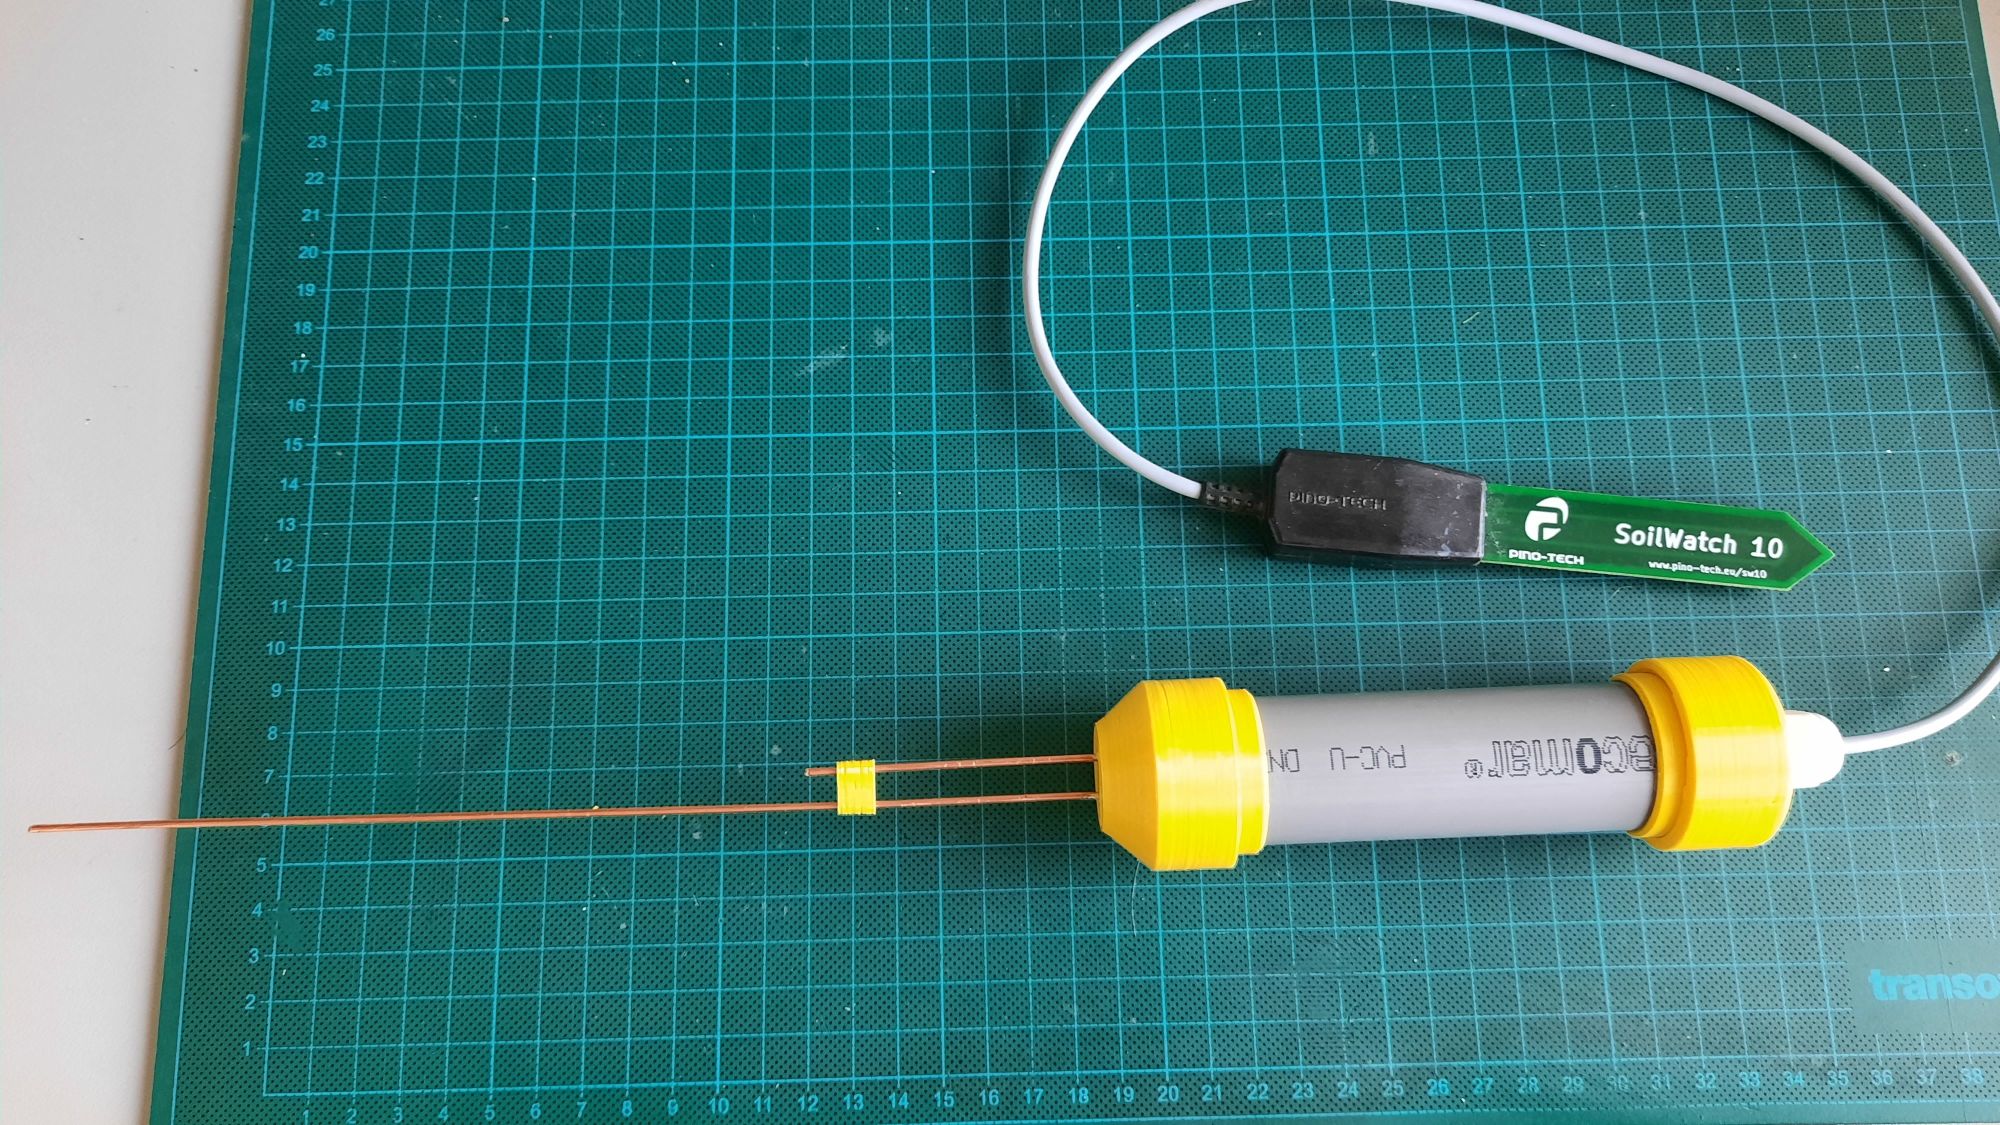
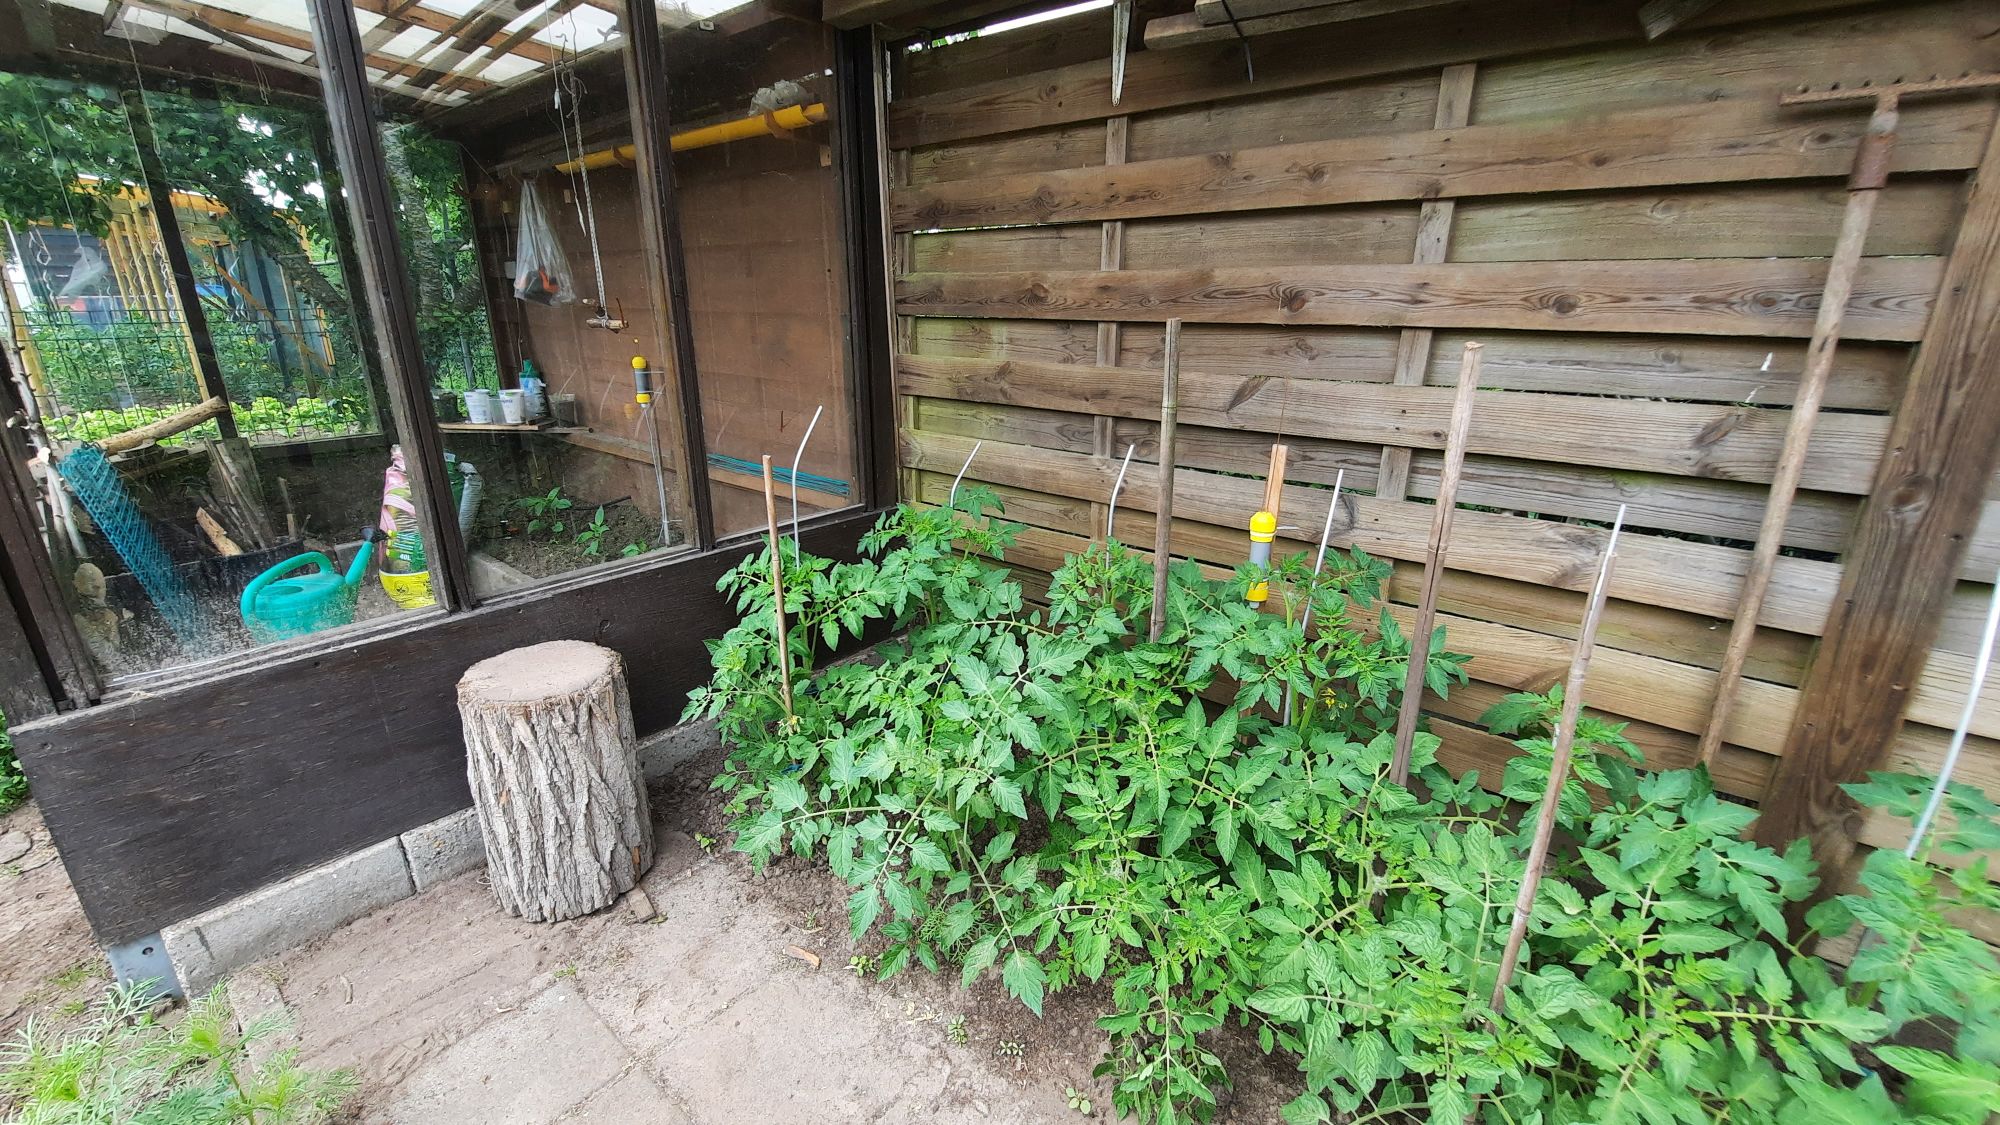
The SoilWatch10 sensors are left over from another project and these are capacitive instead of resistive sensors. Capacitive are more accurate and do not suffer from corrosion.
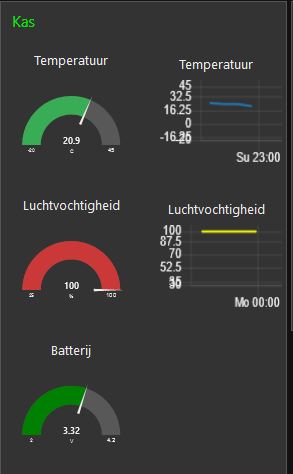
For several years I have a sensor for temperature and humidity (BME280) in my greenhouse but that humidity sensor is actually not suitable and at the moment it is broken again.
i also use a BME280 and the humidity Sensor got problems when outside for a longer time in high humidity. Think it is a corrosion problem.
I now use the BME only for pressure and temperature - for humidity i added a GY21 Si7021. It has a build in heater that can be used a few seconds every Minute to prevent condensate.
That one is doing fine now for a long time.
Hi Marco,
I would like to build your Device using Attnode3. Do you know where to get the PCB? As I am also not good in soldering SMDs a pre-populated PCB at least with the SMDs required would be also fine.
So is it ok to use the PCB layout and send it to JLCPCB (no IP issues?)? They even offer to solder SMDs on it. That would be great! I have heard about JLCPCB but not yet ordered there.
Yes, it’s a nice little node and the DIP package for the ATtiny84a is very convenient - but this node requires you to use a code base that has had changes made to fool TTS in to believing it is behaving like a compliant node. Principally, it can not handle downlinks so has to answer as if it heard them.
The ATtiny3126 is NOT a drop in replacement for the ATtiny84a - it’s just a more up to date ATmega328P - and even then would require some diligence to get the MCCI LMiC running smoothly - something I am happy to help with - but you shouldn’t have expectations of running more than a couple of I2C sensors off it.
A better alternative would be the ATmega4808 which also comes in a SOIC hand-soldering friendly package but has 48K flash(half as much again) and 6K of memory (three times more).
Either device can be programmed using the Arduino IDE but will need their own PCB.
To be clear, as the post author suggests, some may not be happy with this implementation. I am not saying I’m unhappy but I’m not keen on it, I’m saying that buying PCB’s for this design is like buying a brand new leaded petrol only car.
I’ll look at altering my 4808+RFM95 design for hand-soldering only and sharing the PCB asap.
I have now made one Heltec WiFi LoRa 32 V2 running but it is to bulky in size and it sucks up the battery in two days. (Maybe someone could guide me to a link where I can find (Using Arduino IDE) instructions how to reduce power consumption). And it is kind of expensive for the solution I have in mind.
My favorite would be a Raspberry Pi Pico solution - in combination with a RFM95W (as I am a big fan of Raspberry Pi). I have seen that the LMIC is supporting it. Any thoughts on that? I am a little bit heasitating as I am new to Pico.
Yeah, I hear that, but I’m told that it is possible to get the current down. There are posts on the forum to search for that could help.
The lowest I’ve got a Pico after altering the power is 900uA which is not good, so not really a battery powered option.
I am (literally) having nightmares with a node design at present due to the world wide shortage of MCU’s and radio modules. When (if) I come to any conclusions I’ll repost.
I finally got the Raspberry Pi Pico running but due to the decision to use CircuitPython the deep sleep mode is not (not yet, acc. to Adafruit) available. As Nick also stated, 900uA might be still to high for a battery powered node.
I have taken this from the Makerfabs Code and put it into the first USER CODE section:
#include <SPI.h>
#include "I2C_AHT10.h"
#include <Wire.h>
AHT10 humiditySensor;

int sensorPin = A2;    // select the input pin for the potentiometer
int sensorValue = 0;  // variable to store the value coming from the sensor
int sensorPowerCtrlPin = 5;

void sensorPowerOn(void)
{
  digitalWrite(sensorPowerCtrlPin, HIGH);//Sensor power on
}
void sensorPowerOff(void)
{
  digitalWrite(sensorPowerCtrlPin, LOW);//Sensor power on
}
The next USER CODE Section seems to be my Problem Child. I don’t know how to get the Sensor data collected and prepared to be uploaded to the TTS:
// Sensor readings may also be up to 2 seconds 'old' (its a very slow sensor)
//float humidity = 6.18;//dht.readHumidity();
// Read temperature as Celsius (the default)

sensorPowerOn();//
delay(100);
sensorValue = analogRead(sensorPin);
delay(200);

if (humiditySensor.available() == true)
{
    //Get the new temperature and humidity value
    temperature = humiditySensor.getTemperature();
    humidity = humiditySensor.getHumidity();

    //Print the results
    Serial.print("Temperature: ");
    Serial.print(temperature, 2);
    Serial.print(" C\t");
    Serial.print("Humidity: ");
    Serial.print(humidity, 2);
    Serial.println("% RH");

}
    // Check if any reads failed and exit early (to try again).
if (isnan(humidity) || isnan(temperature)) {
    Serial.println(F("Failed to read from AHT sensor!"));
    //return;
}

delay(100);
//sensorPowerOff();

Serial.print(F("Moisture ADC : "));
Serial.println(sensorValue);


//Serial.print(F("Humidity: "));
//Serial.print(humidity);
//Serial.print(F("%  Temperature: "));
//Serial.print(temperature);
//Serial.println("Humidity is " + (String)humidity);
//Serial.println("Temperature is " + (String)temperature);

String message = "#"+(String)packetnum+" Humidity:"+(String)humidity+"% Temperature:"+(String)temperature+"C"+" ADC:"+(String)sensorValue;
Serial.println(message);
packetnum++;
    Serial.println("Transmit: Sending to rf95_server");

// Send a message to rf95_server

uint8_t radioPacket[message.length()+1];
message.toCharArray(radioPacket, message.length()+1);

radioPacket[message.length()+1]= '\0';
The last USER CODE portion (Init section) is:
  //digitalWrite(sensorPowerCtrlPin, LOW);//Sensor power on
  sensorPowerOn();

    Wire.begin(); //Join I2C bus
    //Check if the AHT10 will acknowledge
    if (humiditySensor.begin() == false)
    {
        Serial.println("AHT10 not detected. Please check wiring. Freezing.");
        //while (1);
    }
    else
        Serial.println("AHT10 acknowledged.");
Platformio seems not have a loop section where I could put the respective code and LMIC seems to arrange the data for sending different than Radiohead.
So my data I am looking for is in the variables