LoRA BME280 Environmental Node (with webbased backend)

There is one thing I always found fascinating : weather.

Especially the temperature and humidity. So one of my first TheThingsNetwork projects I made was a DHT22 based beacon who allowed me to measure every 15 minutes the temperature and the humidity. After the measurement was done the beacon would send the values over TheThingsNetwork to my backend (a simple PHP parser and file logger).

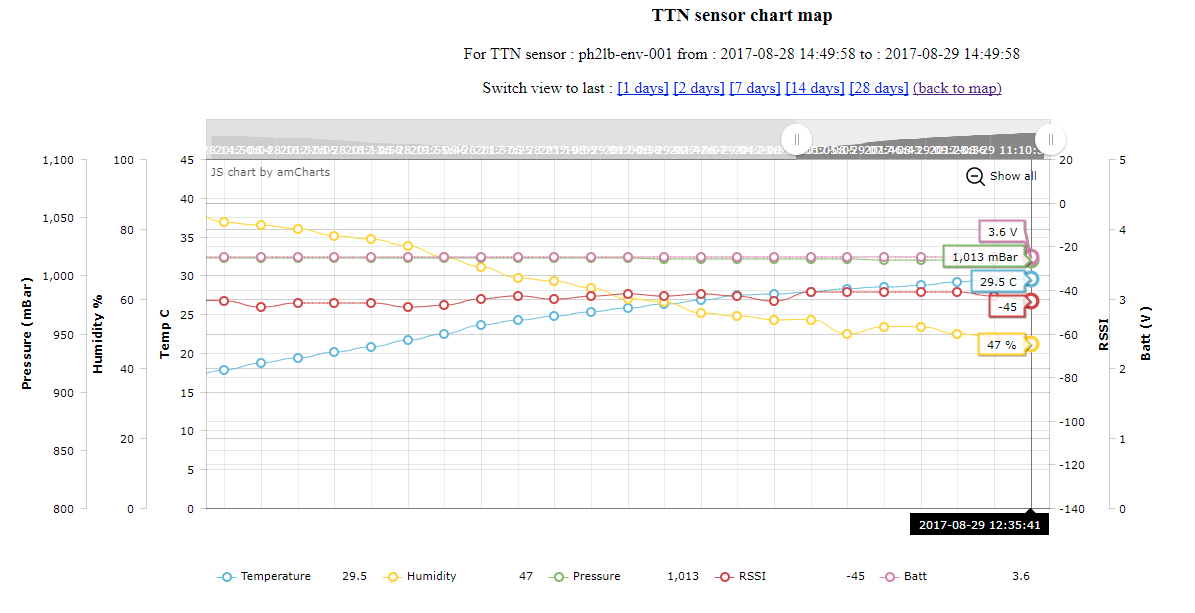
That simple backend showed just one chart with variouse data from the node like :

  • Temperature
  • Humidity
  • Battery voltage
  • RSSI
  • Packetcounter

over a window of 12 hour, 24 hour, 7 days and 28 days. And a CSV export option. Nothing fancy, but just simple logging.

The sourcode of this project can be found on : https://github.com/ph2lb/TTNDHT22Beacon

The next step.
But during that experiment I found out that the RN2483 modules don’t like temperatures below 0 dgr Celsius so I have change course on that one.

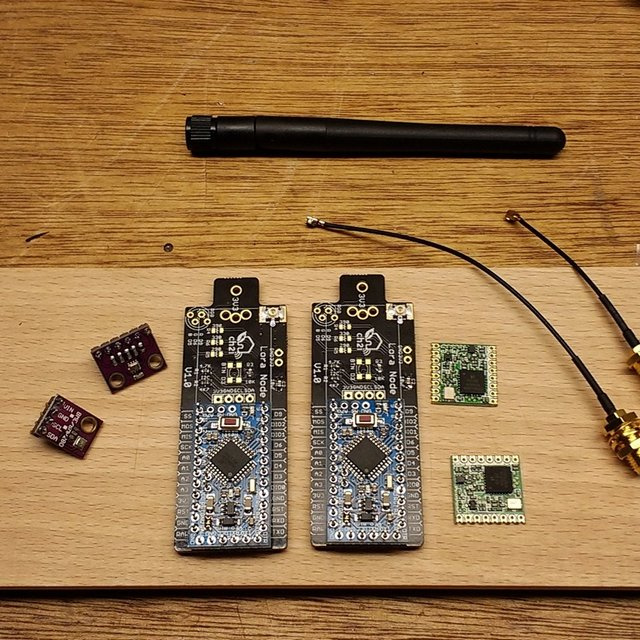
So I switched to the RFM95W modules and tried to stripdown a example so it would fit in a 3.3V Arduino Pro Mini. The result was a low power BME280 based enviromental datalogger node for the ThingsNetwork with deepsleep support and variable interval using a LMIC ABP. The working prototype worked great so it was time to make a new node.

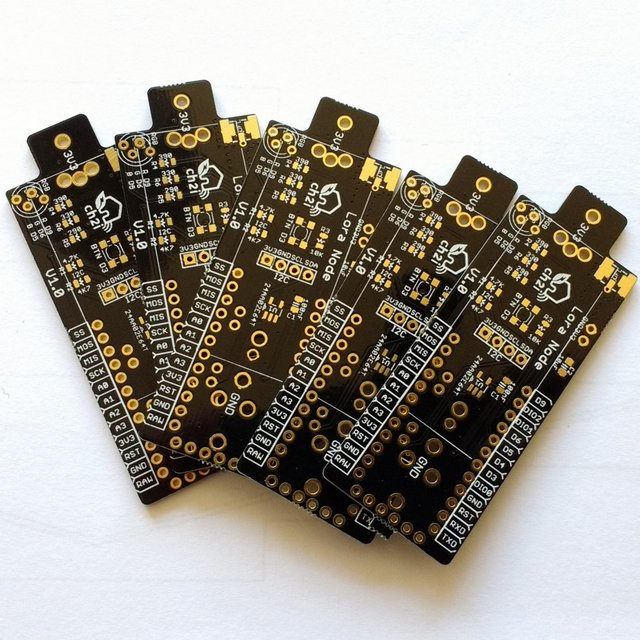
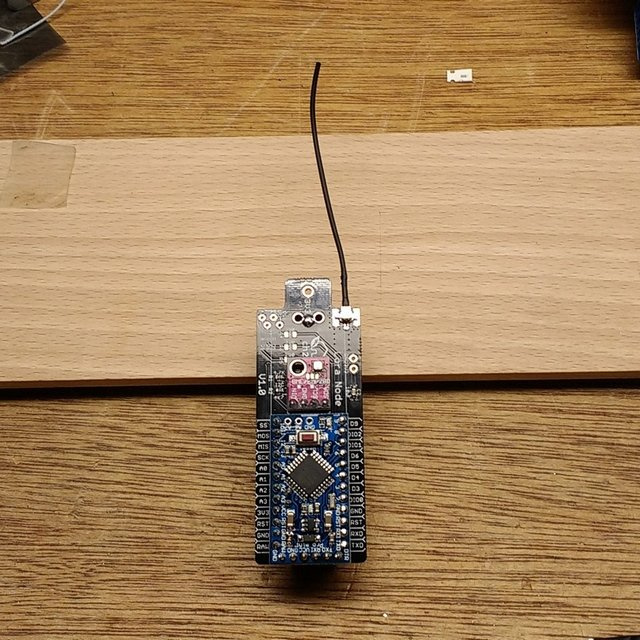
The node (new style)
For the new node I used a PCB designed from @Charles. He has a create Arduino Mini Pro LoRaWAN Node PCB design and posted the design. So checkout the design in the link above. (you can order the PCB’s on https://PCBs.io/).

Check out these beauties. Look great don’t they?

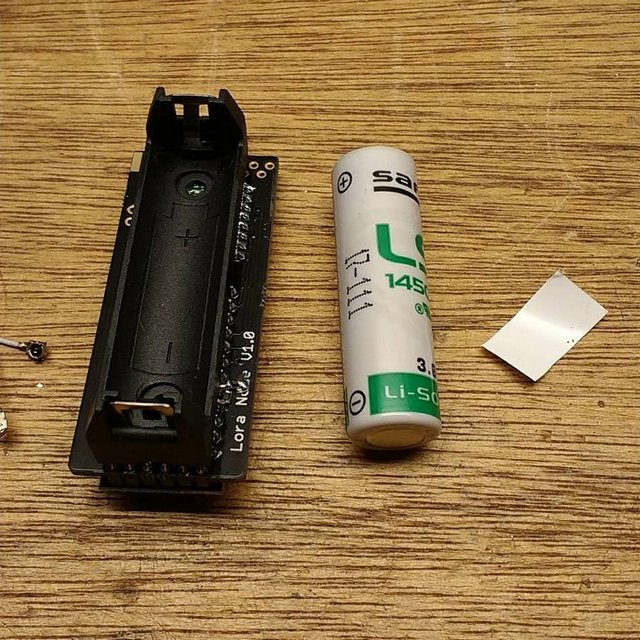
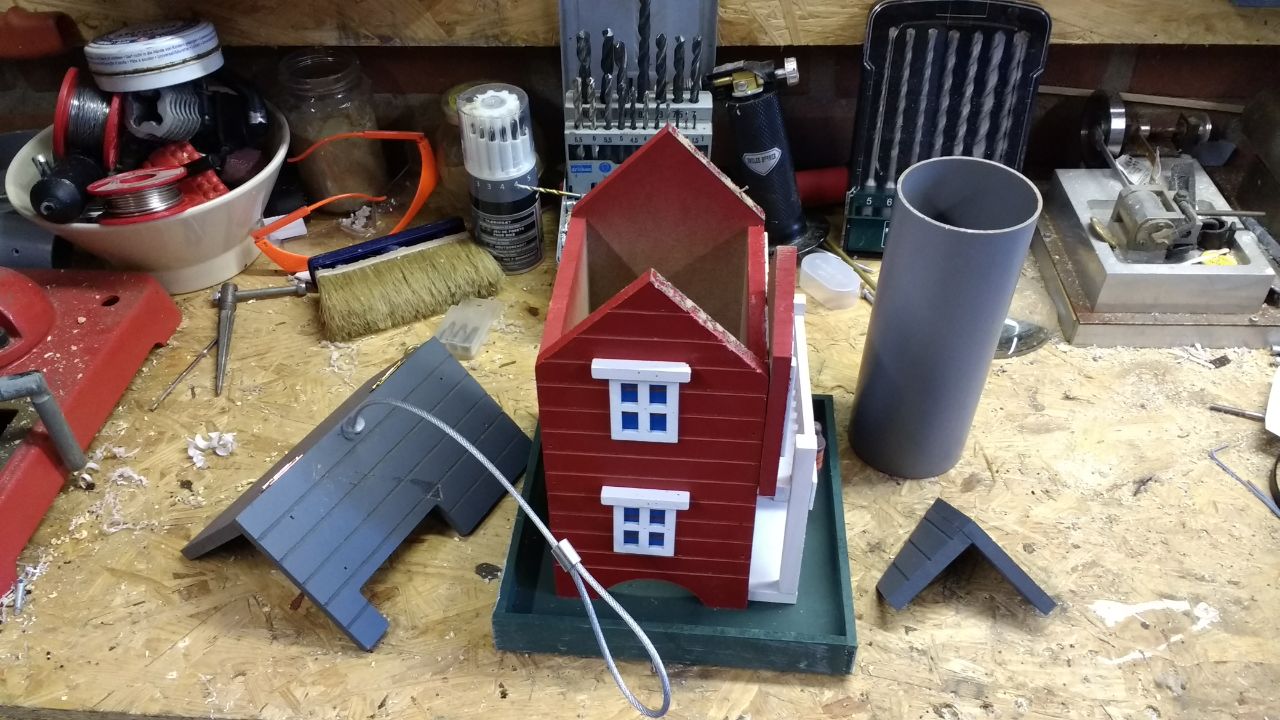
Putting it all together.

There are variouse mounting holes for 3.7 LiIon batteries. I choose the AA model.

The antenna is a trimmed UFL jumper cable. With a total length of 82.2mm with 20mm shield left (so 62.2mm inner wire is exposted).

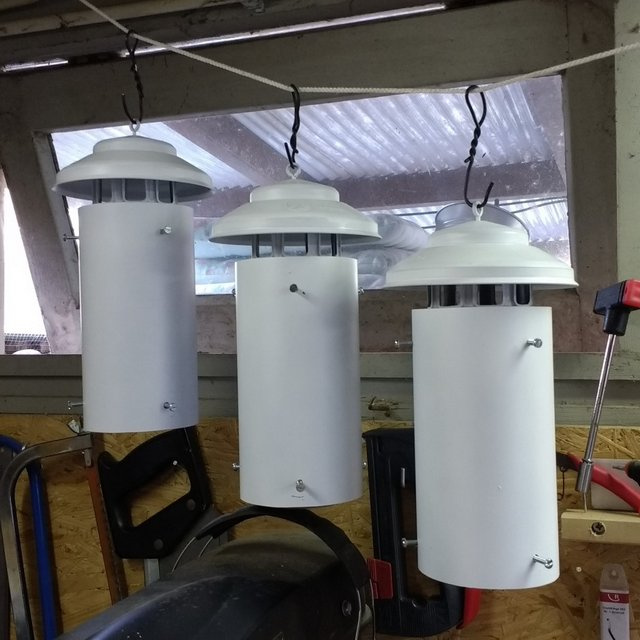
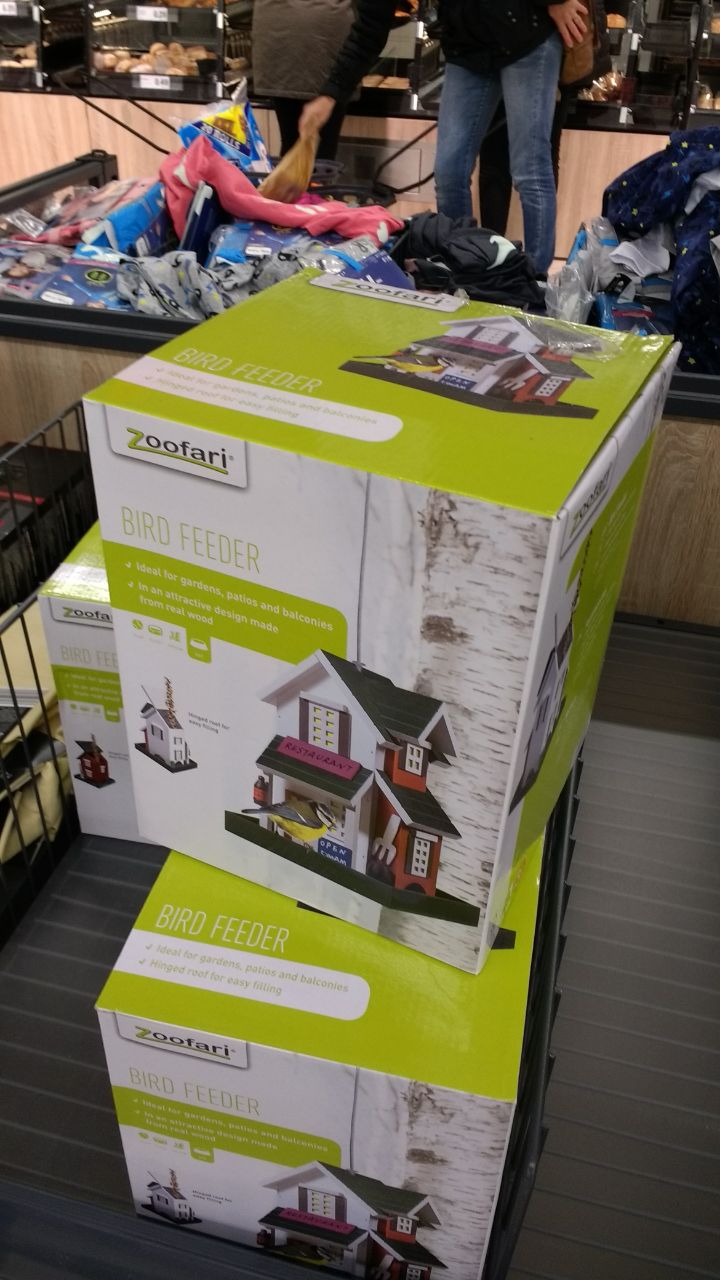
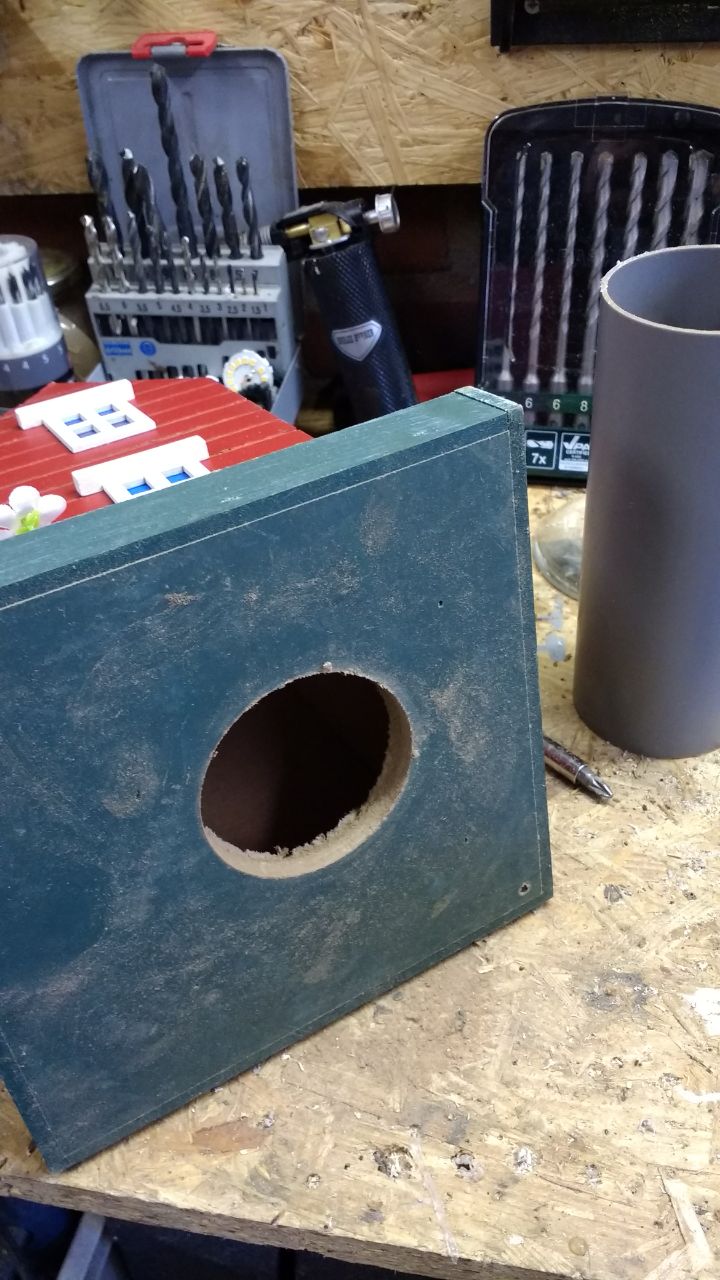
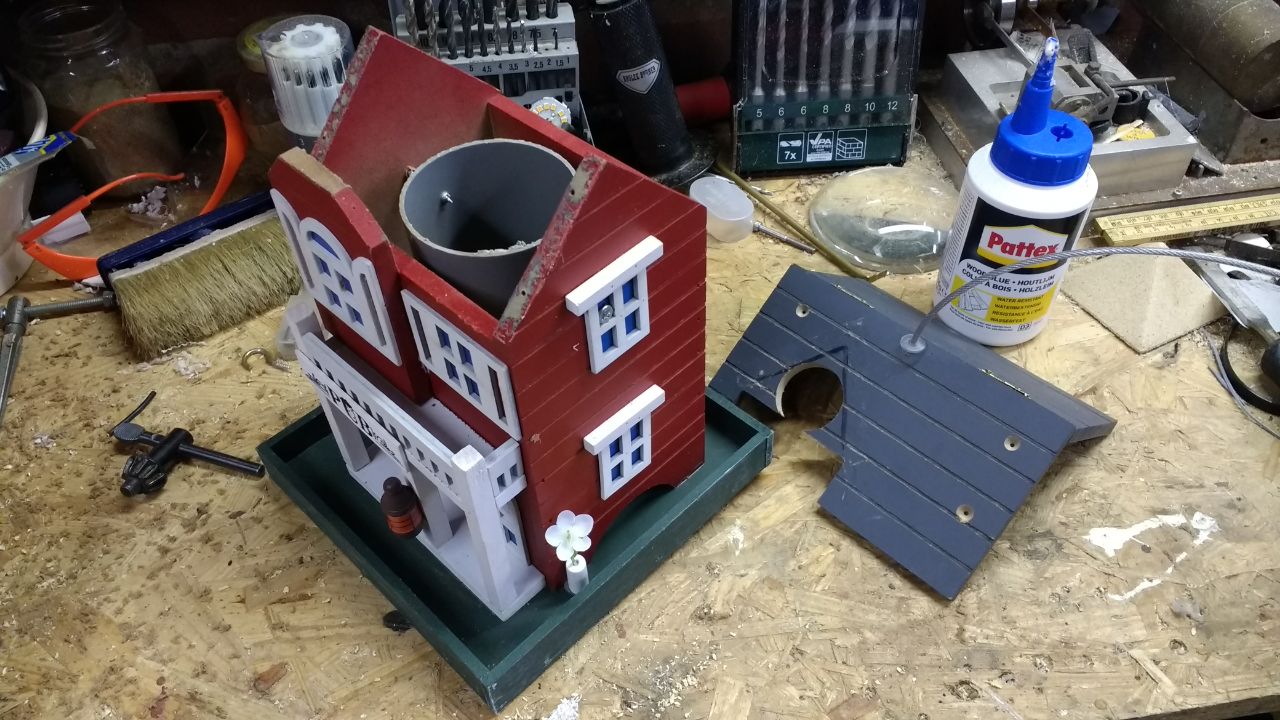
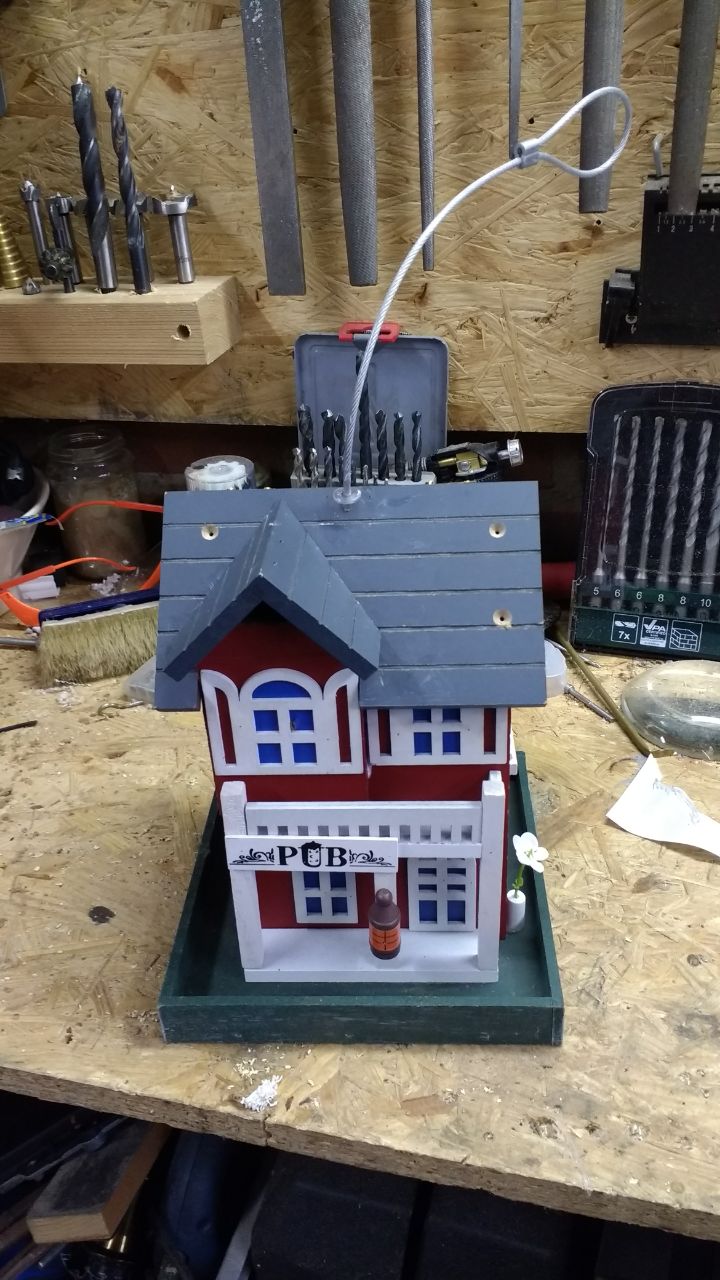
The housing a 70mm Air roof vent with a 100mm outer hull of PVC tubing.

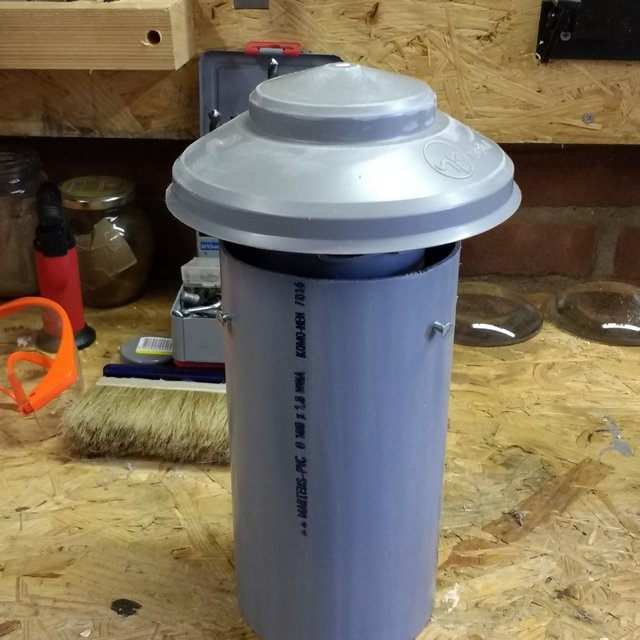
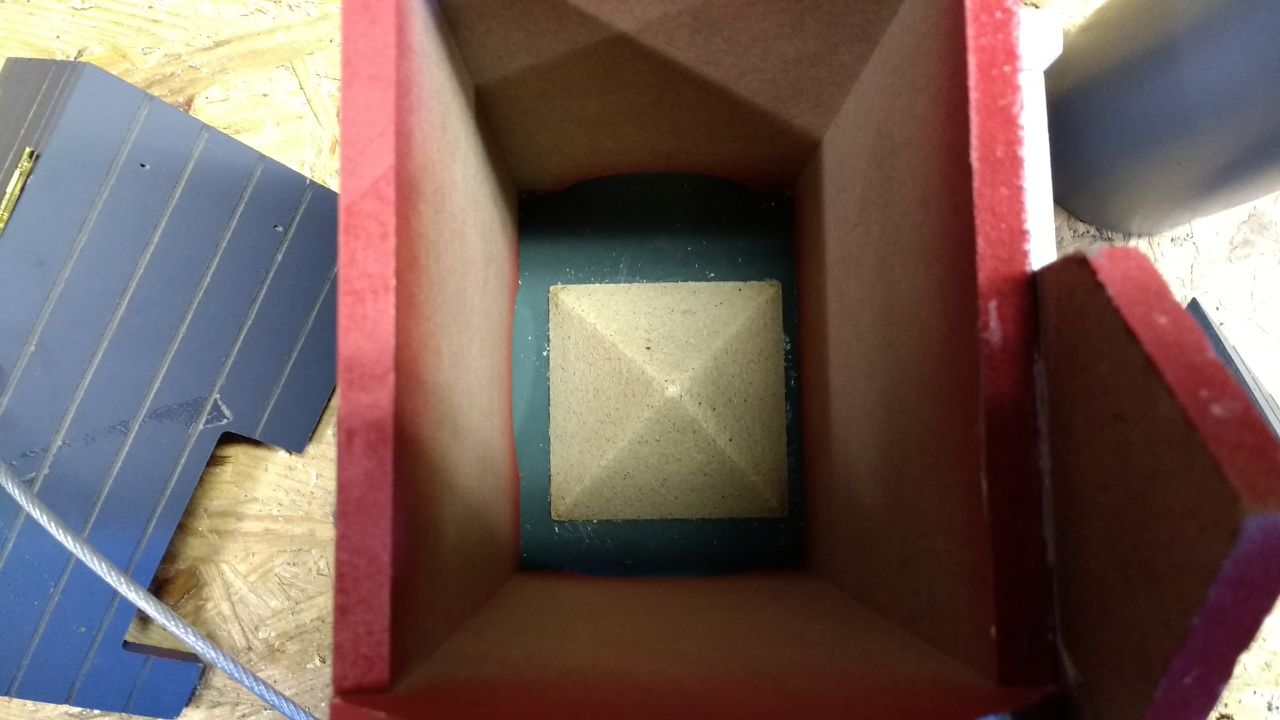
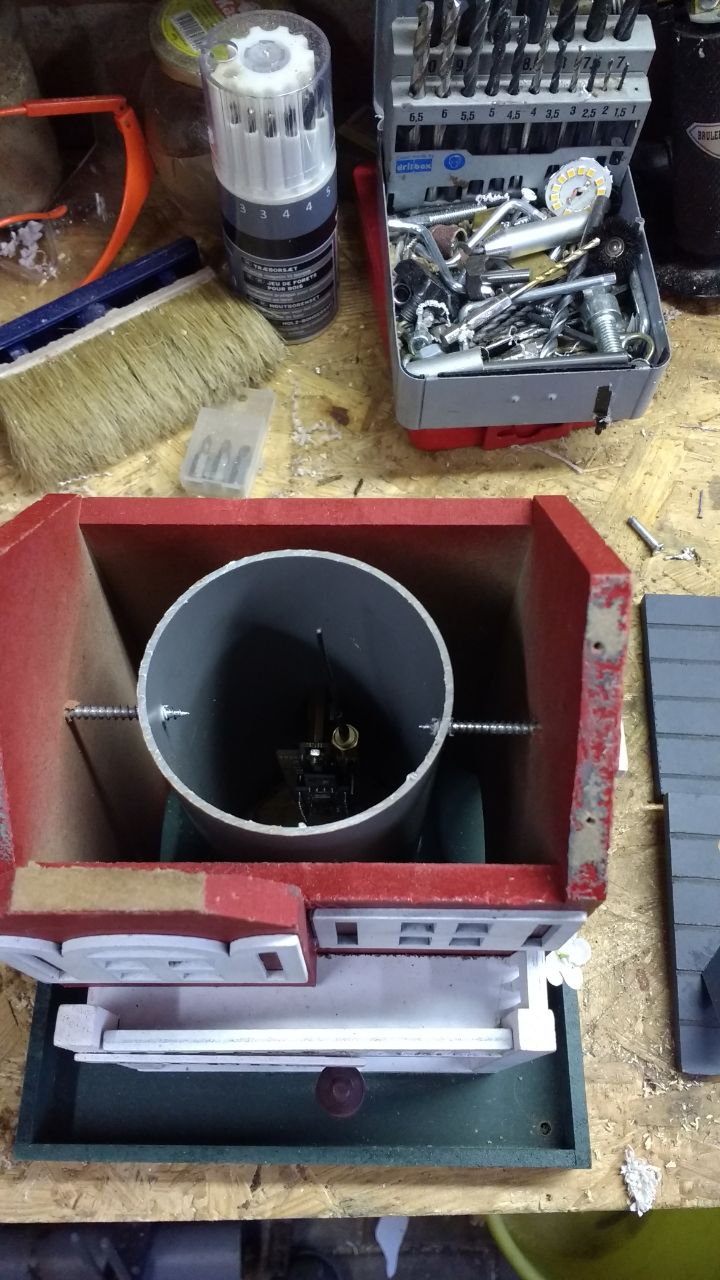
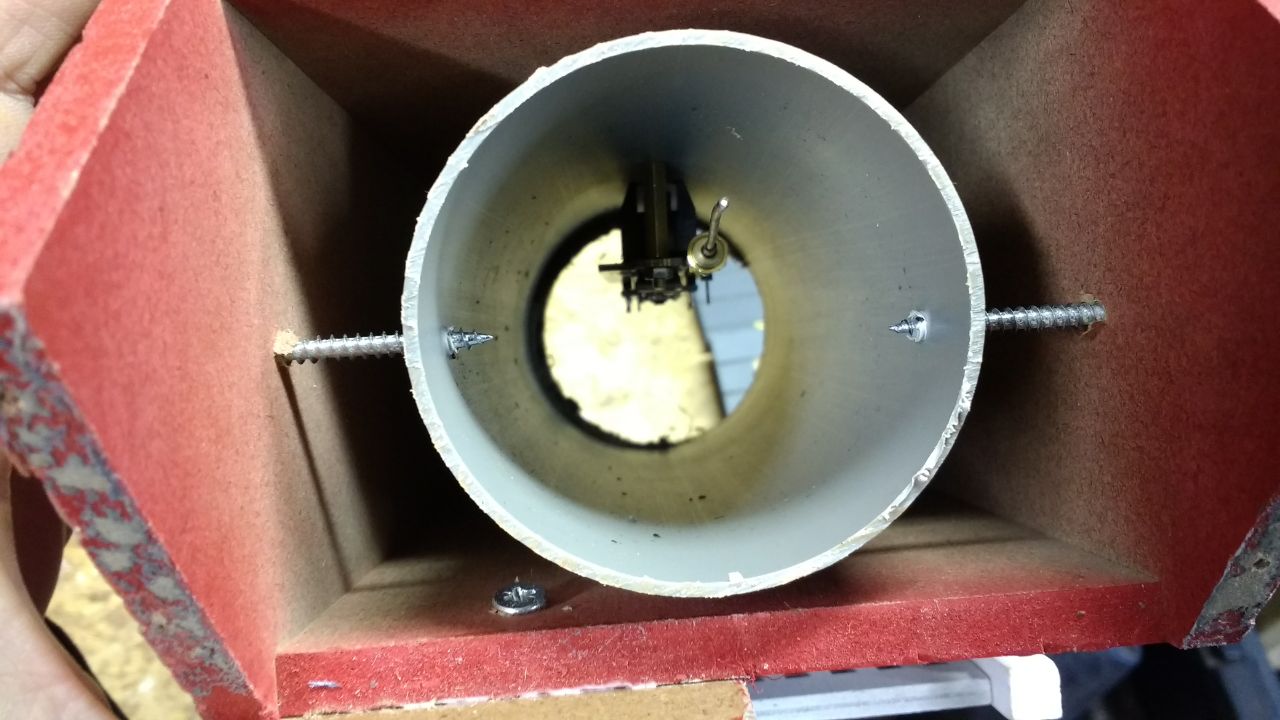
Inner view of the housing (the node is mounted on the 70mm vent, antenne up). After the paint job off-course.

Some cool TheThingsNetwork stickers and a node ID.

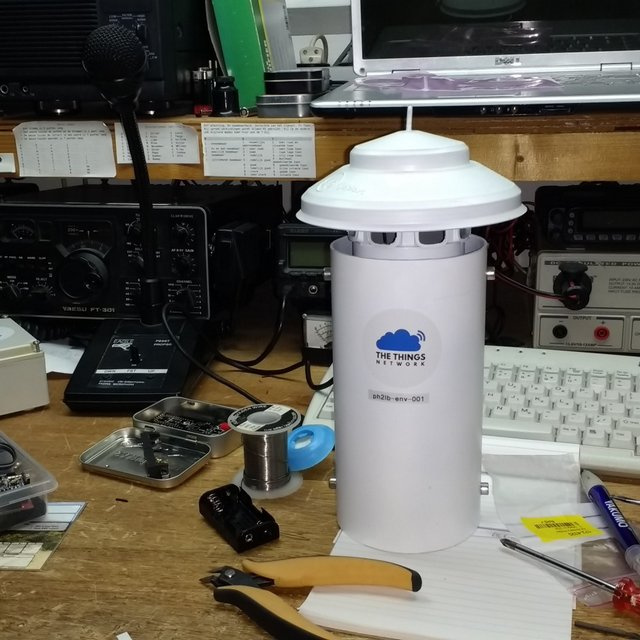
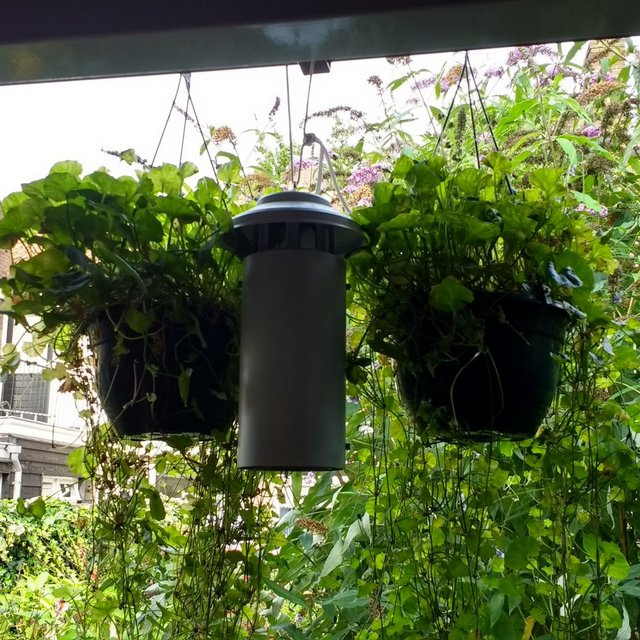
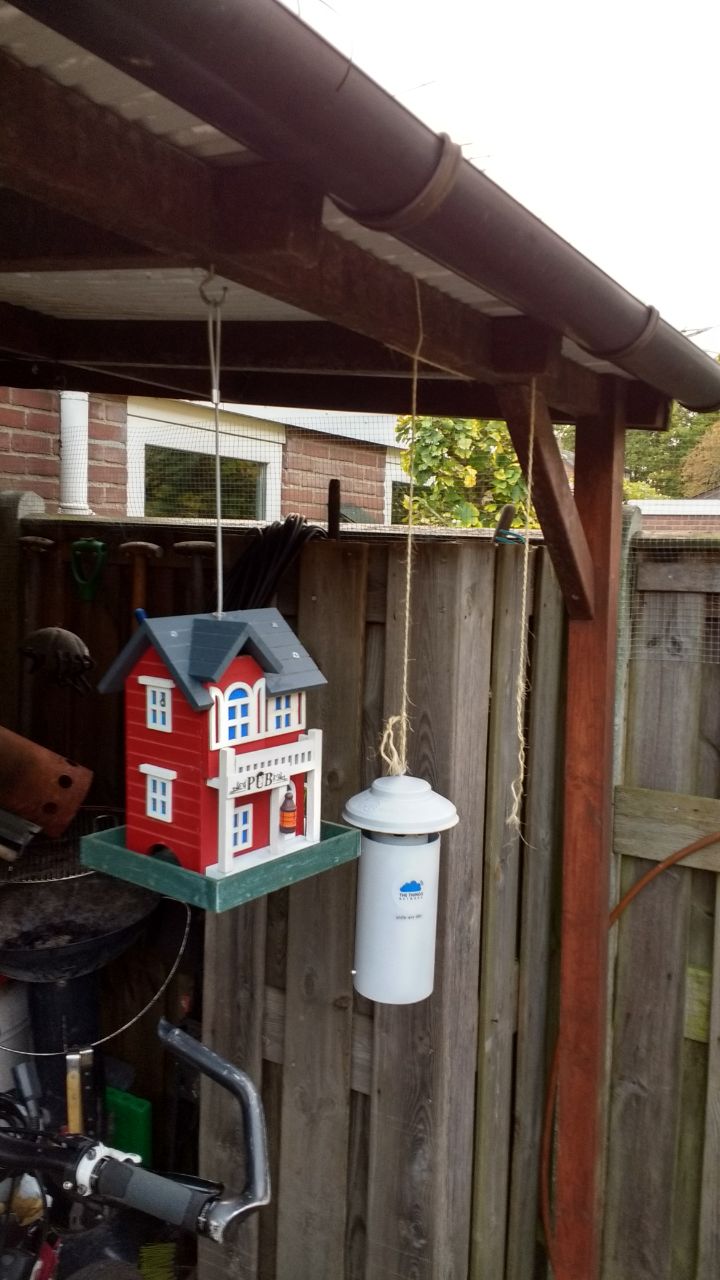
And it can be installed outside.

This one is hanging in my parents backyard. But my mother didn’t like the node in view. So some plants where installed next to it (leaving the humidity and temperature lag a litte)

After a few months of testing the results where very promissing so a new batch of 3 node housings are in production.

The sourcode of this project can be found on : https://github.com/ph2lb/LoRaWAN_TTN_Env_Node

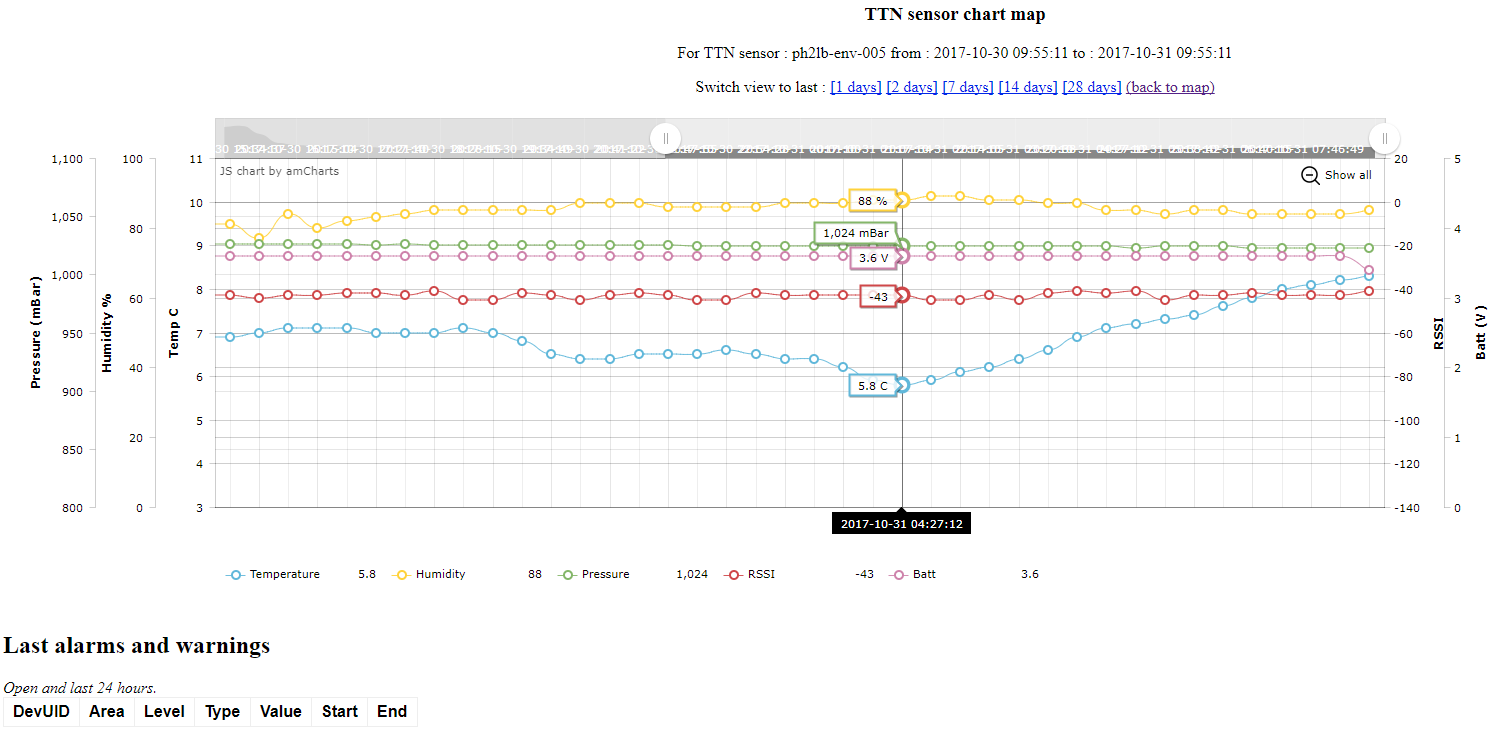
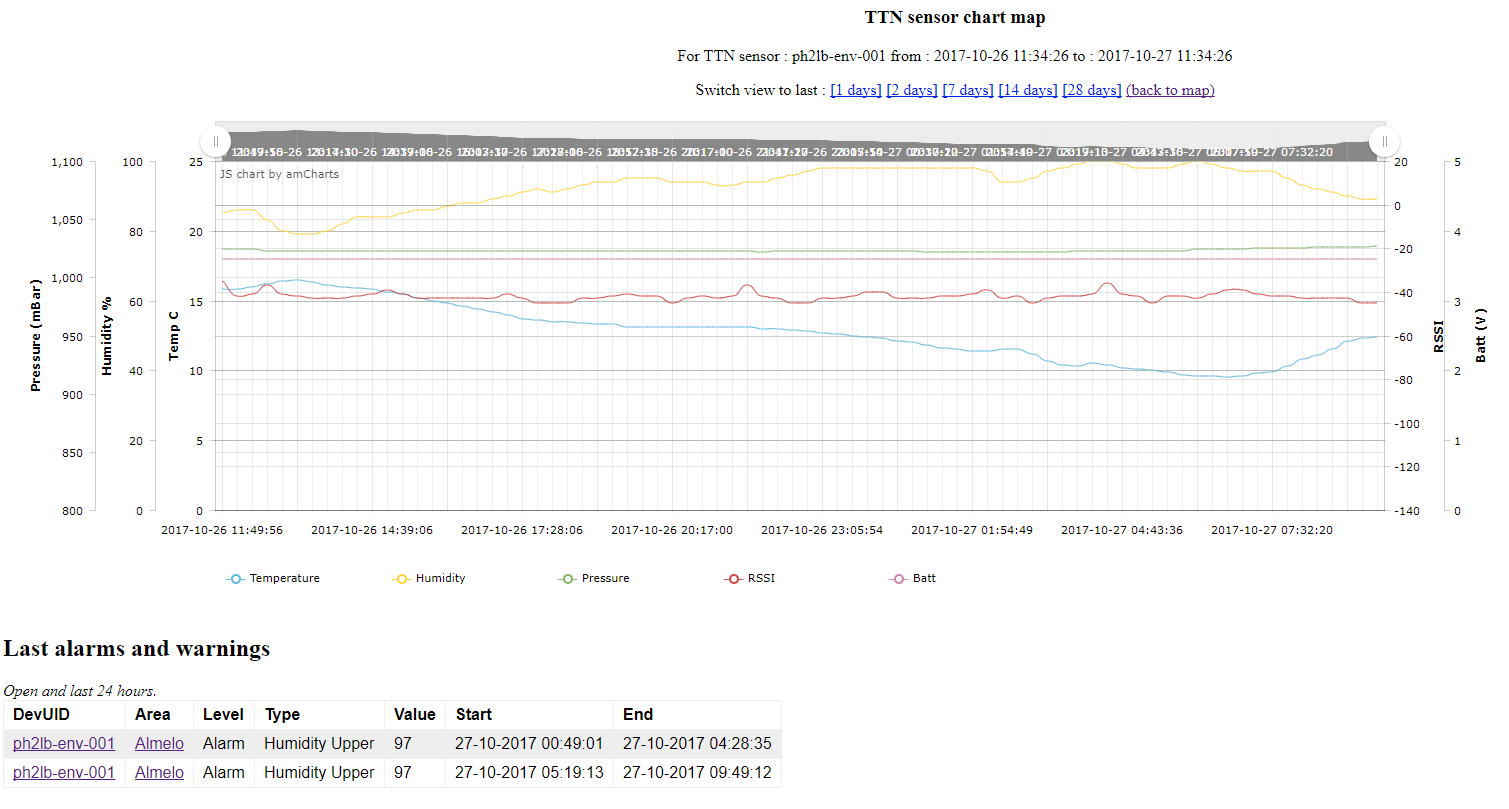
The webbased backend.
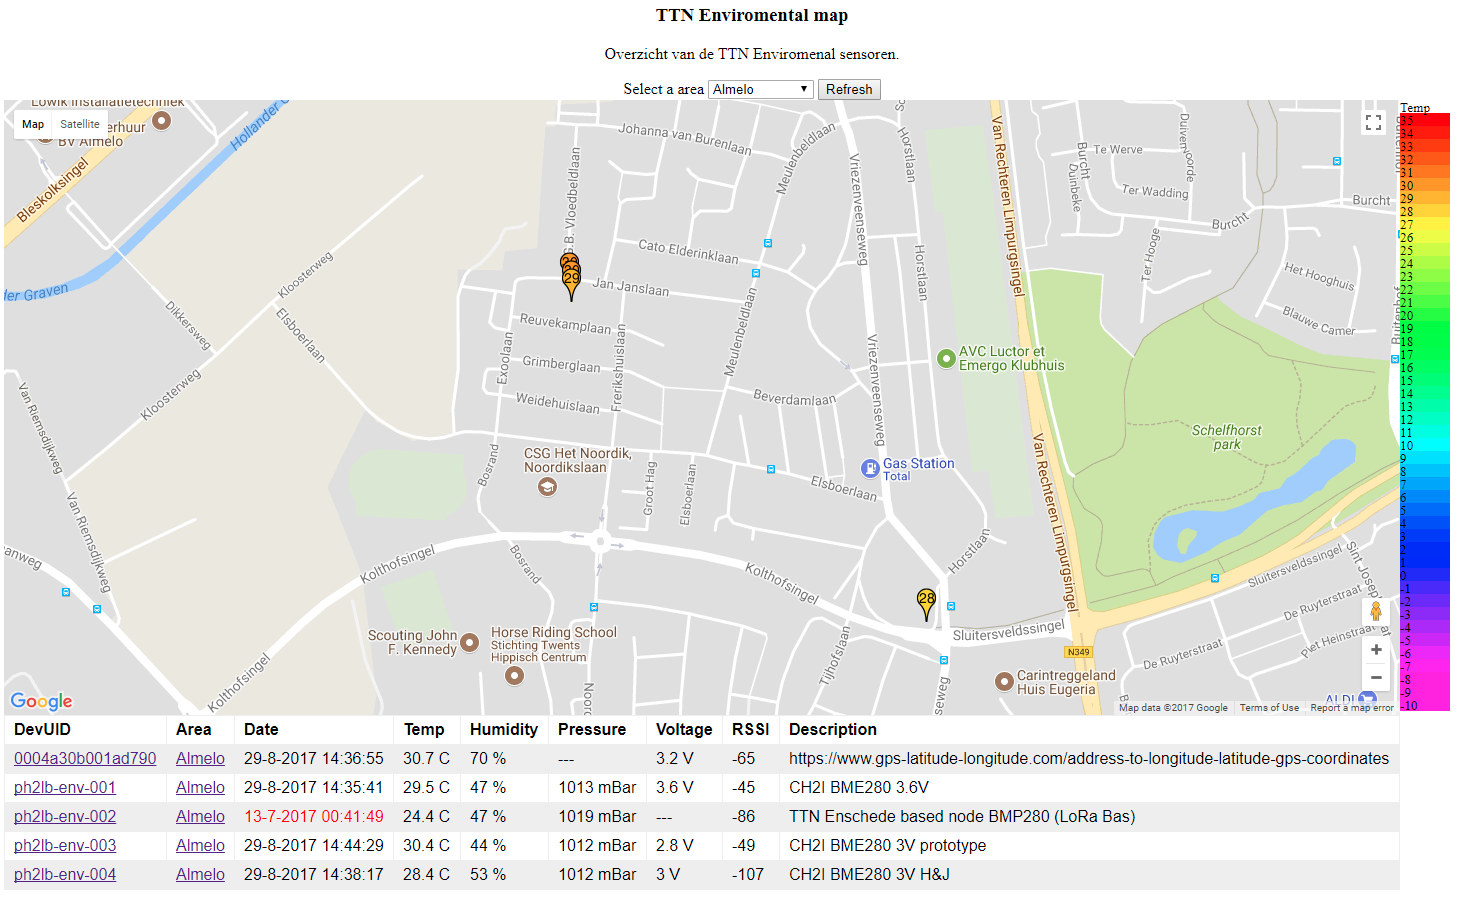
For the presentation I re-wrote the entire backend so it would store the received measurement into a MySQL database. A few new PHP pages show the data in a GoogleMap and a nice chart.

The sources of the backend can be found at : https://github.com/ph2lb/LoRaWAN_TTN_Env

The prototype of the system can be found on : https://ssl.bolkesteijn.nl:8943/env/ttnlora_env_map.php

(main project page ; http://www.bolkesteijn.nl/blog/index.php?page=lora-environmental-node )

21 Likes

great project … well documented ! :sunglasses:

and very creative enclosures

question : how long a full node lion battery last ?

2 Likes

Don’t know yet, I updated the firmware of the node on 25 juli 2017 with a firmware containing the great Battery ADC method from @Charles. And still haven’t lost 0.1V from that day (the resistor battery monitor was unstable).
The ArduinoMiniPro has a brownout of 1.8V. So I hope it will have enough power for atleast a year :slight_smile:

My first prototype had the default brown-out of 3.3V, wasn’t very low power (had 1 low current power indicator led) and used 3 very cheap AAA batteries as a power source. Giving enough power for just 2 months before going down.

4 Likes

nice work!

1 Like

very nice, thanks for sharing the code too

1 Like

hey @lex_ph2lb

That’s awesome, interesting to see how is consumption, but with this battery and if you send TTN data every 5 minutes, you should go for years depending on your sketch (I did not took time to look into your sketch) :wink:
One thing, if you can, is to have some pictures of PCB after one year of outdoor work, to see how humidity and environment affect boards
Last time I put PCB mounted boards outdoor, it was not very cool to see them and got some oxydation on pins. May be you spray some coating on it ?
I found some new 2/3 AA battery cheaper than those (and smaller), less power but 1600mAh could be great also for this kind of projects, Got 10 of them on my desktop :wink:

2 Likes

Wil take a look at it in a year and post the pictures :slight_smile:
Some coating could indeed work out, but the question is, what kind of coating? I have used Elnett hairspray for years to seal a freshly etst PCB. So the again the prove is in the tasting, I will seal one of the PCB’s with that and leave one out to the elements. Time will tell.

That 2/3 AA battery is a interesting one. Indeed a little on the low capacity but when sending just once every 15 minutes its sleeping more then doing stuff.

What a great project. I am trying to do the same thing with the pro mini, BME280 and use Lithium Thionyl Chloride batteries (3.7v). LTC batteries will work in our harsh Canadian winter eh…
We want to measure temperatures on the roofs of apartment and condominium buildings as the HVAC is controlled by local weather (usually from the Airport weather station). Measuring location weather can help us reduce our energy consumption for heat and air conditioning. I will build some and provide you with images etc from Toronto.

3 Likes

Great practical project. :thumbsup:

That would be great to see and off-course we are very interested in the weather trend data over there. :slight_smile:

There is a update to report to the ENV system.

Changes :

  • support for alarm and warning levels with mailer (email) and telegram bot support.
  • own map marker generator

ttn_env_map

ttn_env_chart

Updated sourcecode at : https://github.com/ph2lb/LoRaWAN_TTN_Env

1 Like

I use runmode=0 with the BME280
That forces it to sleep immediate.

Then I do a reading through a force read ( SparkFunBME280.h )

void bmeSetup() {
  bme.settings.commInterface = I2C_MODE;
  bme.settings.I2CAddress = 0x76;
  
  bme.settings.runMode = 0;
}
void rTEMP() {
  bmeForceRead();

  temp = bme.readTempC();
  hum = bme.readFloatHumidity();
  //pres = bme.readFloatPressure() / 100.0F;
  //alt = bme.readFloatAltitudeMeters();
}
void bmeForceRead() {
  // set the BME280 sensor in "forced mode" to force a reading.
  // after the reading the sensor will go back to sleep mode as set before.
  
  uint8_t value = bme.readRegister(BME280_CTRL_MEAS_REG);
  value = (value & 0xFC) + 0x01;
  bme.writeRegister(BME280_CTRL_MEAS_REG, value);
  // Measurement Time (as per BME280 datasheet section 9.1)
  // T_max(ms) = 1.25
  //  + (2.3 * T_oversampling)
  //  + (2.3 * P_oversampling + 0.575)
  //  + (2.4 * H_oversampling + 0.575)
  //  ~ 9.3ms for current settings
  delay(10);
}

see http://tinkerman.cat/low-power-weather-station-bme280-moteino/

2 Likes

During my Monday shopping routine I found a birdfeederhouse at the Lidl.
The price was right so could resist to by it for a side project.

Lora_env_birdfeeder_001!

Step 1 : remove the roof to get access to the internals of the house (and cut a PVC pipe)

Lora_env_birdfeeder_002!

Step 2 : Remove the food dispensing pyramid.

Lora_env_birdfeeder_003!

Step 3 : Cut the large air hole on the bottom.

Lora_env_birdfeeder_004!

Step 4 : Add extra air hole in the roof and cut a part of the dormer to allow the air to flow.

Lora_env_birdfeeder_005!

Step 5 : Install PVC pipe and add screws to hold in in place (and still there is enough room for bird food around it ).

Lora_env_birdfeeder_006!

Step 6 : remove PVC pipe and install the TTN LoraWAN ENV Node (and check if it still works).

Lora_env_birdfeeder_007!

Step 7 : Put it all together again.

Lora_env_birdfeeder_008!

Step 8 : Hang it outside next to a existing node to check out the measurements.

Lora_env_birdfeeder_009!

Step 9 : send girlfriend (E) a picture and wait for response.

E> “WTF? What did you made? A bird house?”
Ik > “Yep, bought one and modified it. Even has as bird food feeder in it. "
E > “Onnie?” (translation : Really? you kidding me aren’t you ?”
Ik > “Yep and it even has a lora env node in it”
E > "LOL, could have seen that coming. Now lets see if it works as good as the other one. If so, the ugly PVC construction has to go. "

Damn, I think I diged a hole for me to step in. :thinking:

11 Likes

great ! :rofl:

First results are coming in :

Below the result of the reference node.

ph2lb-001

Then the result of the birdfeeder node. It seems to work but there is a big difference between them in the humidity. :open_mouth: 
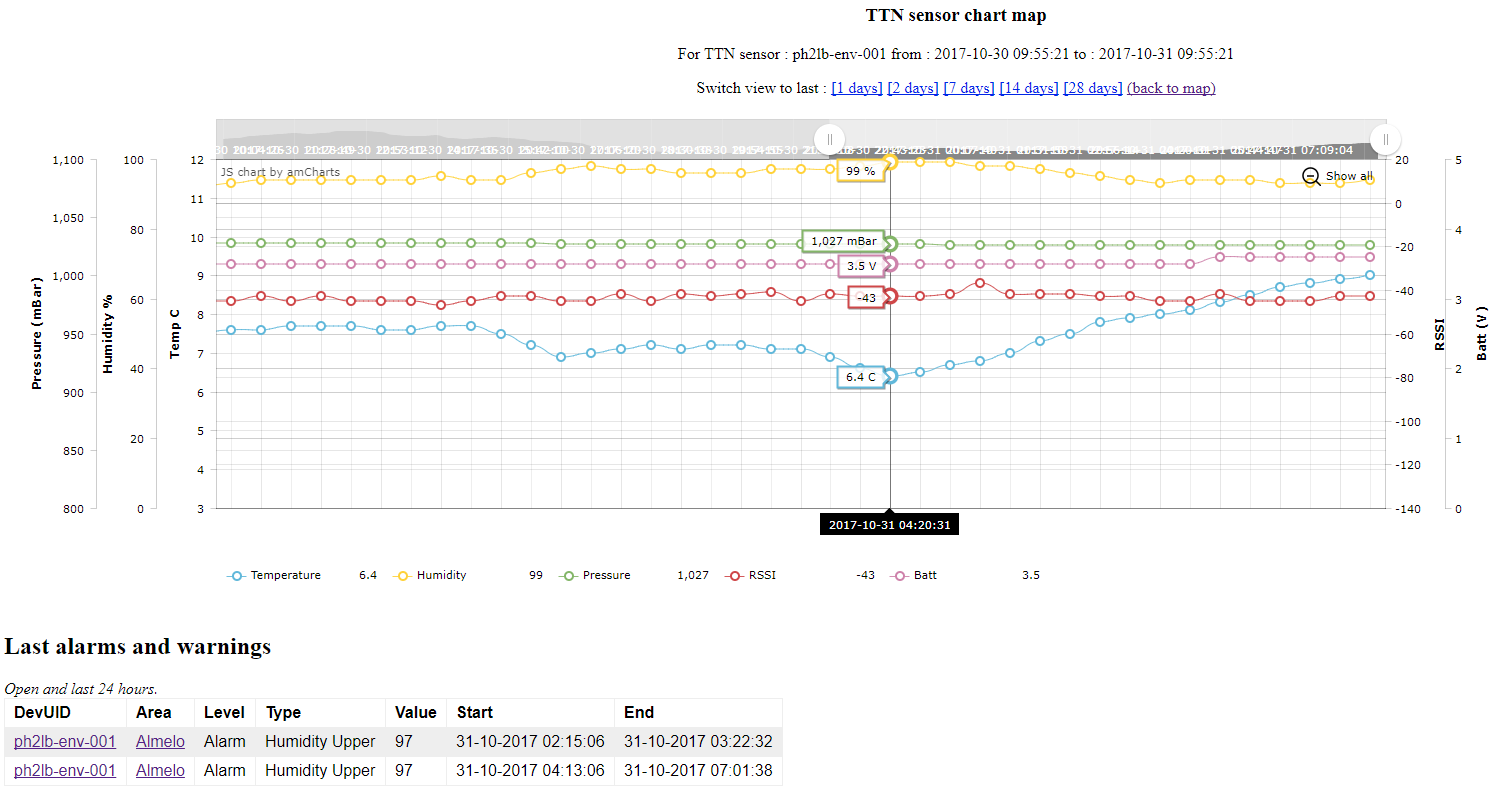
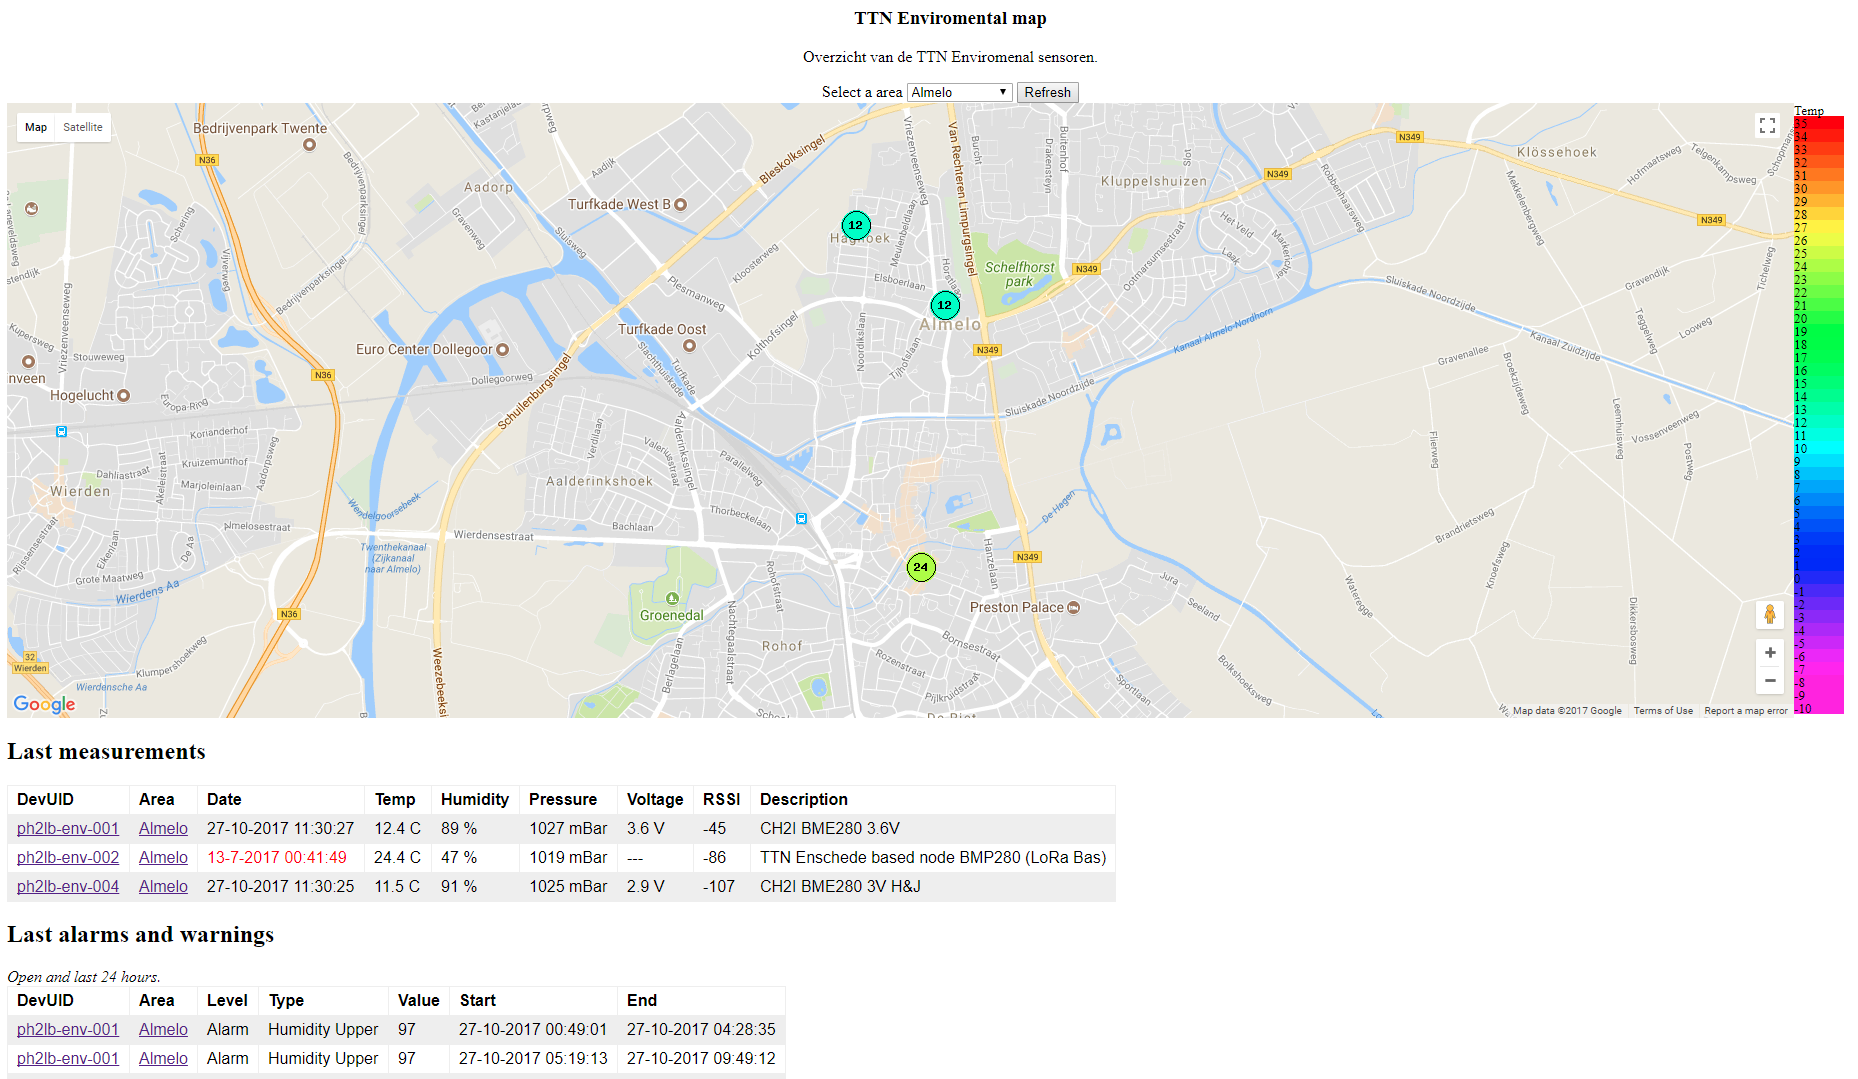
Maybe there isn’t enough air flowing throw the birdfeeder (needs a extra chimney) or maybe the wood is absorbing the humidity. Or maybe even the sensor isn’t working well. This may needs a deeper look into it.

ph2lb-005

So for now the ugly PVC construction is there for the stating. :wink:

1 Like

indoors and outdoors :wink:

1 Like

are you happy with that BME280 sensor ?
and what happends to the components and PCB’s in the open air after a while, did you protect the board with an (anti condens) spray or something ?

Yep quite happy with the BME280. THe components holding out nice, but I’m going apply a layer of clear varnish on one of them for a test. For but for now all seems good.

1 Like

Hi,
the BME280 is connected to A4 and A5 on the Arduino pro mini and did you remove the power LED from the Arduino? I want to use your setup for an indoor monitor to detect water damage from the level above the holiday home. Last time there was a undetected water damage above so the water runs in the walls for 4 week down, you can image what trouble it was… I hope with the BME280 i can detect higher humidity as indicator there is something wrong.

Kind regards
Stefan

Hello Stefan, sorry to hear about your holiday home damage, that really sucks.
Indeed I removed the power LED but also the Power regulator from the Arduino. That drops the deepsleep current bigtime.

Using the BME280 as a higher humidity indicator should work when you have base line.
Iḿ thinking that a humidity of aprx. 50 to 60 would be normal (but that depends on you’re home).
For that I have added alarm/warning rules in the back-end. For example I have a alarm rule for low temperature in the garden. and one for a lower RSSI.

Hi,
can you give us some update about the battery life? I have seen you have added a brown out detection to the source code.

Kind regards
Stefan