
Configure Wi-Fi
Outdated: this section documents The Things Network V2, which is no longer maintained. See the documentation for The Things Stack V3, or browse the V2 docs index.
New models of Multitech Conduit now support Wi-Fi connectivity: ideal for environments where it is difficult to pass over an Ethernet cable.
Connect to the Multitech Conduit #
Connect first to the Multitech Conduit - we’ll need to execute some commands on the gateway.
Configuring Wi-Fi connection #
Once you’re connected to the Conduit, let’s configure it for your Wi-Fi network!
For this part, you’ll need to be able to use a command-line text editor. If you’ve never used any, we recommend using nano - an accessible, user-friendly text editor.
Configuring the Wi-Fi network #
Once connected to the gateway, open the /etc/wpa_supplicant.conf file:
$ nano /etc/wpa_supplicant.conf
We’ll add extra lines at the end of this file, depending on the network you want to add.
- If the network you want to add is not protected by a password, add those lines:
network={
        ssid="<ssid of the network>"
        key_mgmt=NONE
}
- If the network is protected by a password, add those lines:
network={
        ssid="<ssid of the network>"
        psk="<password of the network>"
}
If there already is a network={[...]} configuration, delete it before adding your own network.
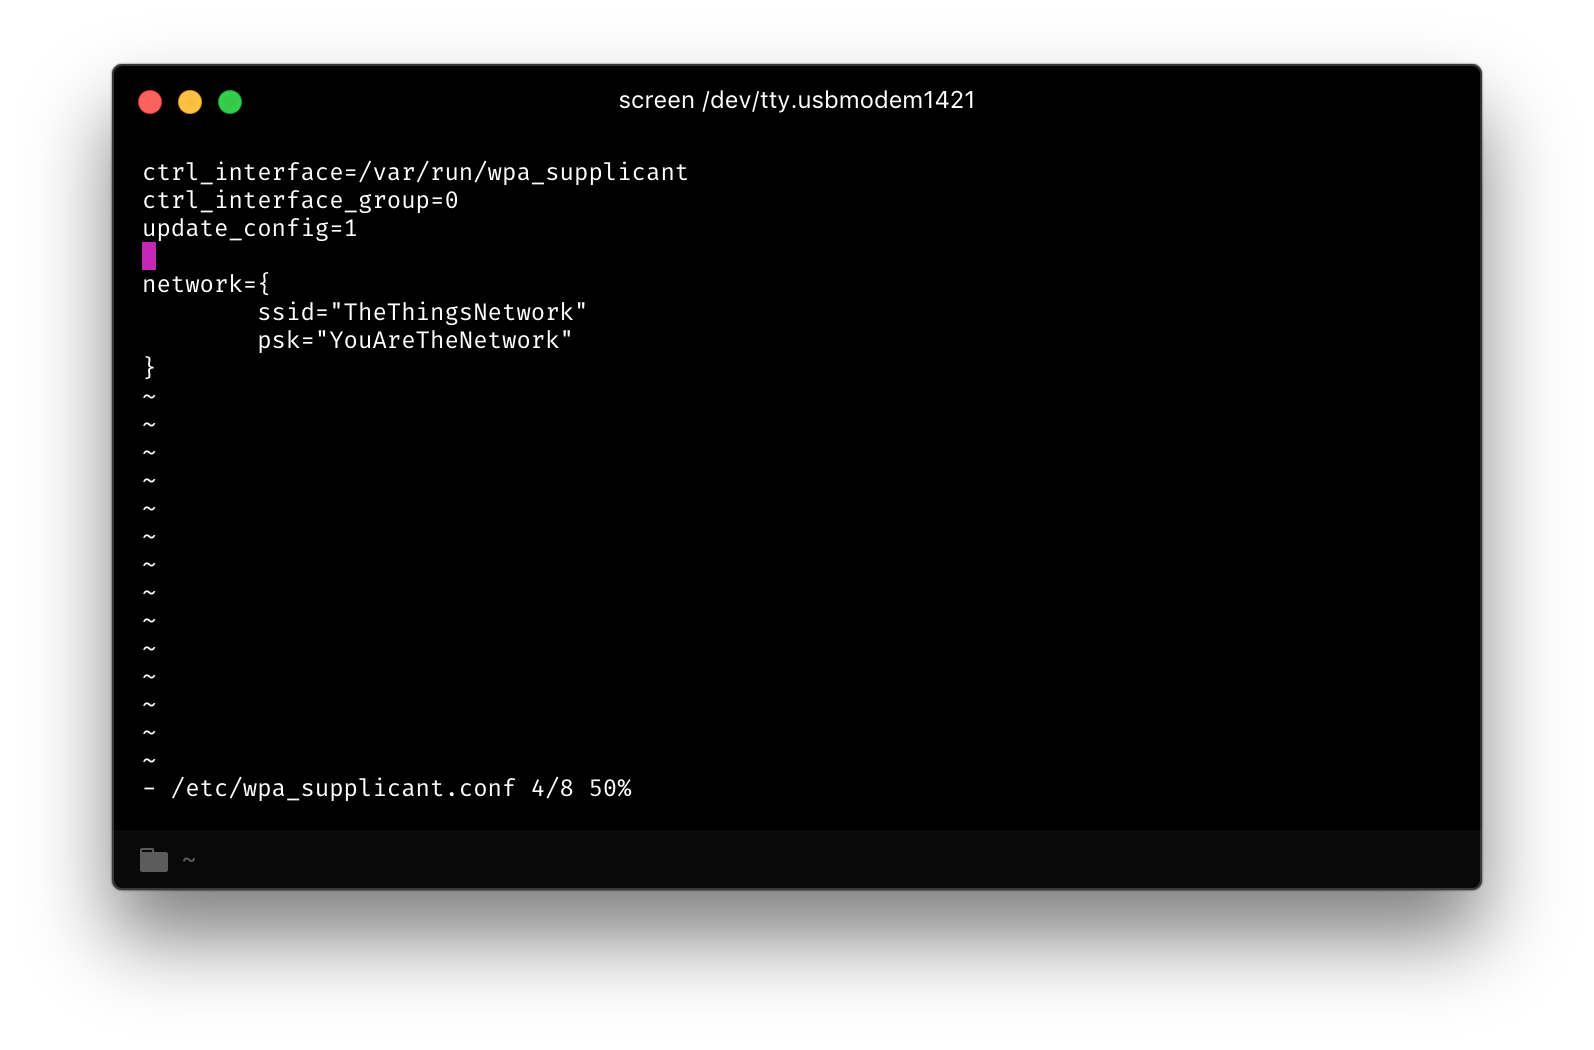
Configuring the network interfaces #
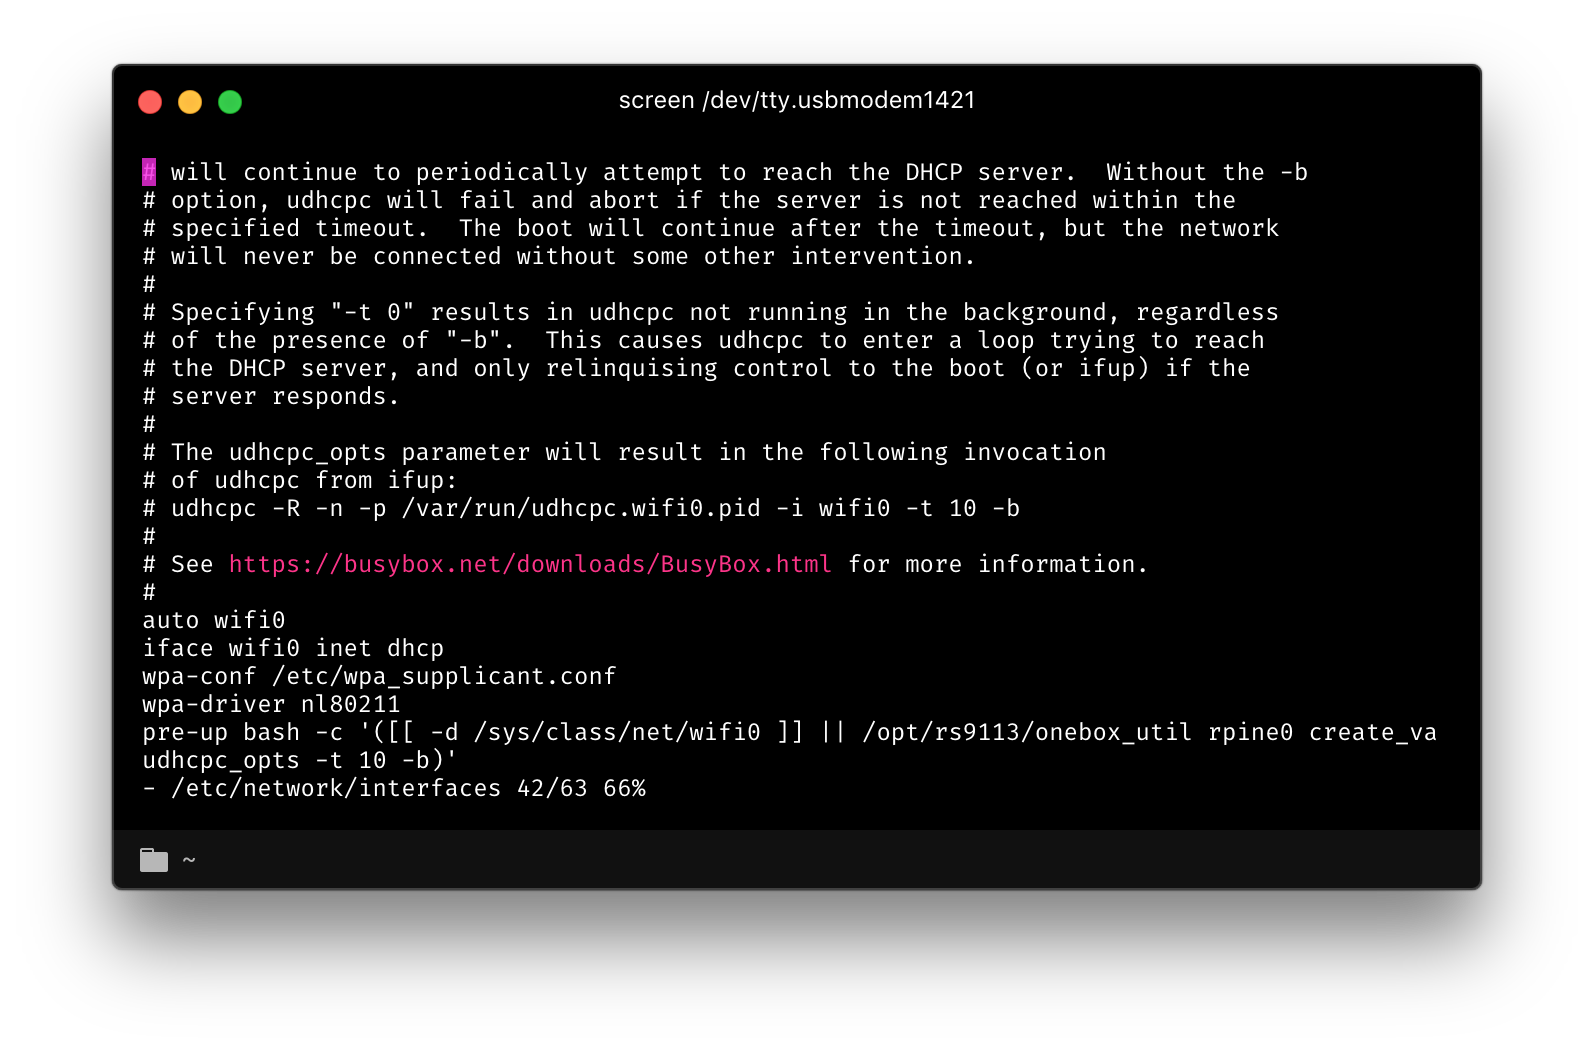
All you have to do left to enable Wi-Fi is to enable the Wi-Fi network interface. Open up the /etc/network/interfaces file, find the paragraph that begins with auto wifi0, and uncomment all the next lines.
Reboot the gateway #
Reboot your gateway, by typing this command: shutdown -r now.
When your gateway starts up, it should have connected to your Wi-Fi network! To verify this, execute the command ifconfig ; the system will show the available network interfaces. The wifi0 should have appeared, with an associated IP for the gateway.